Split Render Tool 4
Split Render Tool 4 ‐ Blender Add-on
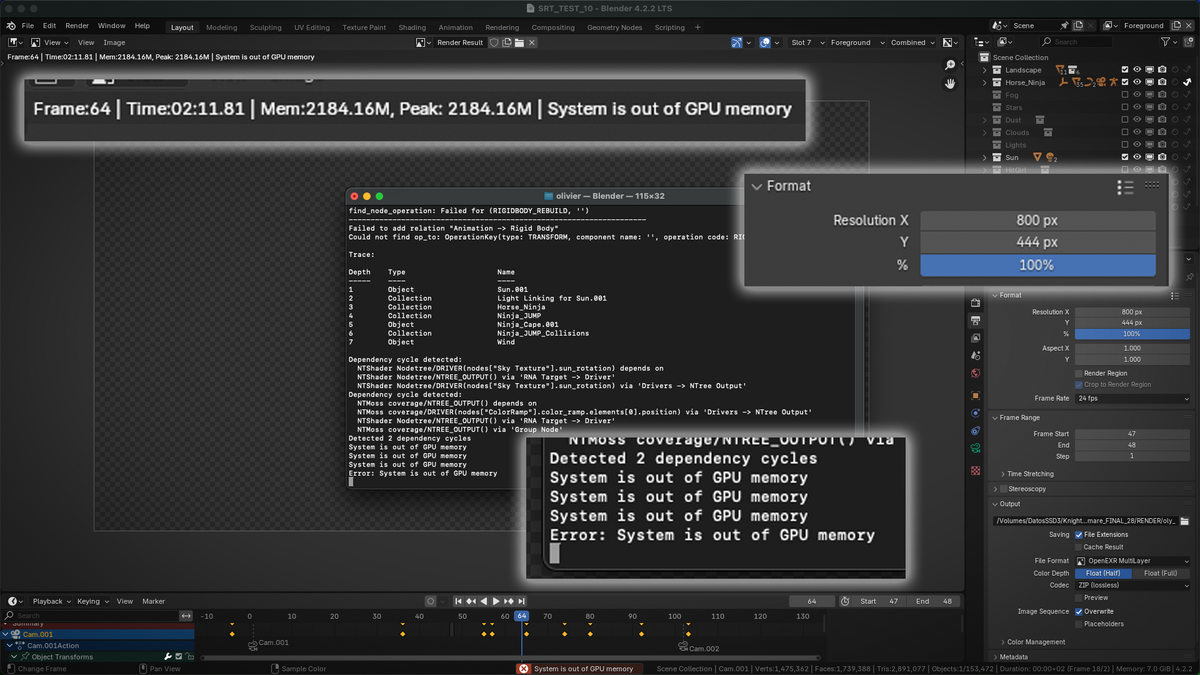
Are you getting "System is out of GPU memory" error? Do you want/need to render a 32K image? Did you render a sequence in which one object is wrong, but you don't want to render the whole sequence again? Do you have some older graphics cards (2GB, 4GB, etc) that can't process any of your projects? Split Render Tool is the add-on you need.
Supports Blender 4.1+, single frame and animations, both Cycles and Eevee engines, and both OSX and Windows. (Blender below 4.1 and Linux had not been tested)
SRT4 brings users the ability to get rid of "System is out of GPU memory" and render even at 400% of your current resolution by rendering split tiles. On the other hand, it allows users to animate Blender's render region area frame by frame along the timeline. It also brings the ability to render based on selected object/s region on screen, by analyzing their location and scale on each frame.
SRT goes far away from other similar add-ons, being able to render single frames as well as animations, and render higher resolutions with same hardware.
Blender vs SRT render tests: Blender max resolution: 850 × 474, SRT resolution: 3840 × 2160
VRAM NOTE:
SRT DOES NOT REDUCE VRAM DATA! What you send to VRAM will remain the same. The key is that because it renders tiles, that does reduce drastically the amount of data that VRAM creates during rendering. This means that while you are able to render just a portion of that frame, SRT will allow you to render full image at higher resolutions (result sometimes looks even like a joke).
SRT4 is the new generation of Split Render Tool, taking the ideas and re thinking them, to be faster, more effective, consume less resources and save space. Complete rewrite from scratch, new features and old features improved: that's the reason to be a new add-on. Why from v.1.3 to 4? Just to match Blender's version for future releases.
Functionalities:
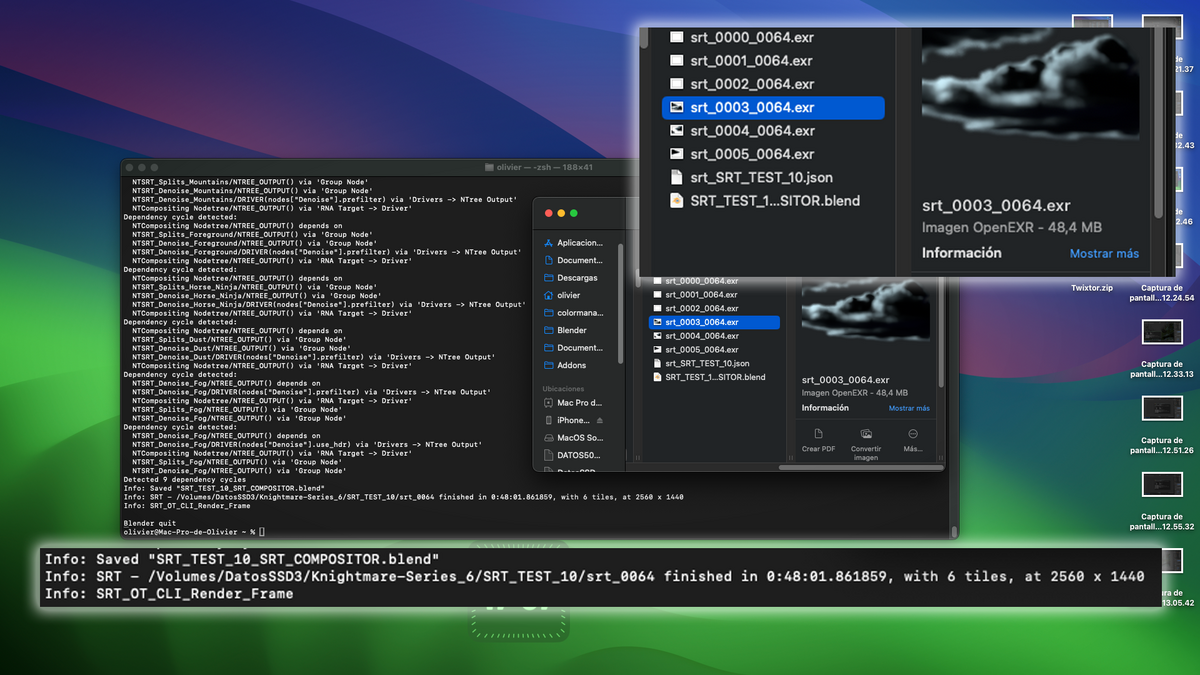
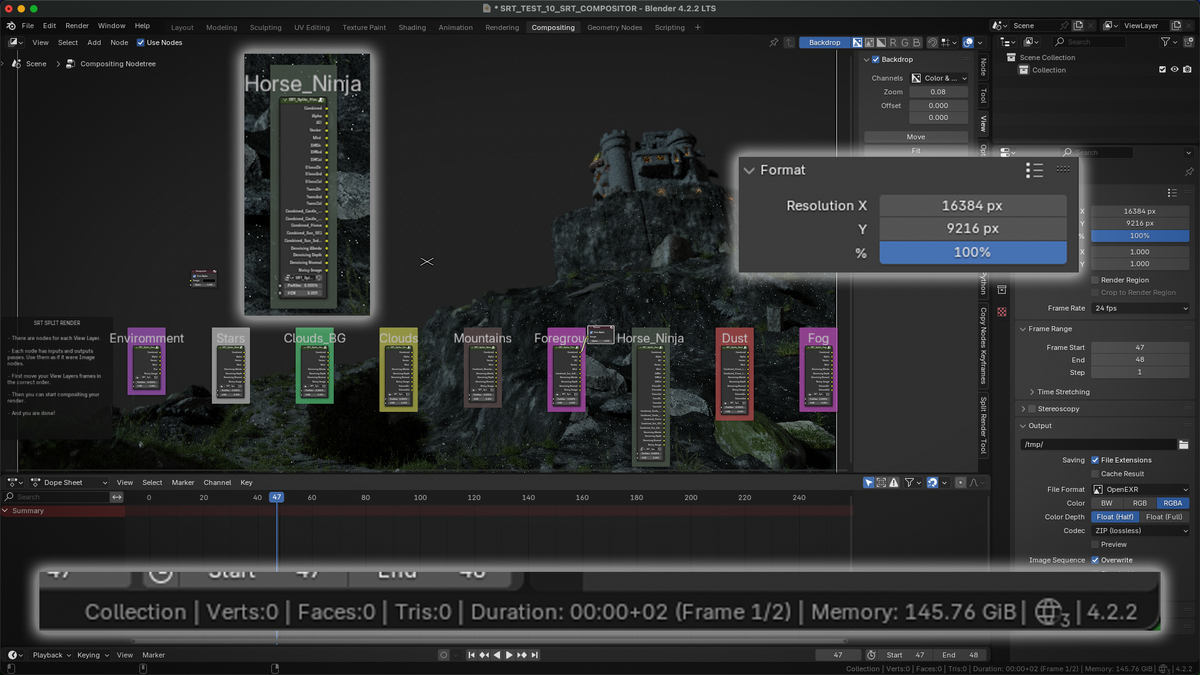
- Split Render: Split render screen into tiles and merge them without any user interaction (single frame or animation) in Compositor Editor. It creates a new Blender file, with all that splits already merged inside a group node (per View Layer), with all its passes (similar to an Image node), ready to start your own composition.
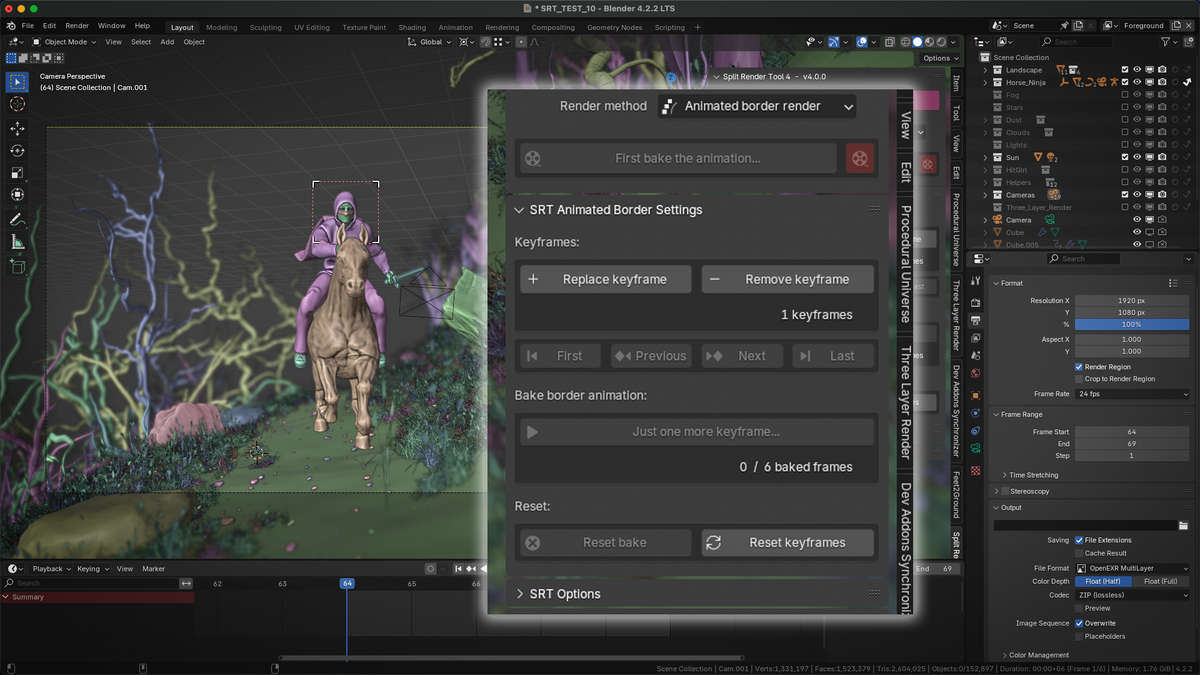
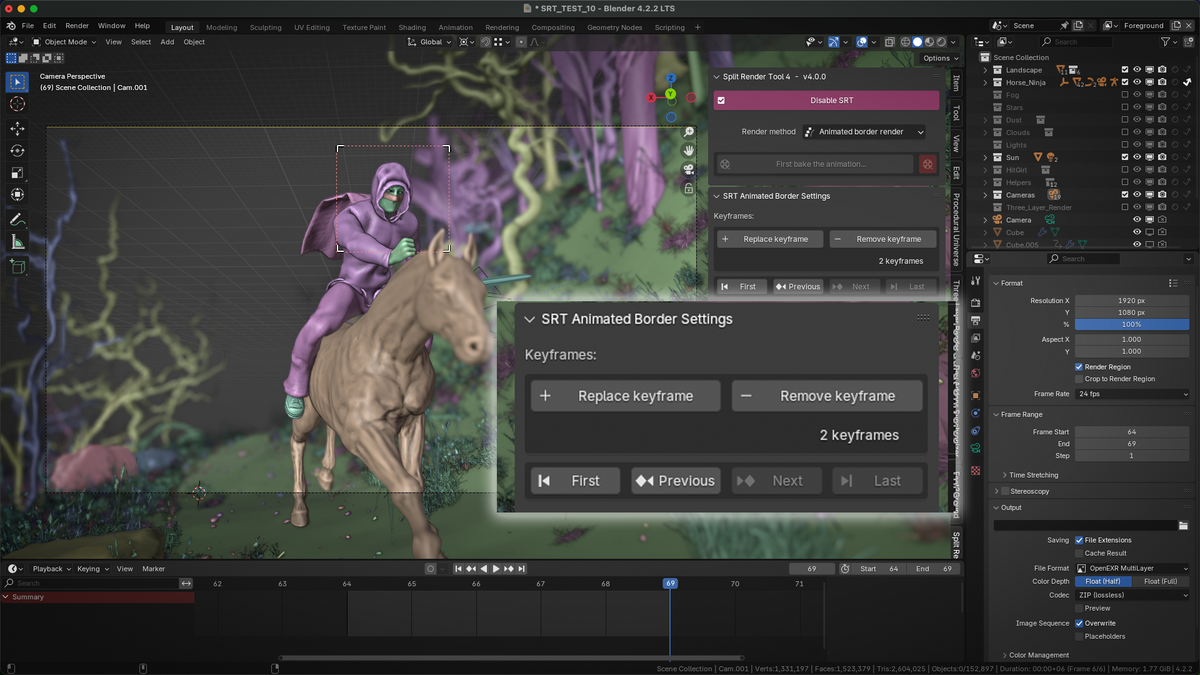
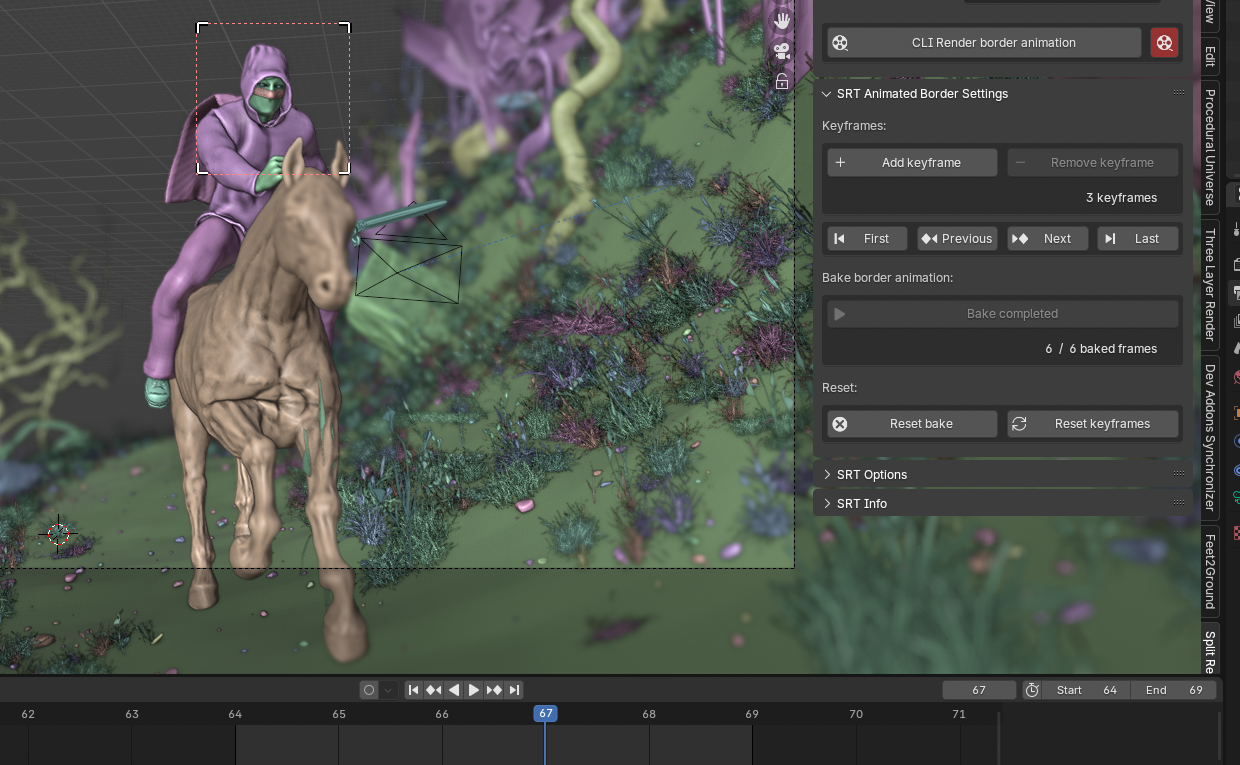
- Animated Border Render: Create Border Region keyframes along the timeline, and create a new Blender file with one Composition group node for each enabled View Layer (with all its passes), ready to add the original image sequence.
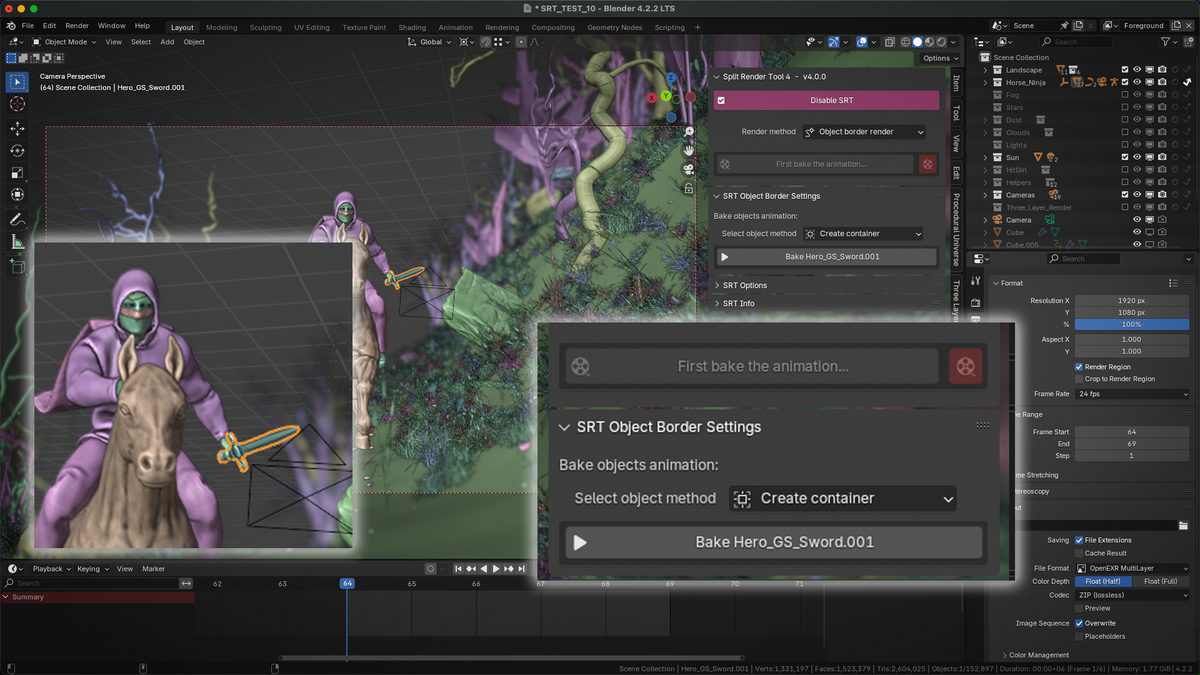
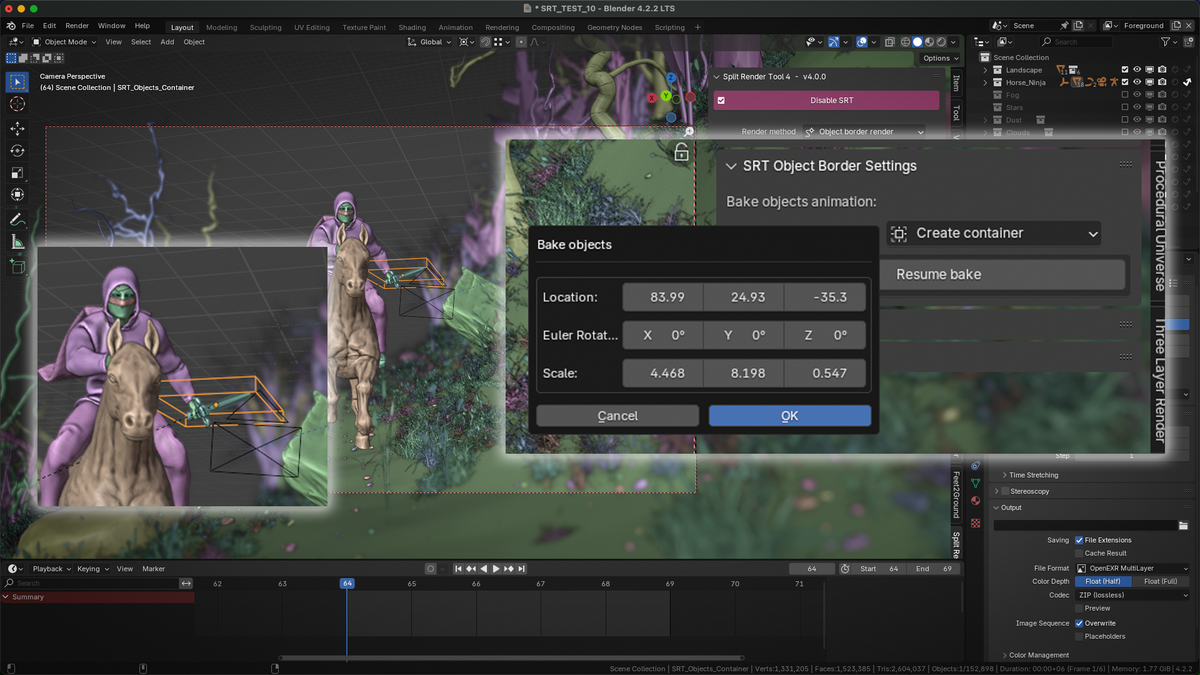
- Object Border Render: Render selected object/s region on screen, and create a new Blender file with one Composition group node for each enabled View Layer (with all its passes), ready to add the original image sequence.
Split Render Tool 4 is the next generation of Split Render Tool add-on. It had been re-coded from scratch taking the initial ideas, but re-thinking its methods to be more efficient in terms of render times and resources consumption.
Features:
Split Render
It is well known that split a render into several pieces and merge them later has issues with Denoising internal AI. Blender Denoising works by analyzing all the image, processing all pixels, and returning the final image. So when we split an image, it just analyze those pixels, but AI does not know what is beyond them. The resulting image after merge all pieces will have at the borders some pixels that will not match with the rest of the image. Leaving us with a useless image.
SRT fixes that issue WITHOUT user interaction, using 3 different methods:
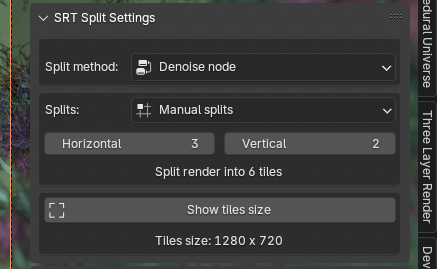
- Denoise Node: Fix splits by using Denoising passes and Denoise node (Recommended).
- Render Borders: Fix splits by rendering extra images (Old method, slow, requires more disk space).
- Denoise Borders: Fix splits by mixing both methods. It does not render extra images (Combined image with IA Denoise is used), and to fix the splits it uses Denoise nodes. If you want Blender IA Denoising in your renders, this is the best solution. You can set the size of the borders and blur amount with this method.
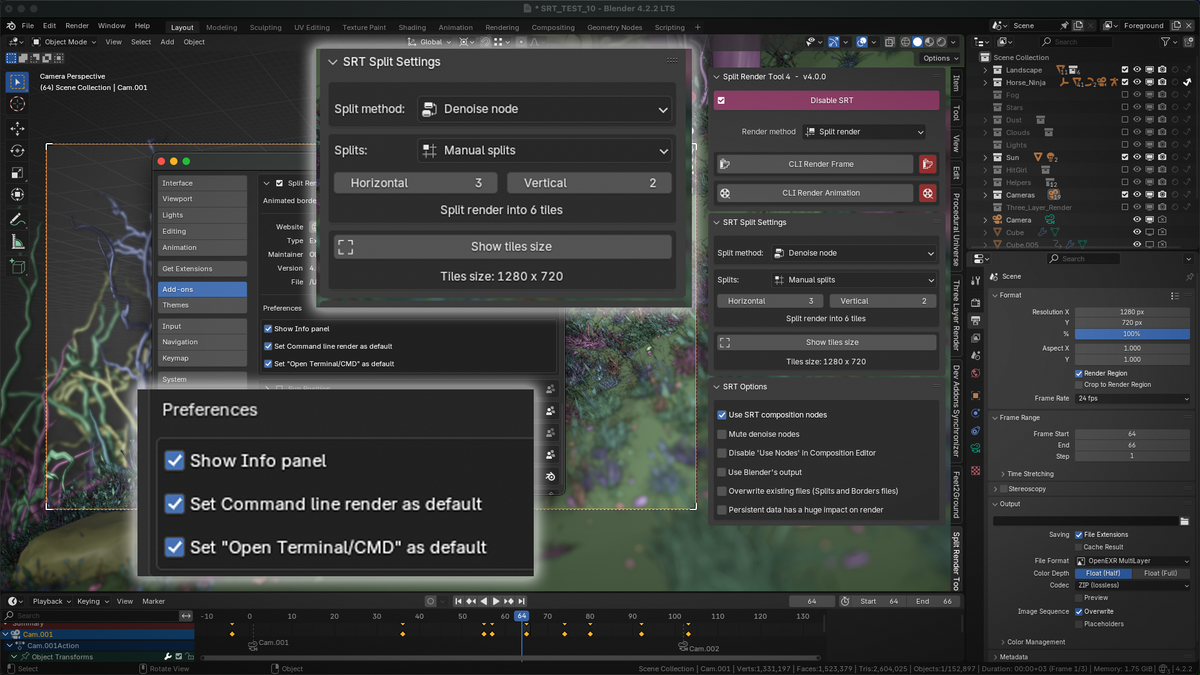
- Set Command line render as default: Enabled will set default render to Command line, which has progress. Otherwise Blender UI will get blocked until it finishes rendering.
- Set Open Terminal/CMD as default: Enabled will set "Open Terminal/CMD" option as default, that way Blender will close, Terminal/CMD will open, and you just need to paste and hit Enter.
Options:
- Splits: Select number of splits (Manual splits, 6, 12, 24, 48, 96, 192 or 384). "Manual splits" allow users to be more precise adjusting the splits, in order to save render time.
- Copy command line to clipboard: Just open Terminal or CMD, paste and press enter. This way you can see the progress and all the processes.
- Enable Cycles debug: You will see more information about each render step.
- Open Terminal/CMD: Automatically: open Terminal/CMD after copying CLI render command and closes Blender.
- Use SRT Composition nodes: Use SRT nodes directly to start compositing, otherwise render OpenEXR Multilayer images (one for each View Layer).
- Mute Denoise nodes: Only with "Denoise Node" method and "Use SRT Composition nodes". Useful at high resolutions to speed up Blender interface.
- Auto disable Use Nodes in Composition Editor: Only with "Denoise Node" method and "Use SRT Composition nodes". Useful at higher resolutions to speed up Blender interface.
- Separate passes: Only with "Use SRT Composition nodes" disabled. Separate each pass into files, instead of creating one multilayer file.
- Passes to folders: Only with "Use SRT Composition nodes" disabled and "Separate passes" enabled. This option will create a folder for each View Layer, and inside of them a folder for each pass.
- View Layers to folders: Only with "Use SRT Composition nodes" disabled, "Separate passes" disabled, and at least 2 enabled View Layers. With this option SRT will create a folder for each View Layer.
- Don't delete split images: Only with "Use SRT Composition nodes" disabled. By default, after render final images, SRT deletes all splits and borders automatically.
- Use Blender's output: By default SRT creates a directory where your .blend file is and with the same name as output for render. Enabled, this option will take Blender's output instead.
- Overwrite existing files: This applies only to splits and borders, not to final images in any case. When disabled and if render crashes, init again SRT render, it will check and skip from render each existing split.
- Show tiles size: Show render tiles region by activating Camera View.
- Show borders size: Show render borders region by activating Camera View.
This feature will save you a lot of render time. After a render, it can happen that some object is wrong, or you forgot to hide something, or just want to change some texture. You can create Border Region keyframes along the timeline (just like any other property). First you need to create keyframes using the in-built Keyframe System, then you must bake the animation (to process the rest of frames).
Add-on preferences:
- Show Info panel: Enabled will show a new panel in which you can check Resolution size and Render Border Region size.
Options:
- Animate border region like any other object.
- Bake system to animate border. Create, Remove, Jump to First, Jump to previous, Jump to next, Jump to last, Bake animation, Reset bake and Reset keyframes buttons.
- Preview Render Region while scrolling the timeline, like animating any object property (after bake).
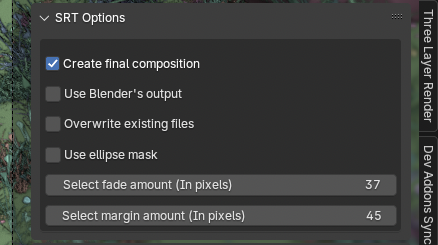
- Create final composition: One group node for each enabled View Layer (with all its passes), ready to add the original image sequence.
- Use Blender's output: By default SRT creates a directory where your .blend file is and with the same name as output for render. Enabled, this option will take Blender's output instead.
- Use ellipse mask: By default SRT uses square mask.
- Fade amount: Select amount of blur edges size.
Object Border Render
This feature is similar to Animated Border. Select one or more objects and bake the animation (to process the rest of frames).

Add-on preferences:
- Show Info panel: Enabled will show a new panel in which you can check Resolution size and Render Border Region size.
Options:
- Preview Render Region while scrolling the timeline, like animating any object property (after bake).
- Create final composition: One group node for each enabled View Layer (with all its passes), ready to add the original image sequence.
- Use Blender's output: By default SRT creates a directory where your .blend file is and with the same name as output for render. Enabled, this option will take Blender's output instead.
- Use ellipse mask: By default SRT uses square mask.
- Fade amount: Select blur edges amount of size.
- Margin amount: Select objects amount of margin.
Discover more products like this
view layers split Blender cycles crop 3drenders out-of-gpu-memory vram-error render-region gpu rendering blender eevee animations render-passes