Shader Node Wizard
WHAT IS SHADER NODE WIZARD
Shader Node Wizard brings several concepts of tools like Substance Painter into Blenders Material Node Editor. You can easilyuse masks to mix material layers or add effects to materials. Masks can simply be adjusted with different grunge textures (the shipped one or your own), which gives unlimited variations.
Plus:
- Simply create full featured PBR node groups from PBR set-files.
- Paint textures, masks or bump maps
- Easily assign vertex colors to mask or effect your material
- much more useful tools, read further.
POWERFUL PIE MENU 
The main interface to Shader Node Wizard. Just hit D-KEY in Shader Editor to add common or extended nodes. Version 1.4 adds colors to Standard Nodes and relaces the FX Nodes with Mask Nodes. There are also some useful new Quick Materials.
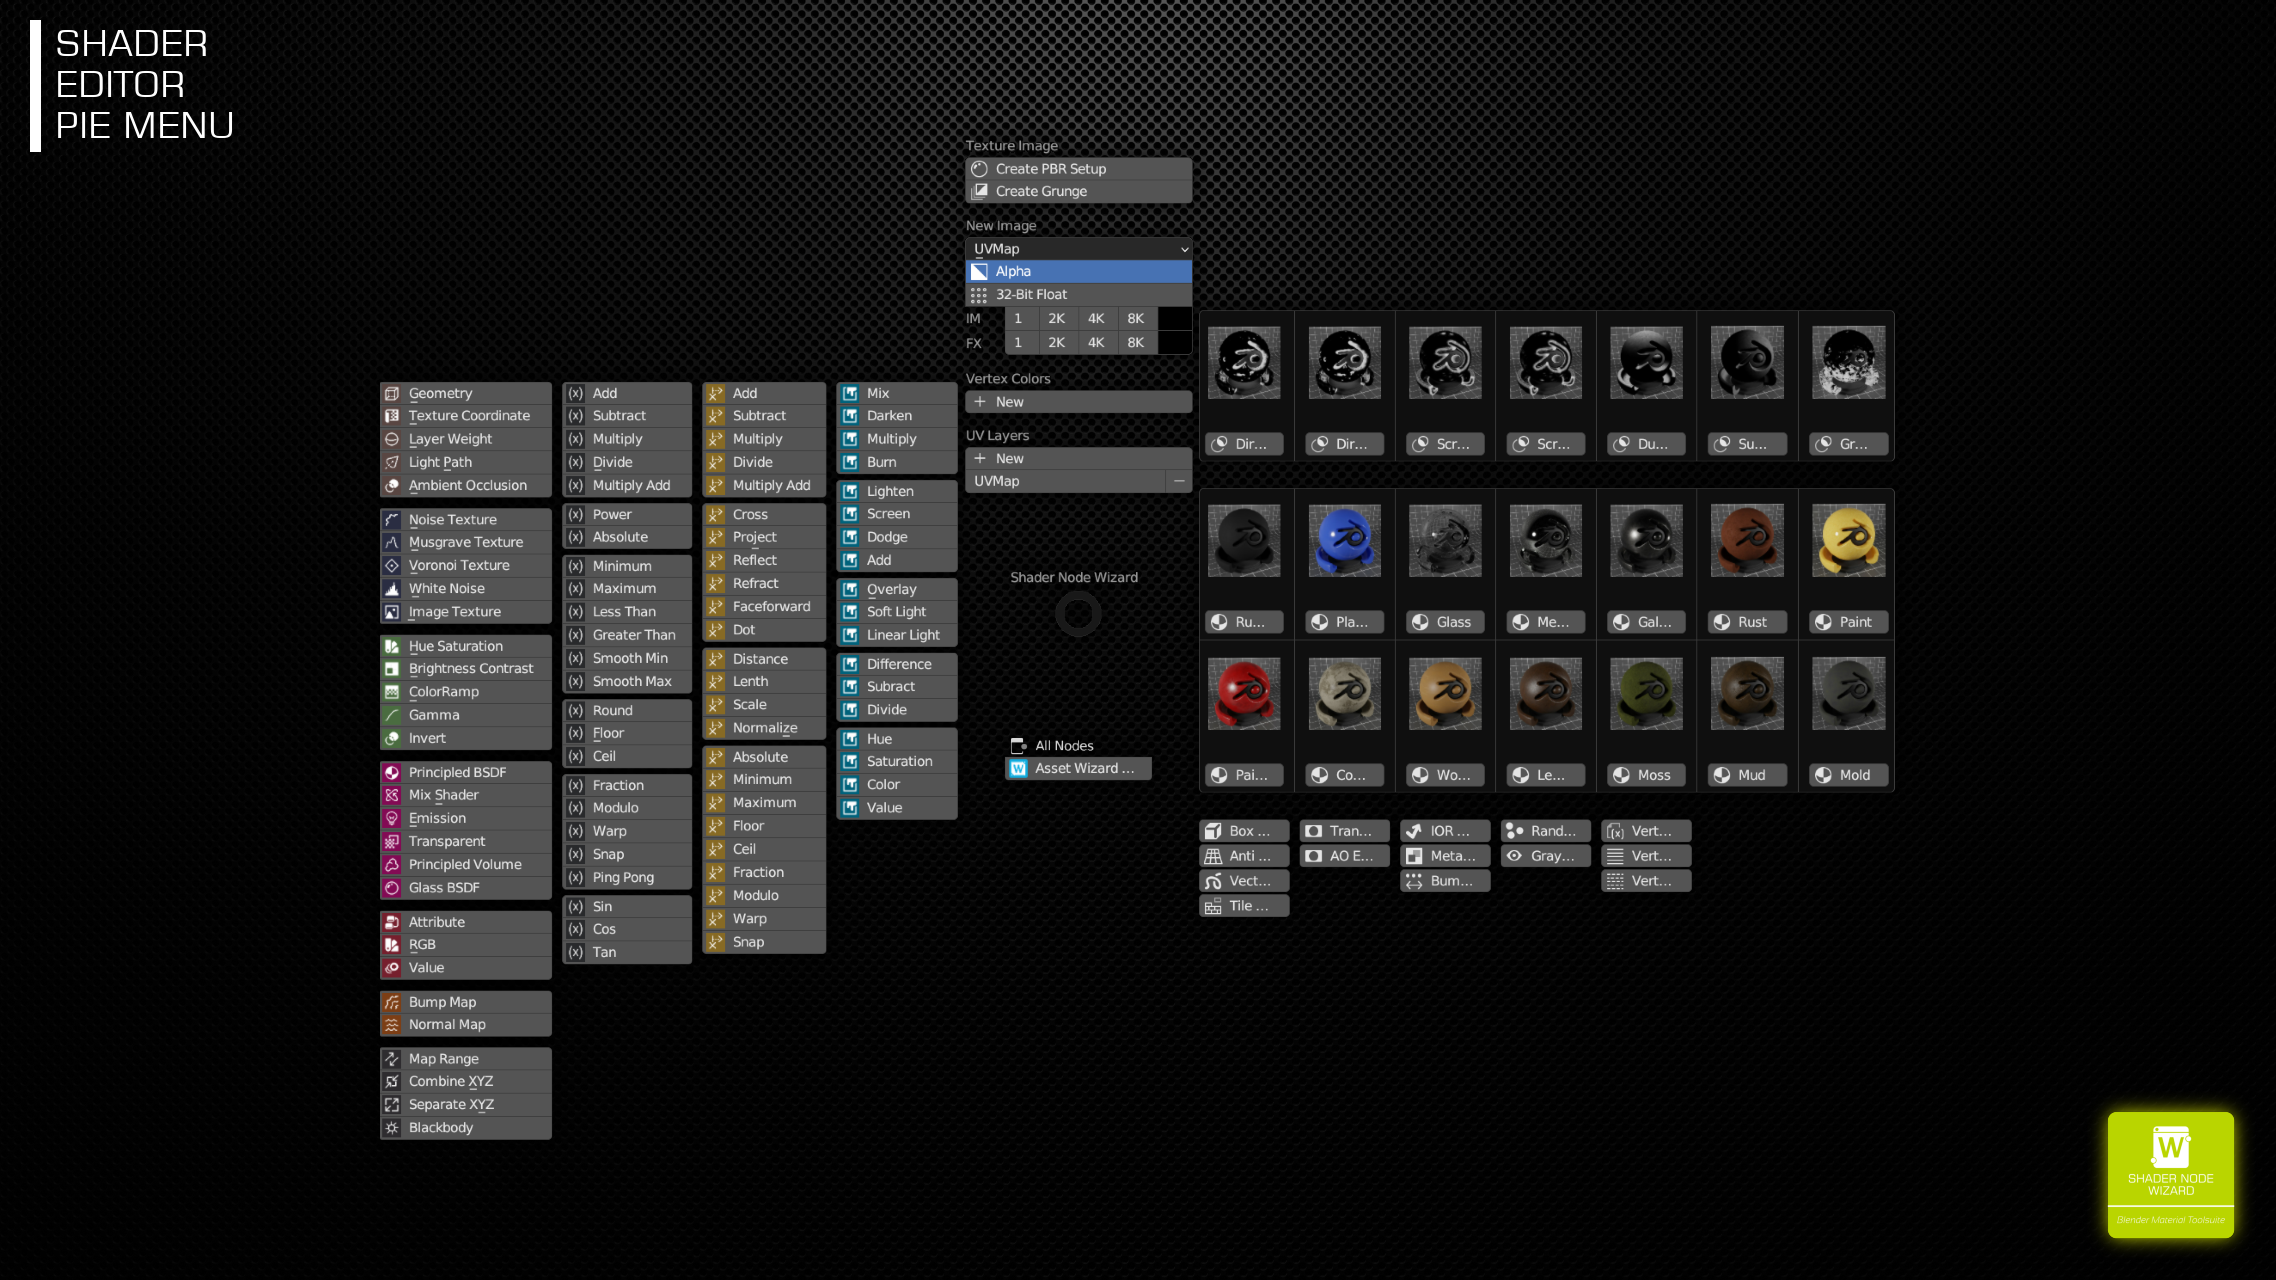
NORTH
- PBR Nodes from PBR image files
- Grunge Nodes (gray effect) maps
- Image and Effect paint textures,
- Vertex Color Masks
- UV Maps
EAST
- Mask Nodes
- Basic Materials
- Tool Nodes
WEST
- Most used Shader Nodes
- Math, Vector Math and Mix Color Node with predefined operation.
CREATE PBR SETUP
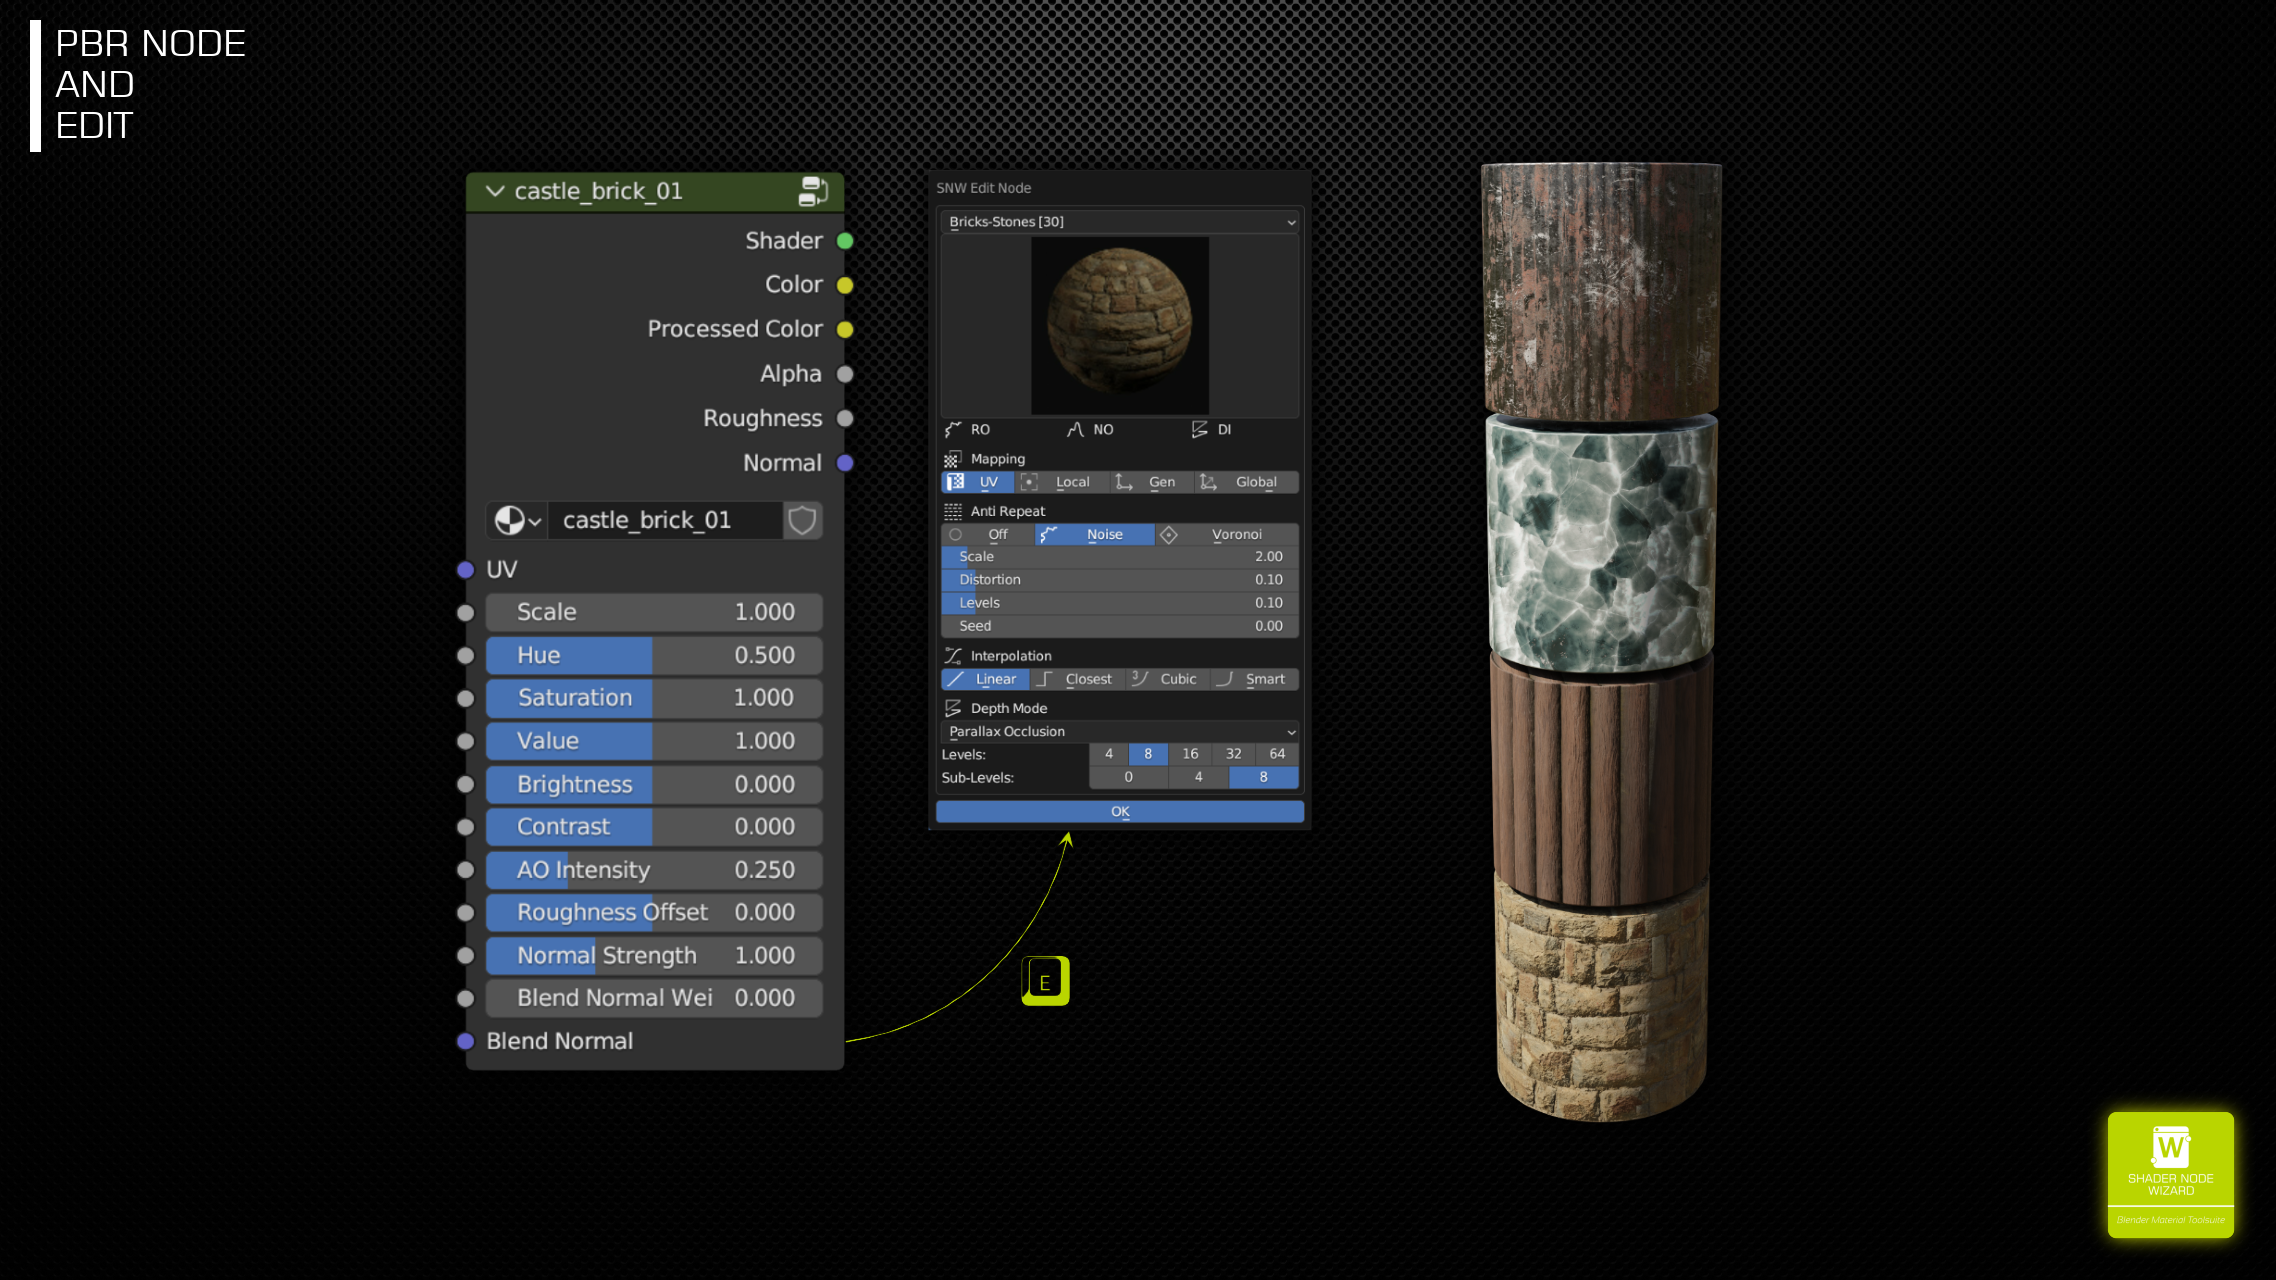
One click generation of material nodes from Sets of PBR files. Sets are scanned from your folders, they were automatically recognized, no manual selection required.
Each file set is turned into a Node Group with many controls. Hue, Saturation, Value, Brightness and Contrast for adjustments. Roughness Offset for wet and dry effects. Blend normal to mix normals from other material layers.
Once the node is created, you have bunch of options to modify it. Hit E on Node for Edit Dialog. Look, Mapping, Anti-Repeat, Parallax Mapping/Displacement and even to quickly change the Set itself.

MIX NORMAL WITH OTHER LAYERS
For more realistic materials, transfer normals from one layer to another. Or do crazy stuff using a total different normal.
REDUCE TEXTURE REPETITION
There are two algorithms to reduce texture repeat effects at your hands.
PARALLAX MAPPING 
While that technique may have its limitations, it can be quit useful in several situations. Just enable it in the PBR edit dialog for everyPBR set with a height map. Up to 64 x 8 depth levels. Works in both Cycles and Eevee and for all texture mapping modes.
Limitations:
- Mesh edges are not cut to depth
- Looks weird when combined with Anti-Repeat
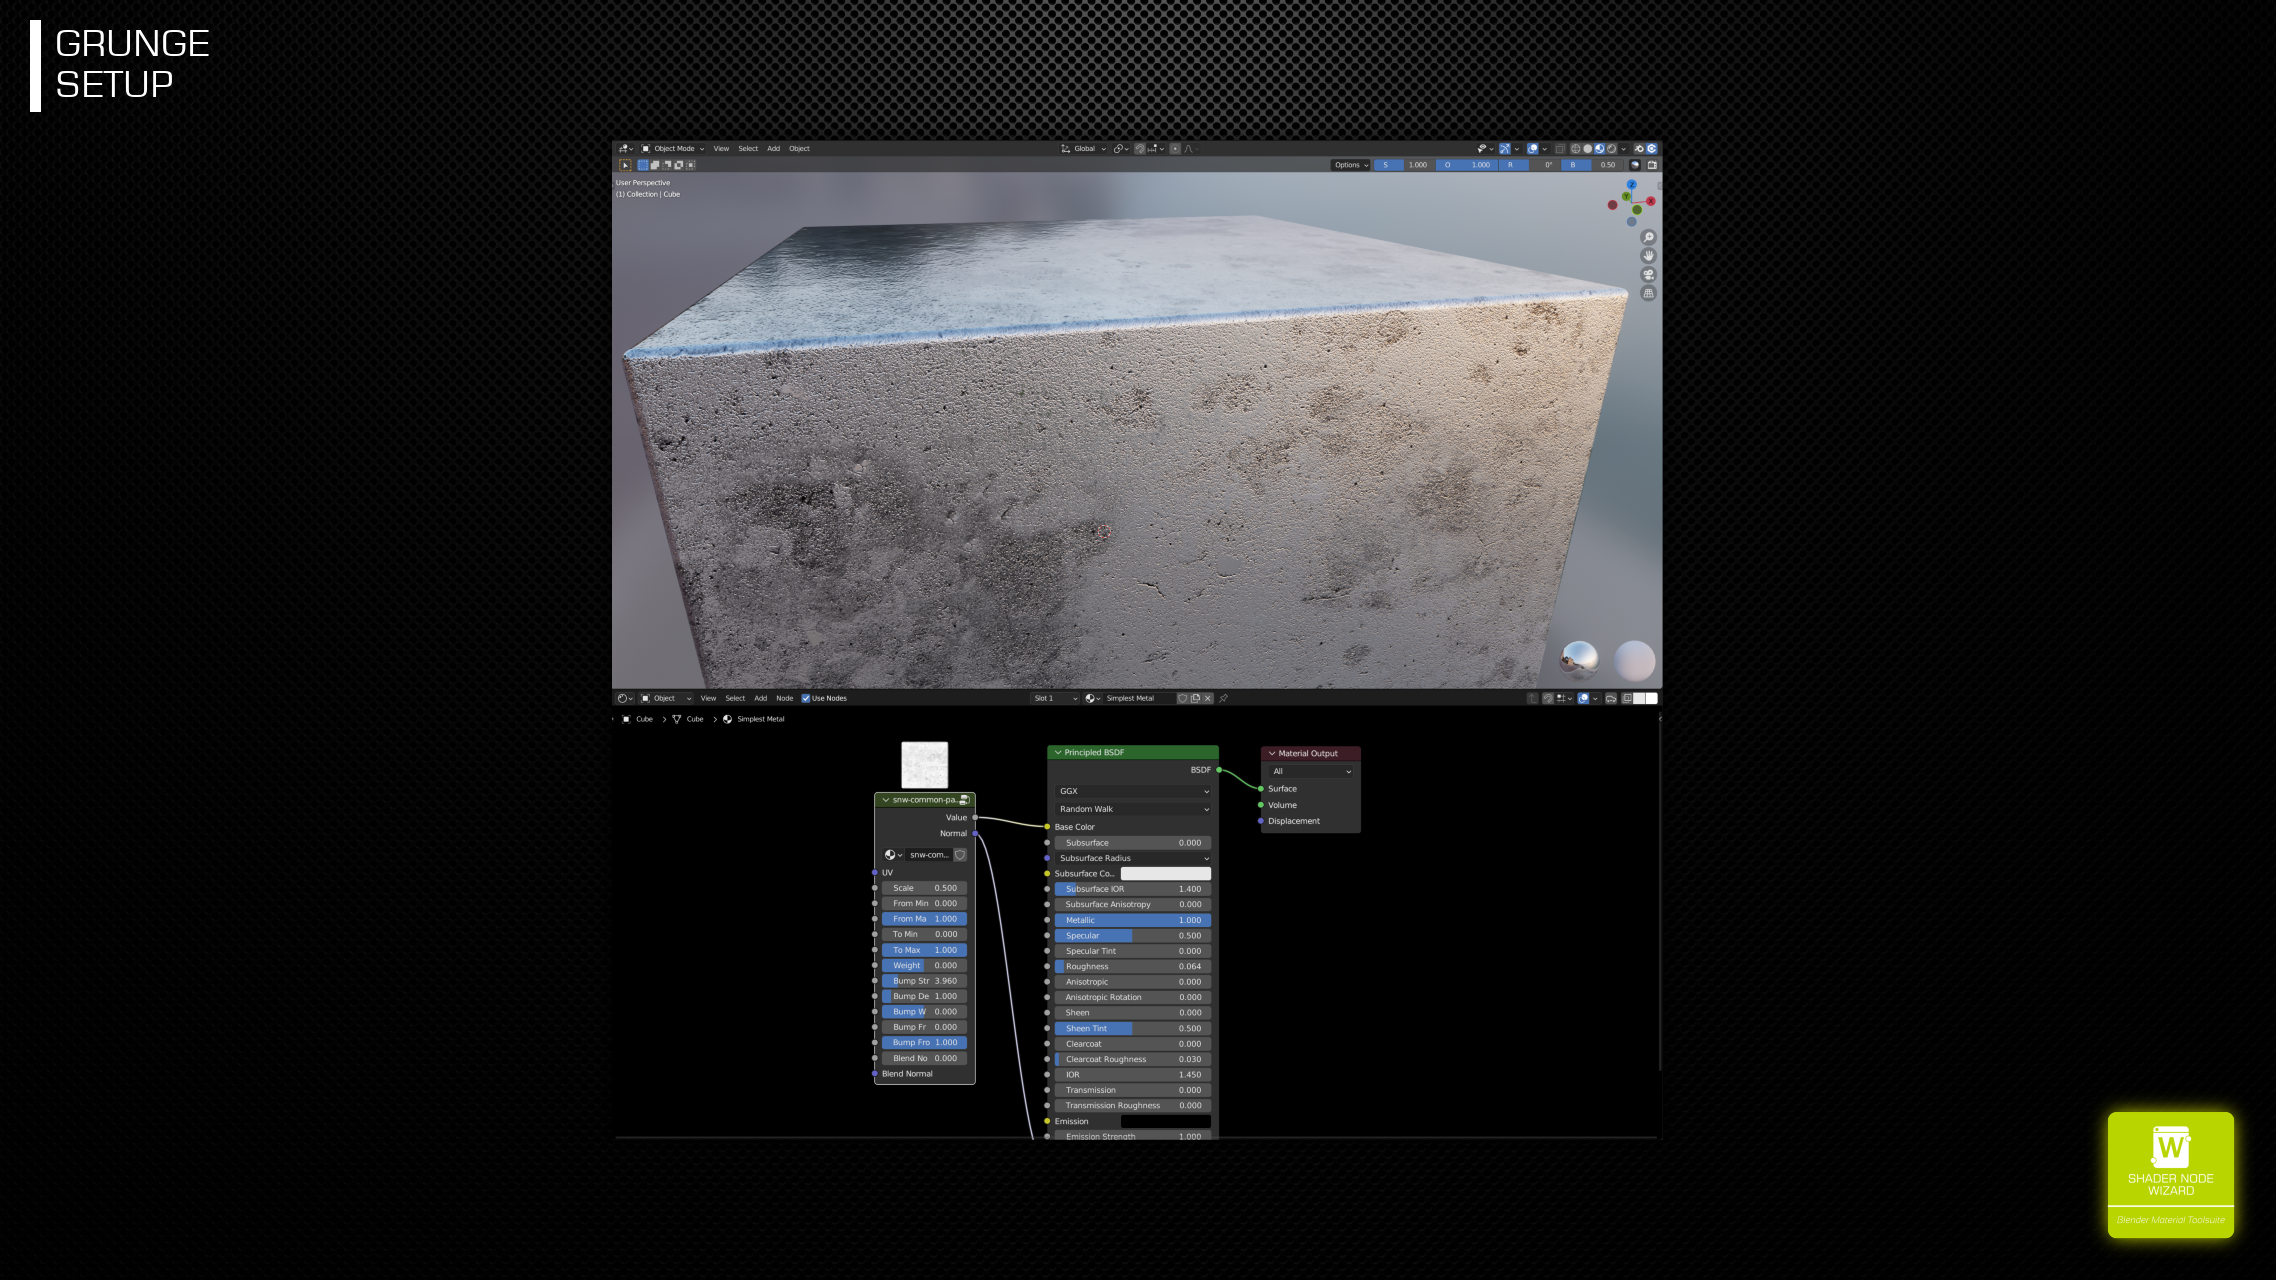
CREATE GRUNGE SETUP
Grunge nodes share several features with PBR nodes. Setup and edit features are very similar. But instead of outputting a Shader, they output a gray image as well and a bump map. The node inputs have many controls to control both outputs in detail.
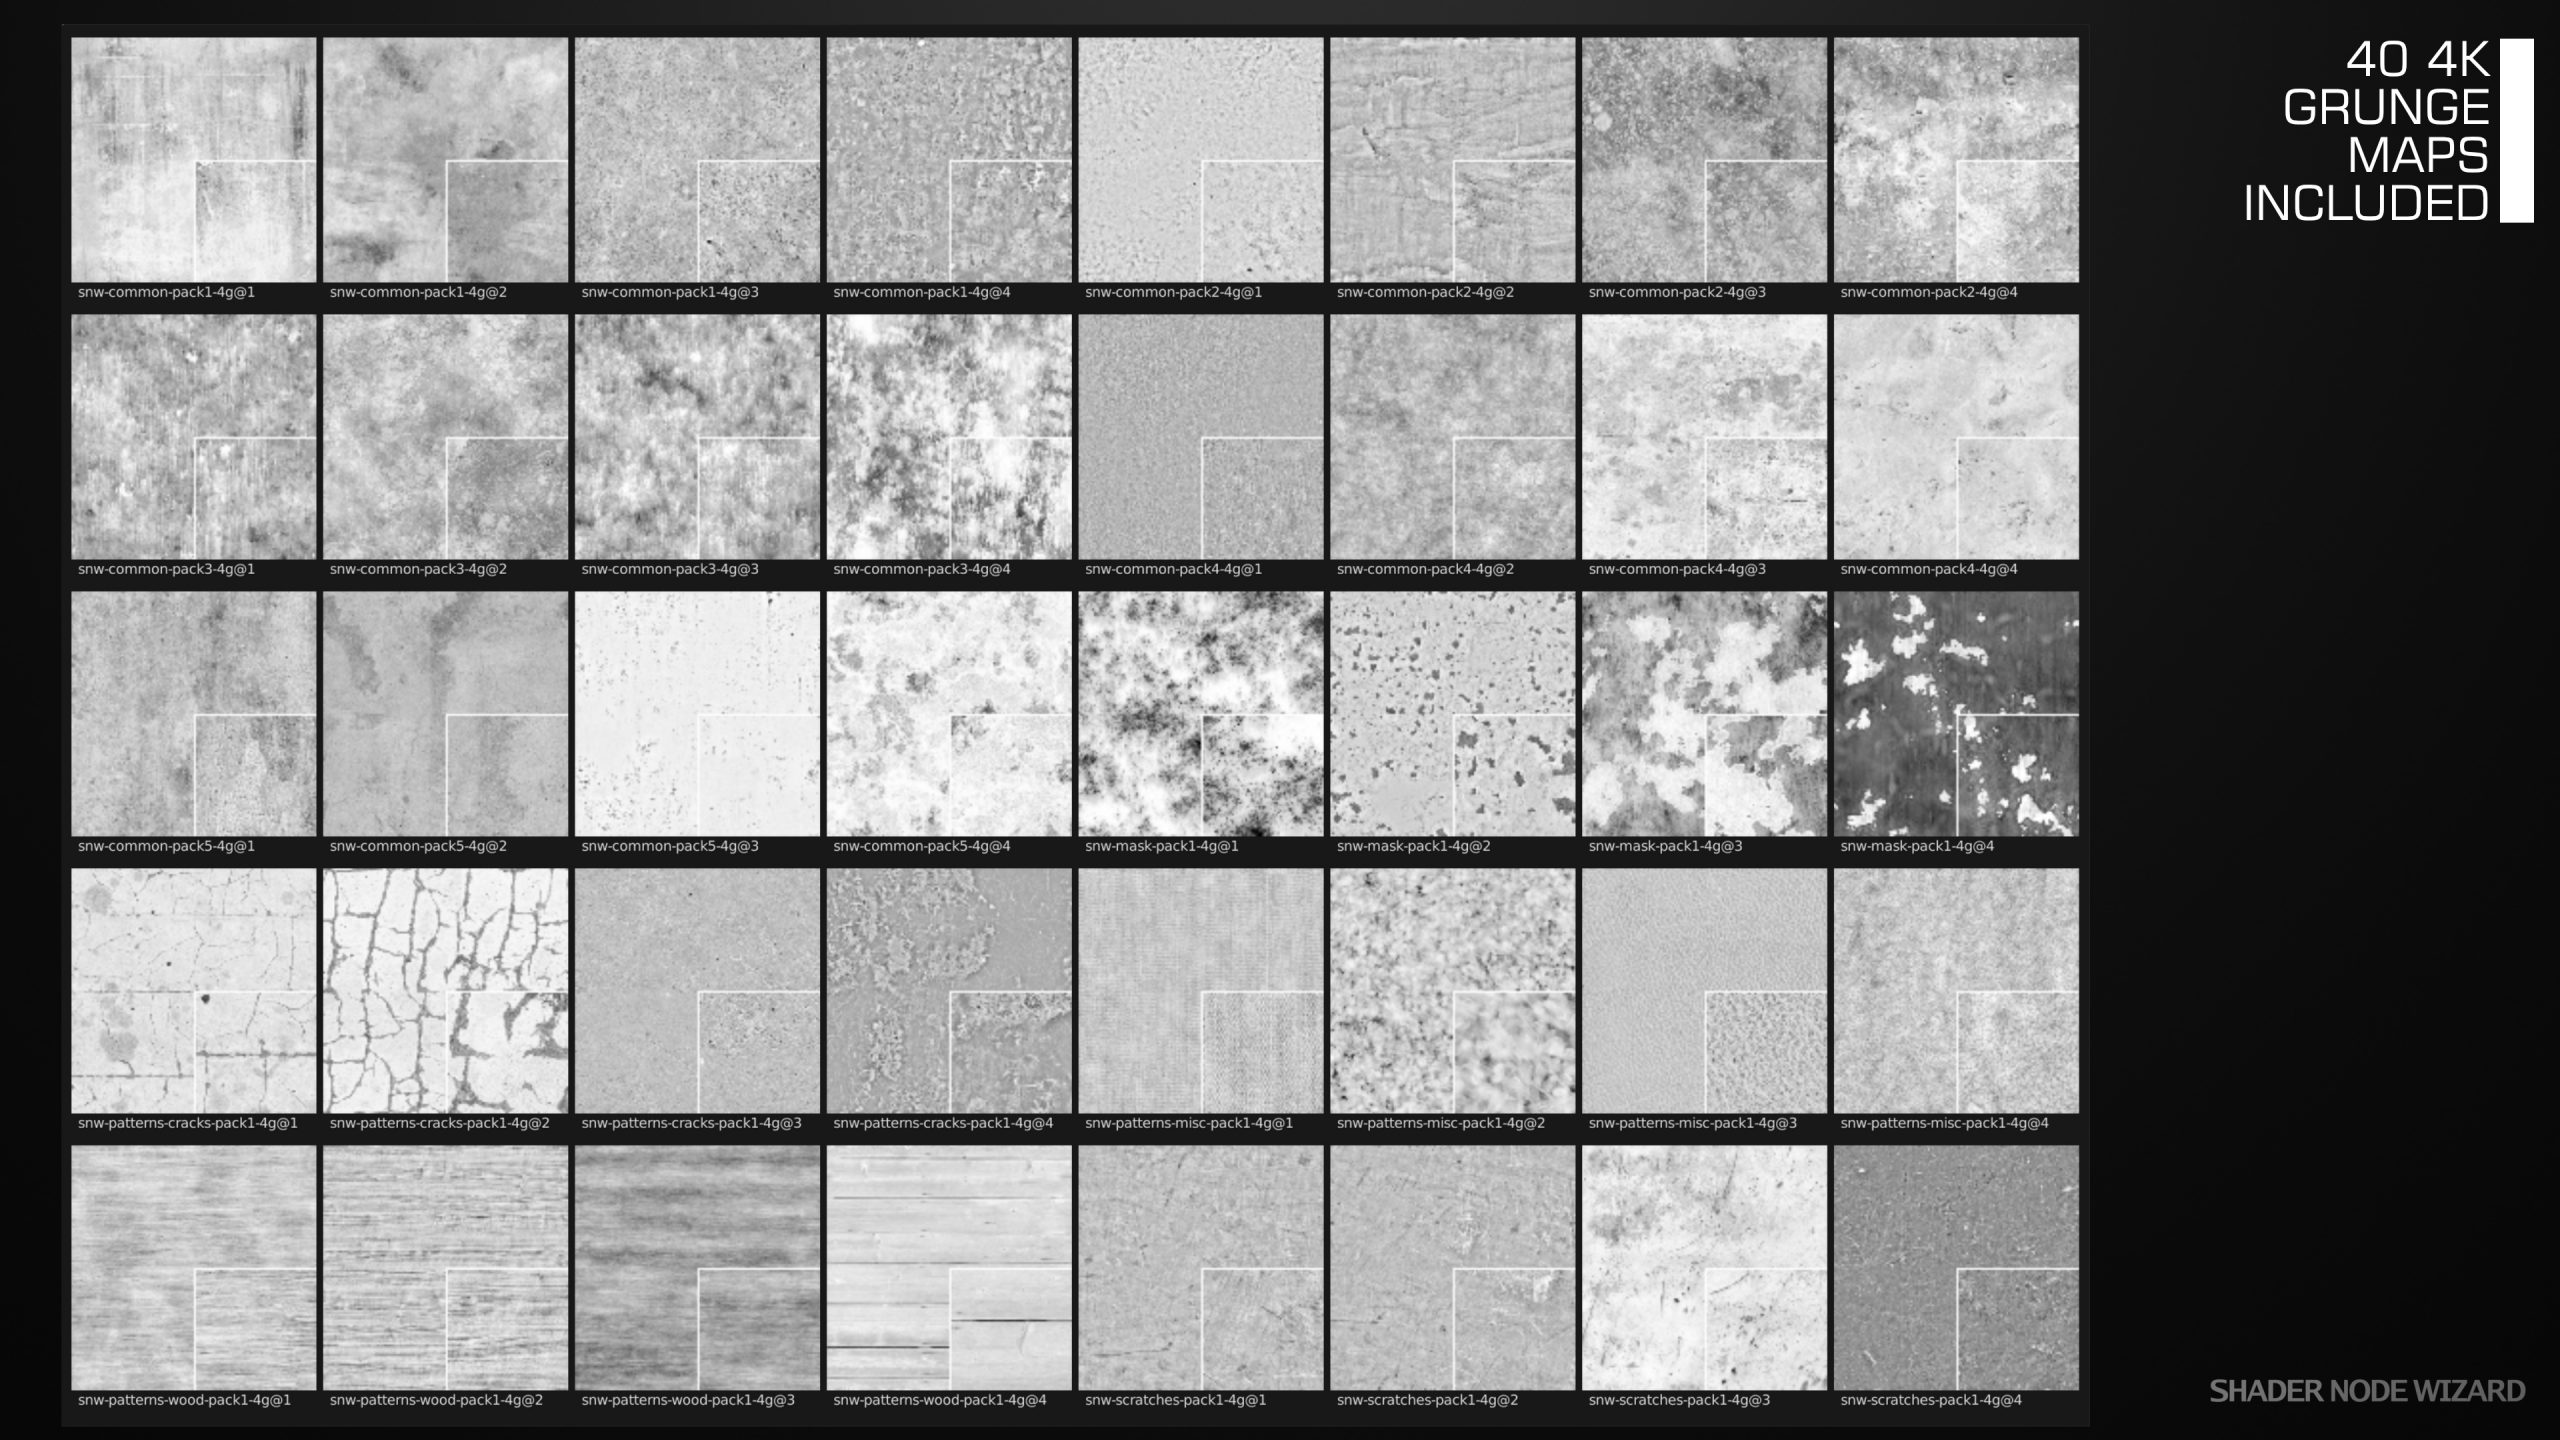
INCLUDED GRUNGE MAPS
These maps are very well suited to use with PBR Extractor’s features, effect nodes, but also to just add grunge and imperfections to your materials.
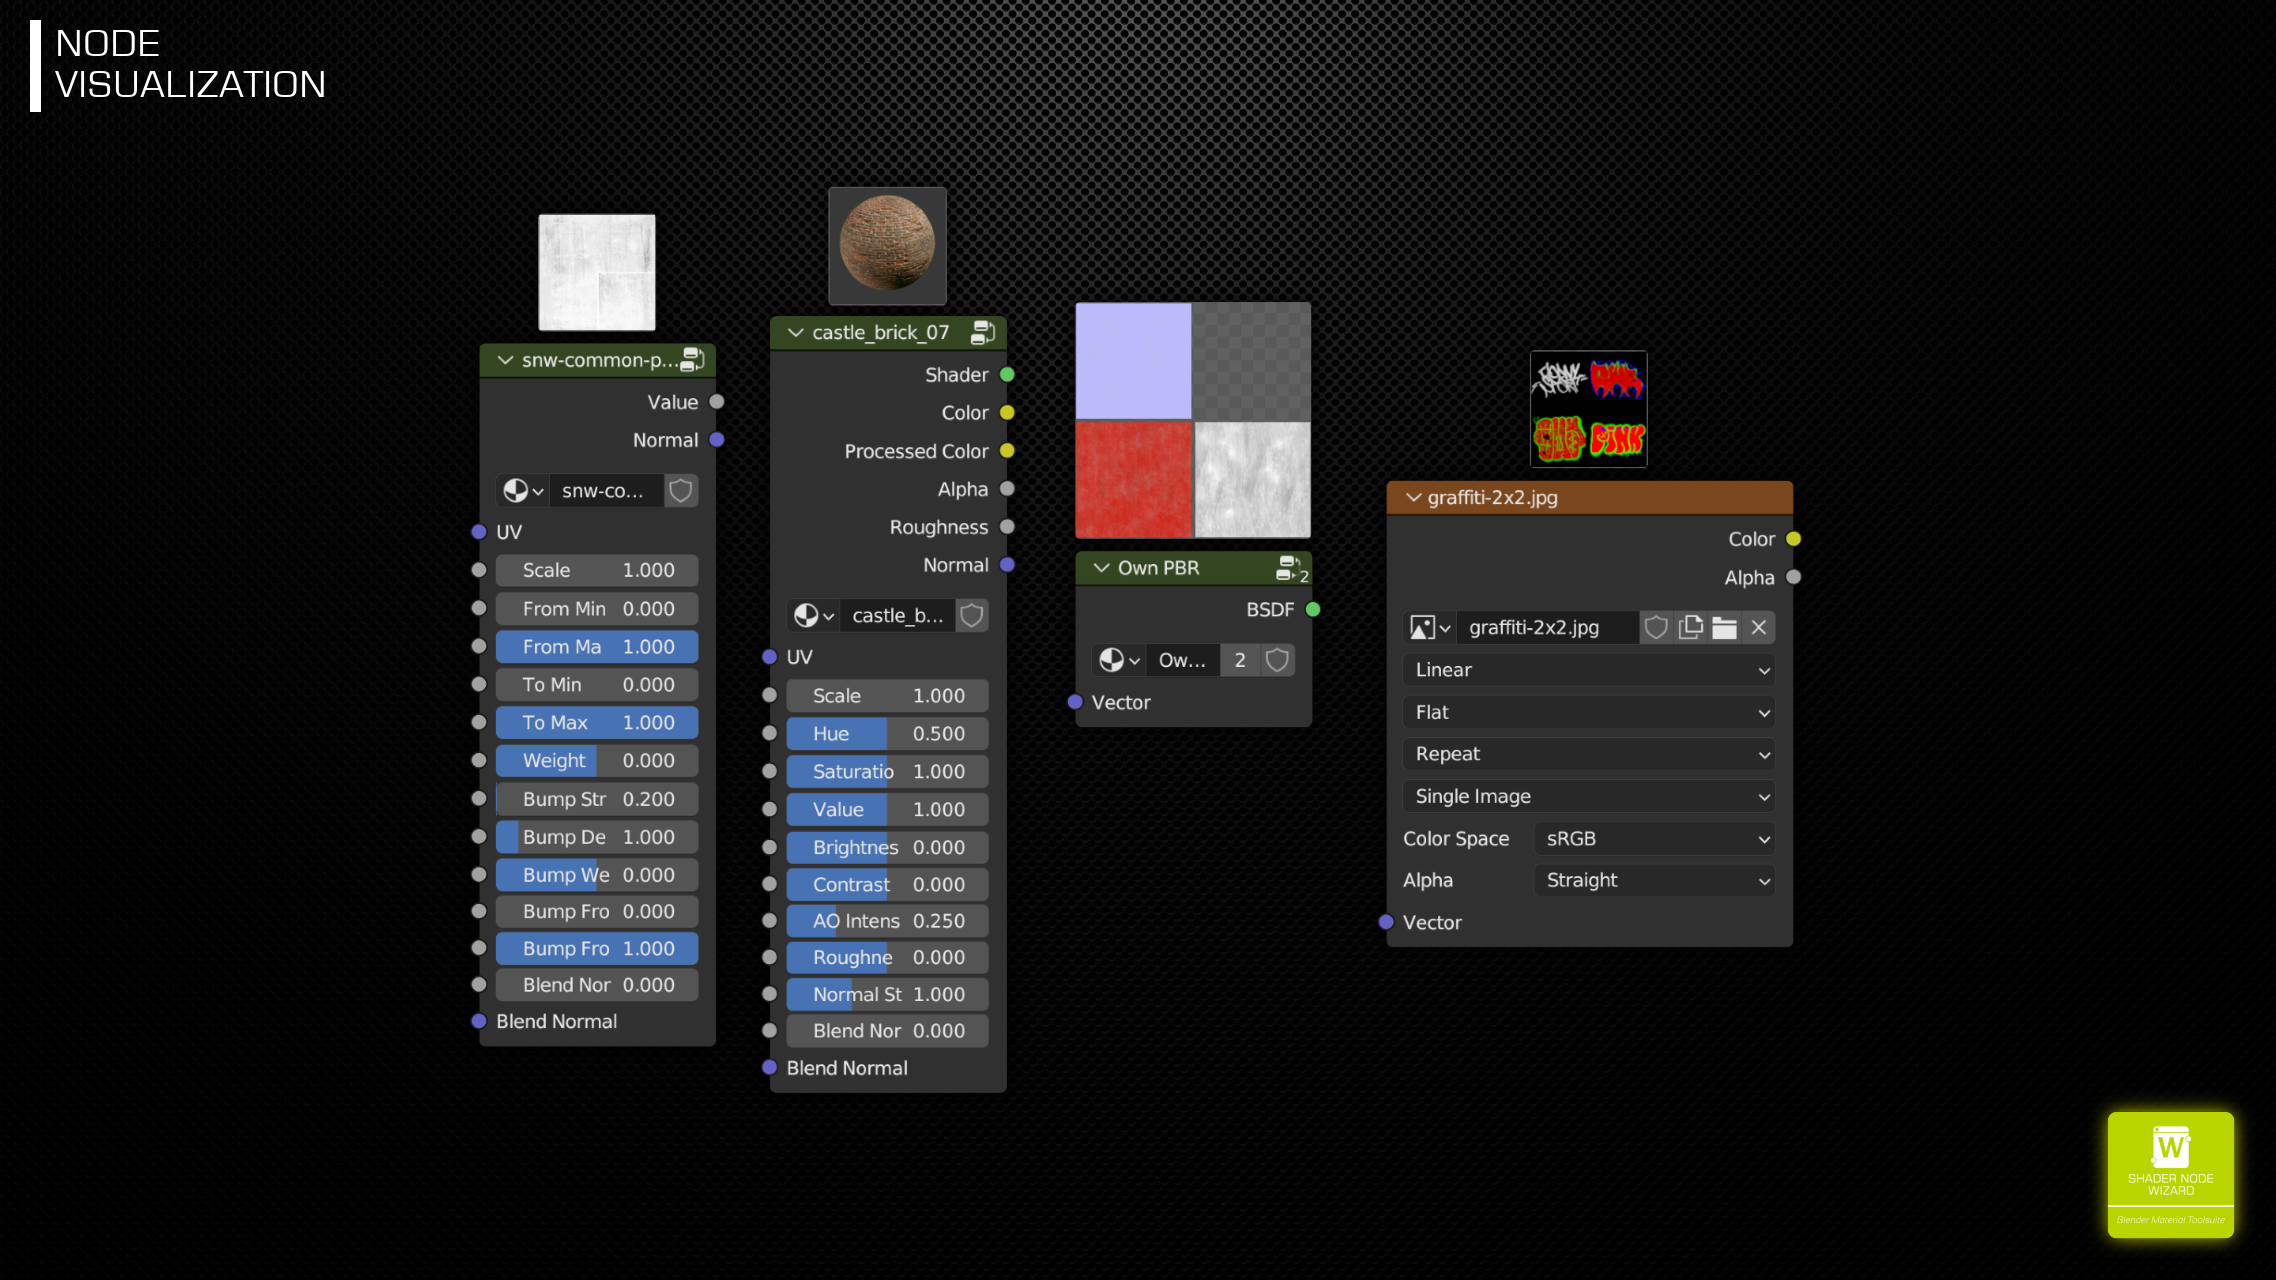
NODE VISUALIZATION 
Image Texture Nodes as well as Node Groups now show the image as small preview on top of the node. Supported Node Groups are both the SNW specific Nodes (which show the Preview), as well as all other (scanned recursively for images). Behaviour can be adjusted in Preferences.
PBR EXTRACTOR
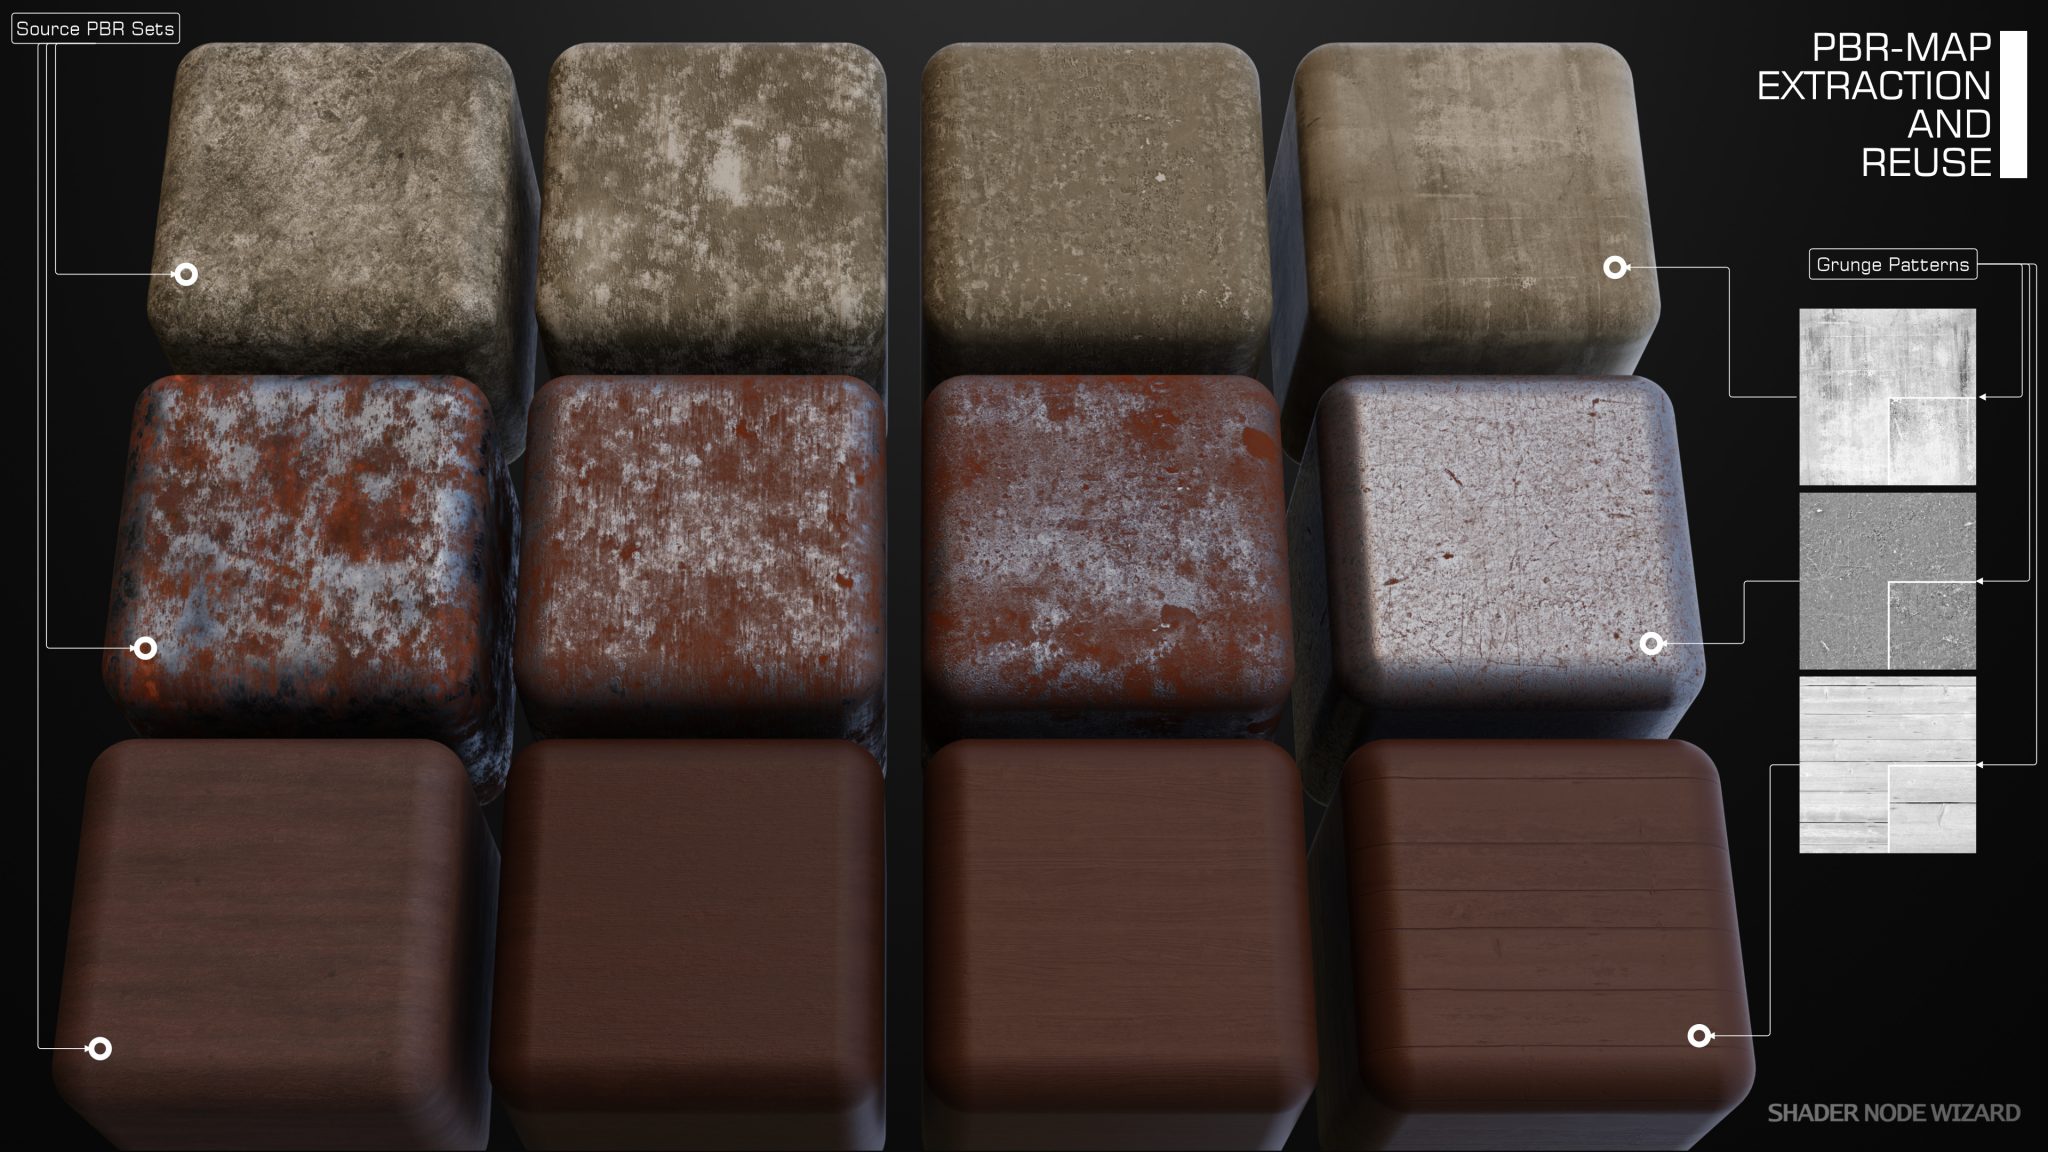
Good looking PBR sets are very common, but using them on multiple objects in a single scene gets repetetive. The PBR extractor creates color ramps from your a PBR set's color, metallic, roughness and specular information. You can use them with different grunge maps, they look similar, but not identical.
MASK NODES 
Nodes that use geometry information (live or baked) and at least one grunge map to build a black/white mask to use for example with a Mix Shader node to create material layers.
Includes Masks:
- Dirt/cavity
- Scratch
- Dust
- Sun Bleach
- Ground dirt
All these masks are highly configurable using E-KEY to change the grunge texture as well with the nodes inputs.
PREDEFINED COMMON MATERIALS 
Many objects just need a quick material to be applied. You either can leave that as it suites or you can replace it later with a more complex setup. Either way, the node can be created with a single click and is highly modifyable.
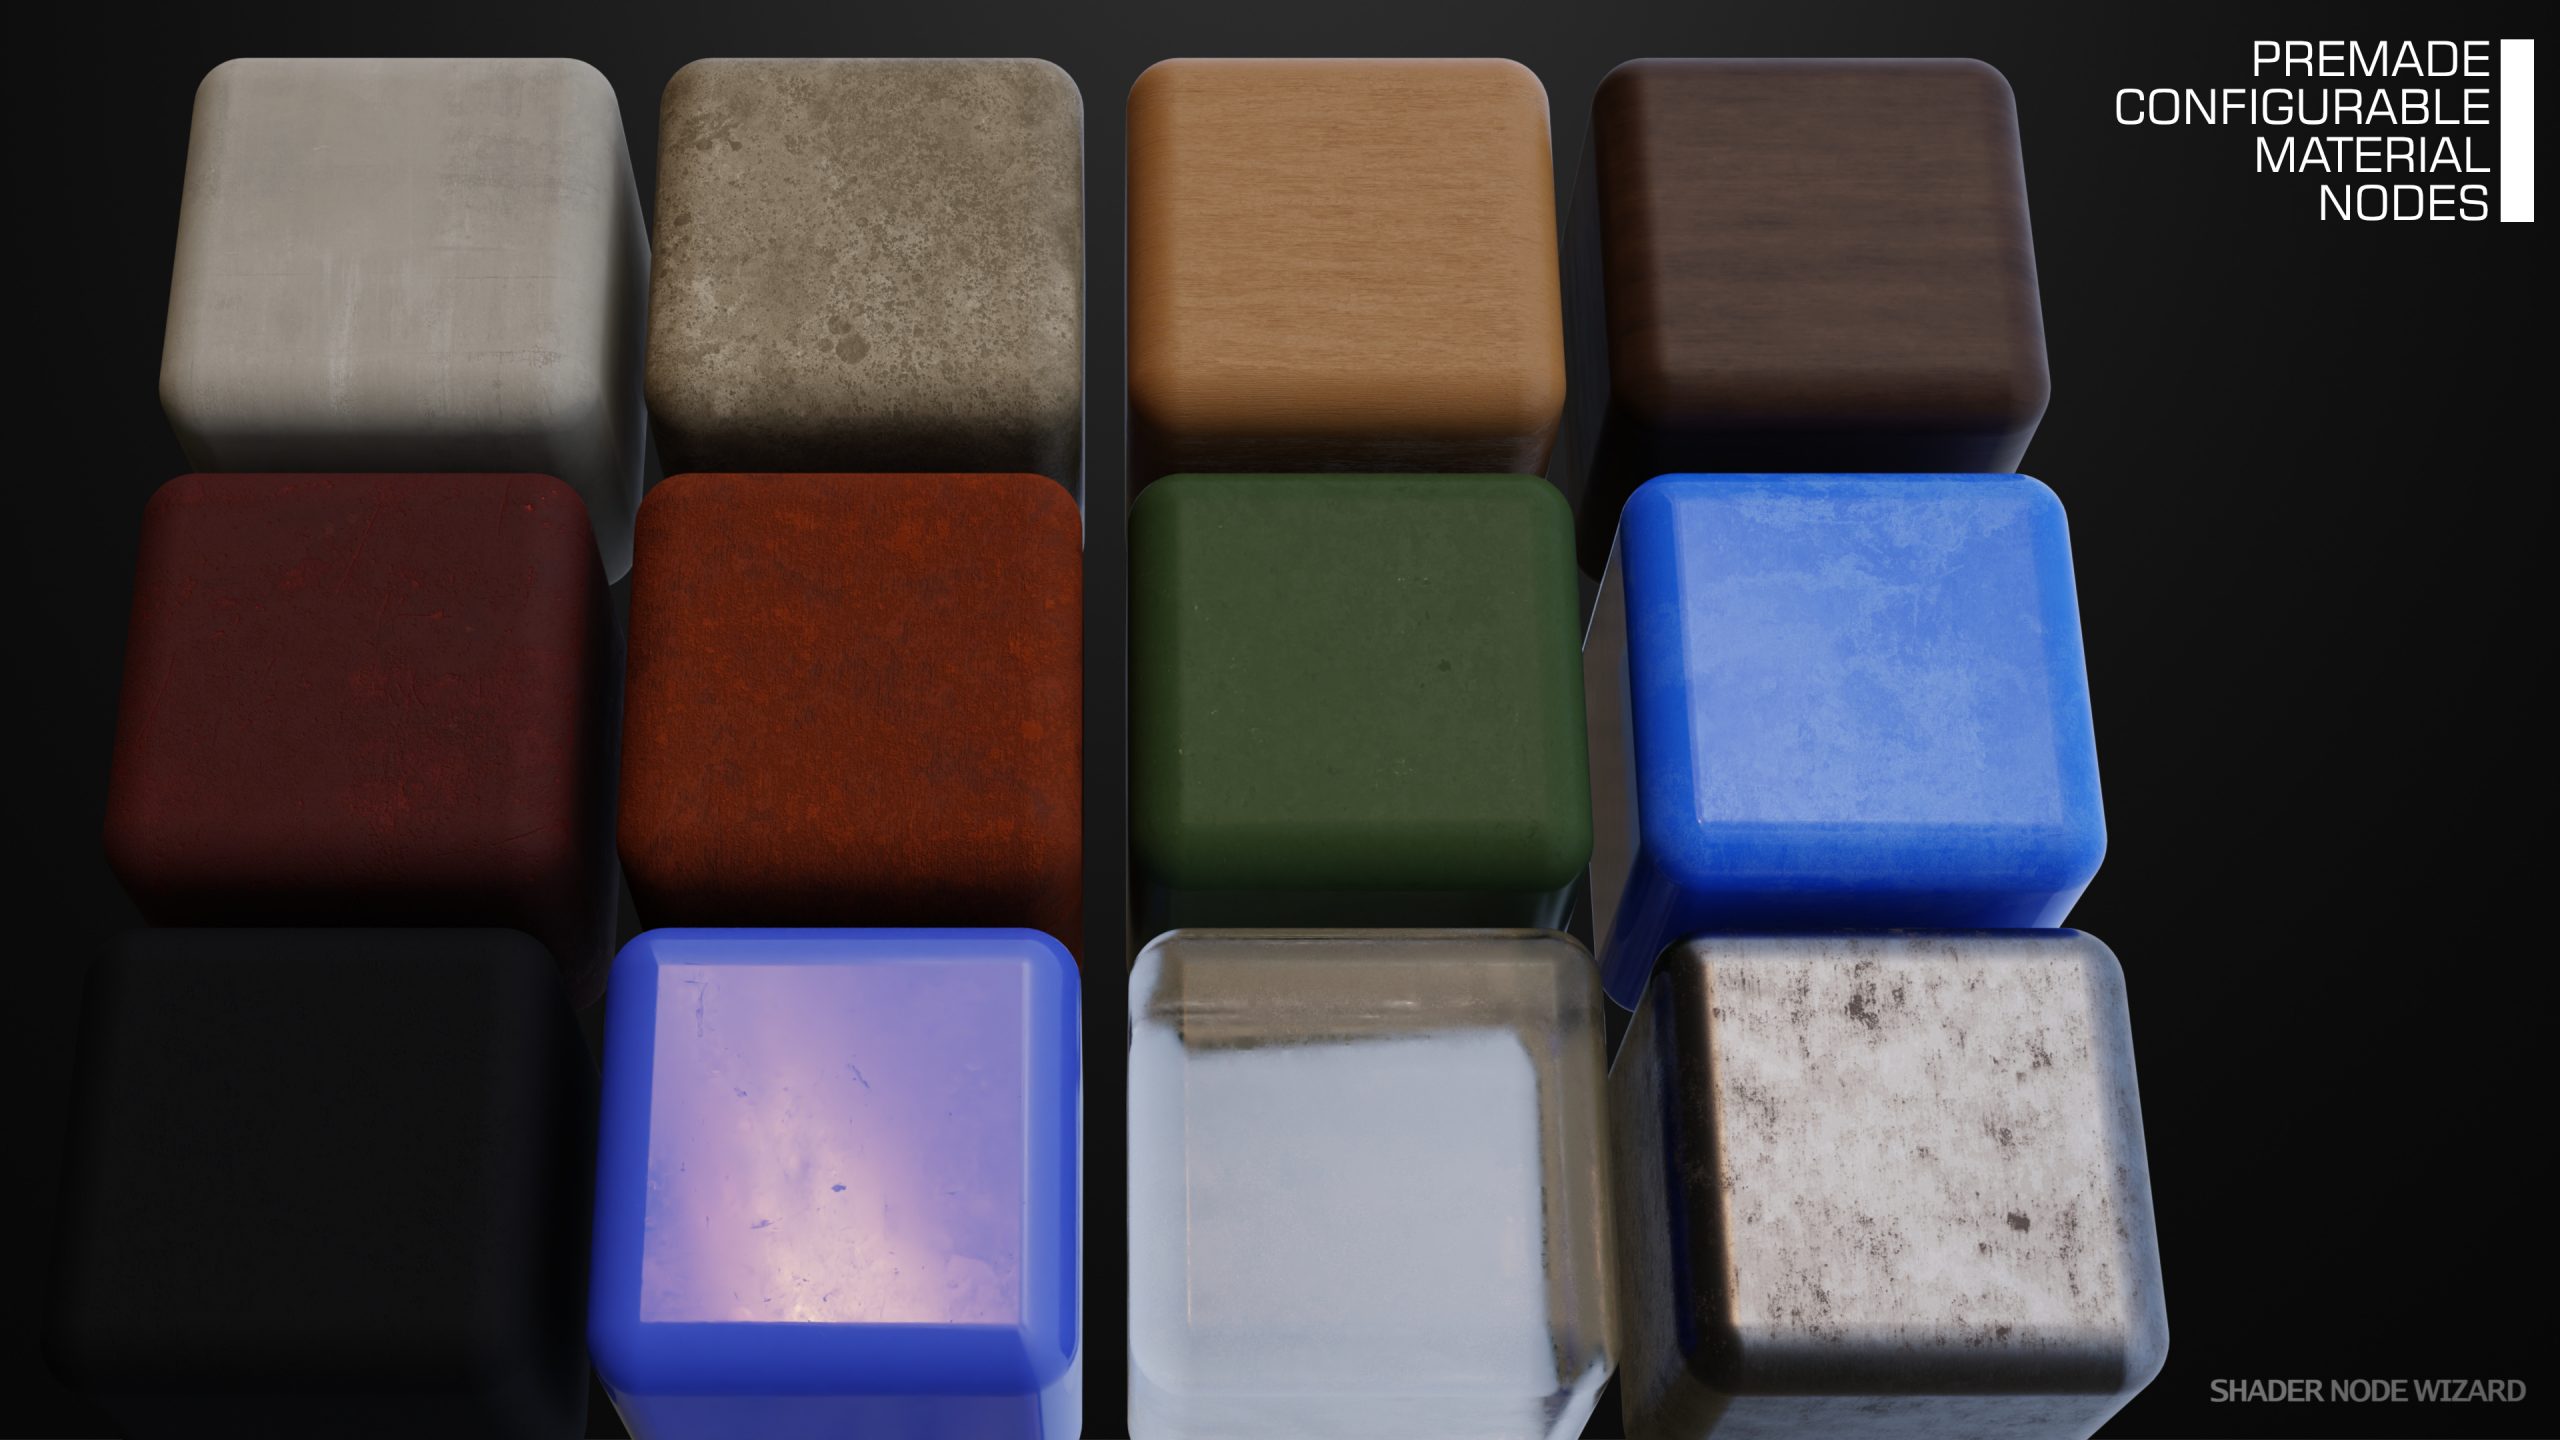
New Materials:
- Galvanized Metal
- Paint 2
- Leather
- Moss
- Mud
- Mold
PAINTING SUPPORT
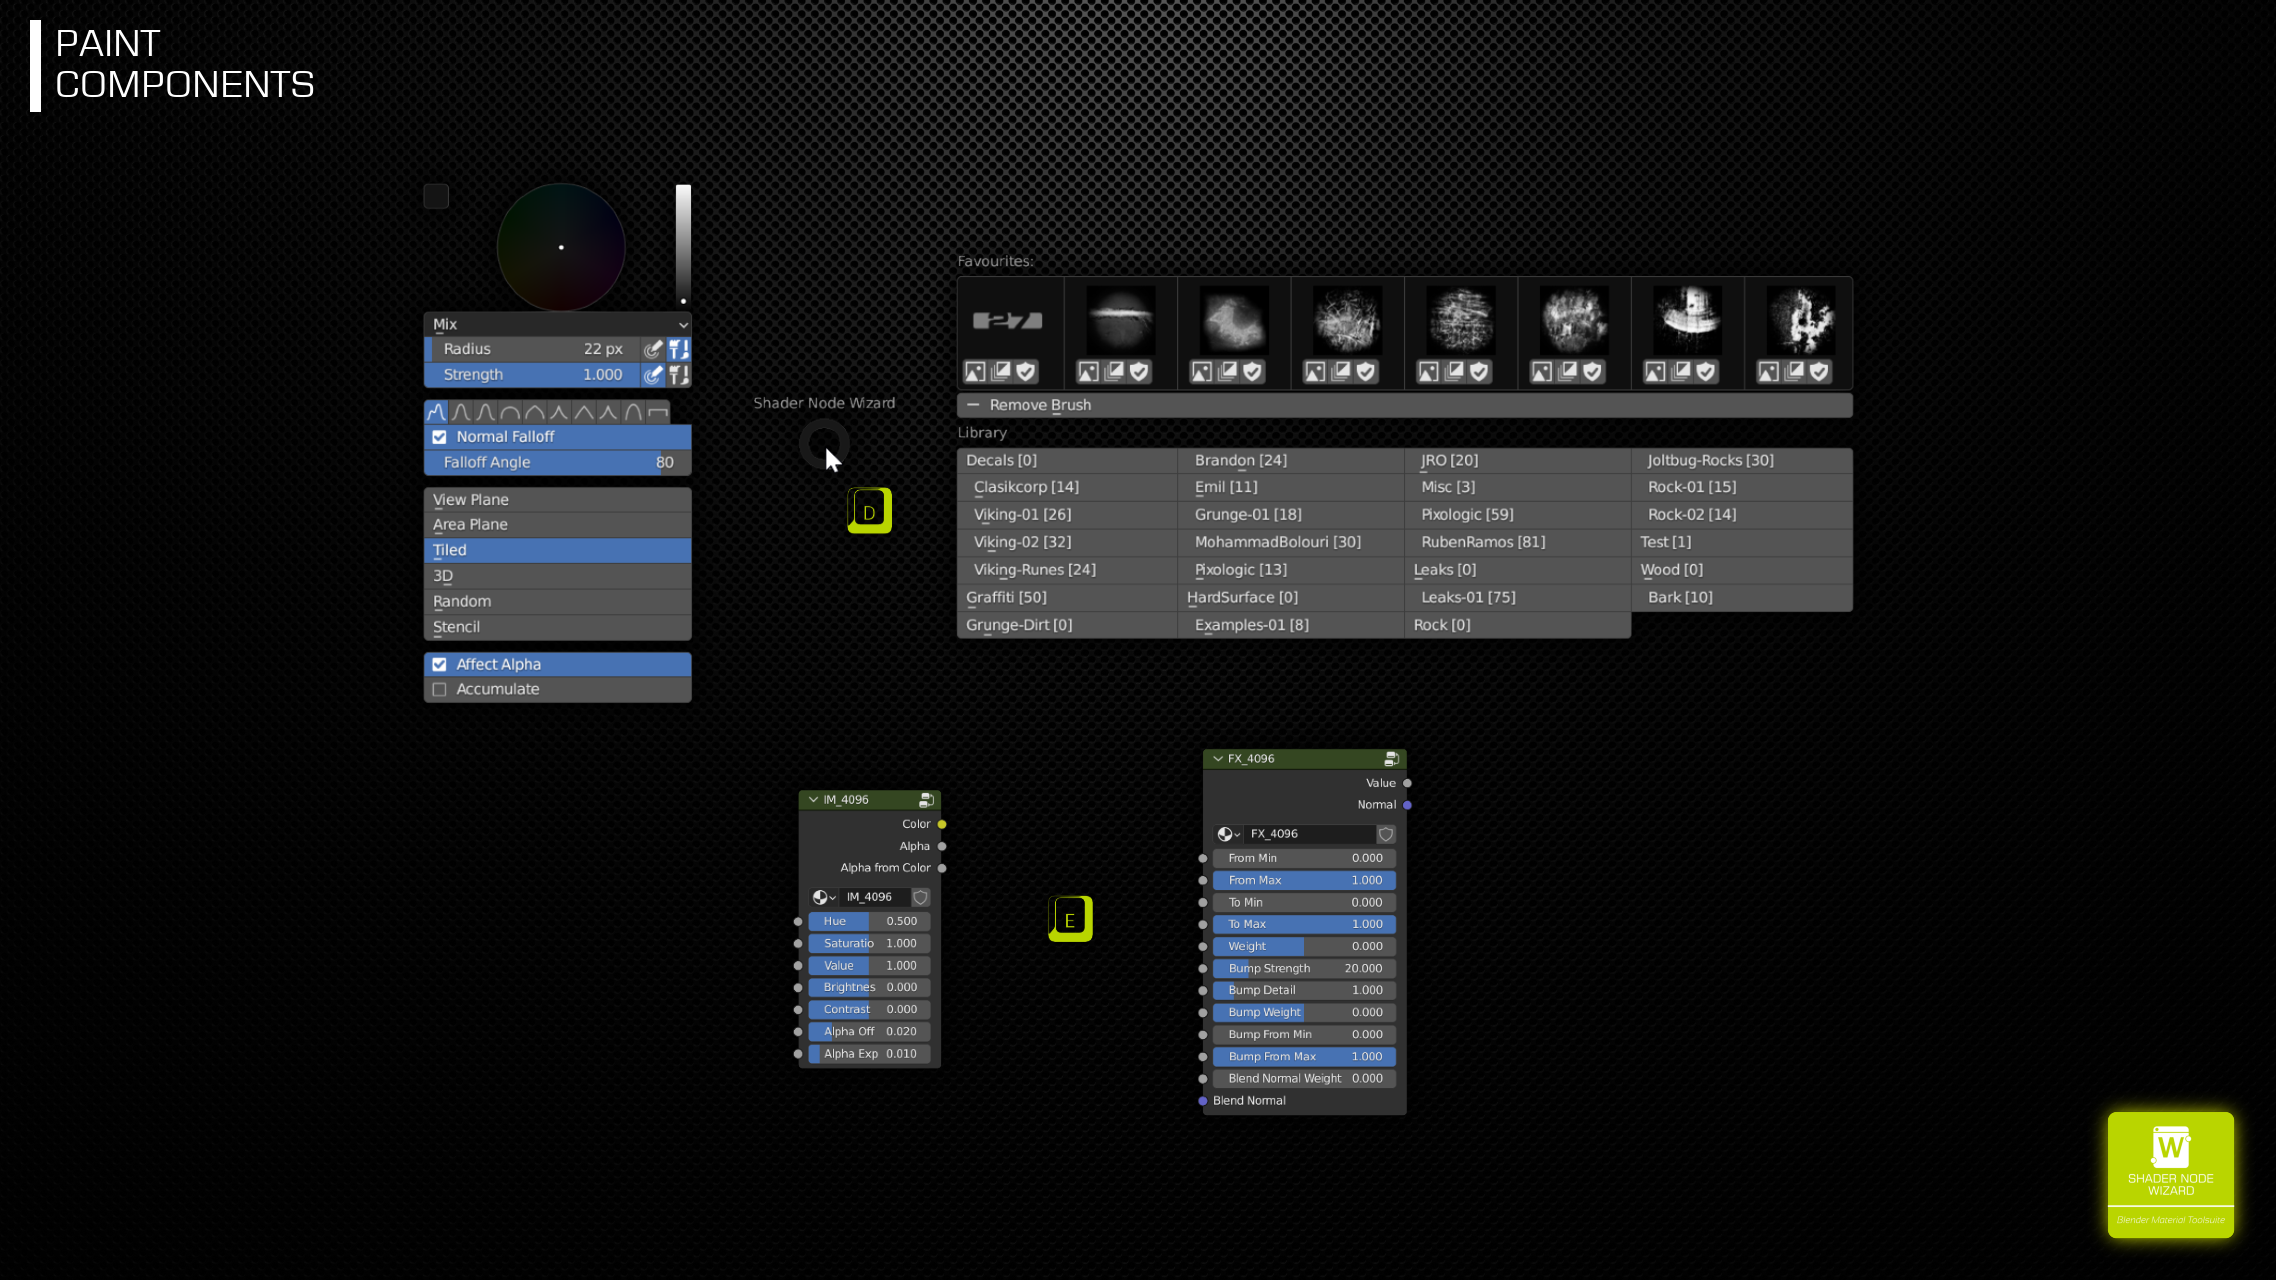
Select an IM or FX Node in your shader graph and hit E-KEY to paint on them. While painting, hit D-KEY in 3D View to bring up the Paint PIE to quickly select a Brush and change common options.
IM NODE
Manages single texture mainly used for Direct Painting and Decals.
FX NODE
Contains gray image, intended to paint Masks or Height Maps
Hitting E-KEY on one of those nodes enters Paint Mode and selects the managed texture as target.

WEST
Most common Brush Controls
EAST
Categorized Brushes scanned from folder, support for Favorites and Last Used brushes.
WIZARD ADDON BUNDLE 
If you are interested in this Addon, please note that you can also buy the WIZARD ADDON BUNDLE.

