Pose2Sim Blender

Pose2Sim Blender
Pose2Sim_Blender is a Blender add-on for visualizing Pose2Sim results -- and more.
Pose2Sim is an open-source pipeline for obtaining research-grade 3D motion analysis from consumer-grade cameras (such as phones, webcams, GoPros, etc).
This add-on can be used to visualize:
- Camera calibration (from a
.tomlfile) - Markers (from a
.trcor.c3dfile) -
OpenSim data (such as
.osimmodels,.motmotions, and.motforces) - And much more...
N.B.:
OpenSim is an open-source software for research in biomechanics, widely used in motion capture (MoCap).
Blender is an open-source software used for 3D modeling, animation, and rendering. \
Contents
Installation
Quick install
N.B.: Full install is required for importing .mot motion files.
- Install Blender
- Download Pose2Sim_Blender.zip
- Open Blender -> Edit -> Preferences -> Add-ons -> Install -> Choose Pose2Sim_Blender.zip
- Check
Pose2Sim Blender to enable it
- Press
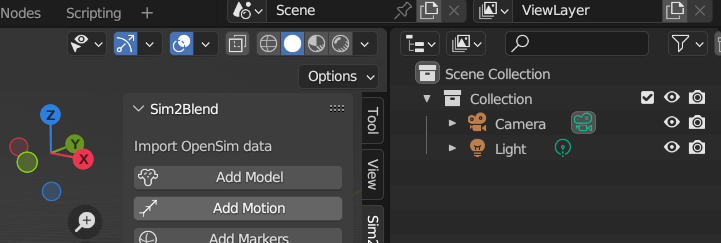
n or Click on the tiny arrow on the upper-right corner of the 3D viewport to open the tool
N.B.: Full install is required for importing .mot motion files.
Pose2Sim Blender to enable itn or Click on the tiny arrow on the upper-right corner of the 3D viewport to open the tool
Full install
Full install requires admin rights on your computer. It is a little tricky, but the following steps should do it smoothly. If you encounter any issue, please submit an issue. Only Windows has been tested, but feel free to tell me how it goes on other platforms!
1. Prerequisites
- Install Blender (tested on v 3.6 and 4.0.)
- Install Miniconda
- Download Pose2Sim_Blender.zip
2. Find your Blender Python version
Open Blender, press Shift+F4, type the following lines:
import sys
sys.version
3. Install Sim2Blend libraries
Open Miniconda, and copy-paste these lines. Replace with the Python version you just found:
conda create -n Pose2Sim_Blender python=3.10.12 -y
conda activate Pose2Sim_Blender
conda install -c opensim-org opensim -y
pip uninstall numpy
pip install numpy bpy toml vtk
4. Install Pose2Sim_Blender add-on
You will need admin rights for the next steps:
- Rename
pythoninC:\Program Files\Blender Foundation\Blender 3.6\3.6\pythontopython_old - Copy-paste there your
Pose2Sim_Blenderenvironment folder (to find its location, typeconda env listin Anaconda prompt). Rename it topython - Open
C:\Program Files\Blender Foundation\Blender 3.6\3.6\python\Lib\opensim\__init__.py- comment out the line
# from .moco import * - line 4, add the path to your OpenSim bin folder:
os.add_dll_directory(r"C:/OpenSim 4.4/bin")(or 4.5, depending on your version)
- comment out the line
5. Install Pose2Sim_Blender add-on in Blender
- Blender -> Edit -> Preferences -> Add-ons -> Install -> Choose Pose2Sim_Blender.zip
- Check
Pose2Sim_Blender to enable it
- Press
n or Click on the tiny arrow on the upper-right corner of the 3D viewport to open the tool
Pose2Sim_Blender to enable itn or Click on the tiny arrow on the upper-right corner of the 3D viewport to open the toolDemonstration
Find example files in the Examples folder of your Pose2Sim_Blender.zip archive.
Camera tools
-
Import:
Import a .toml calibration file from Pose2Sim.
-
Export:
Export updated cameras as a .toml calibration file.
-
Show:
Import videos, image sequences, or still images in your camera frame of reference. The image plane is automatically scaled when translated.
-
Film:
Render view from all or selected cameras, as a movie or an image sequence. Choose your framerate, the first and last frame to be rendered, and the output quality.
Import a
.toml calibration file from Pose2Sim.Export updated cameras as a
.toml calibration file.Import videos, image sequences, or still images in your camera frame of reference. The image plane is automatically scaled when translated.
Render view from all or selected cameras, as a movie or an image sequence. Choose your framerate, the first and last frame to be rendered, and the output quality.
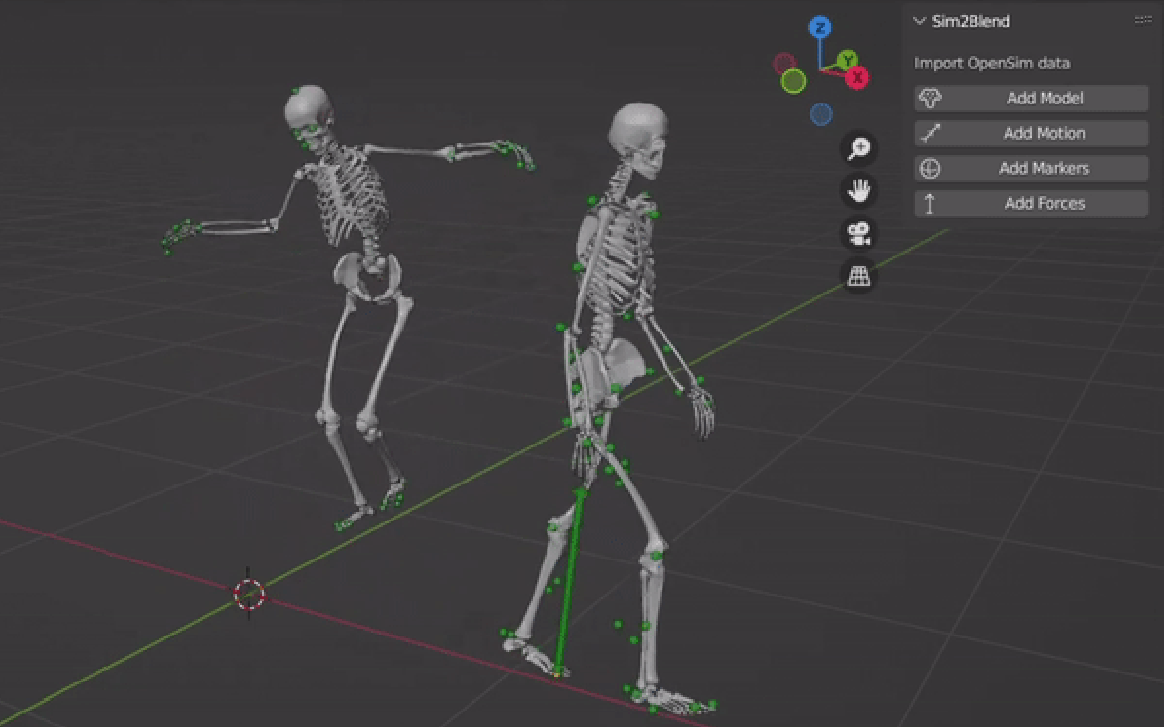
OpenSim imports
-
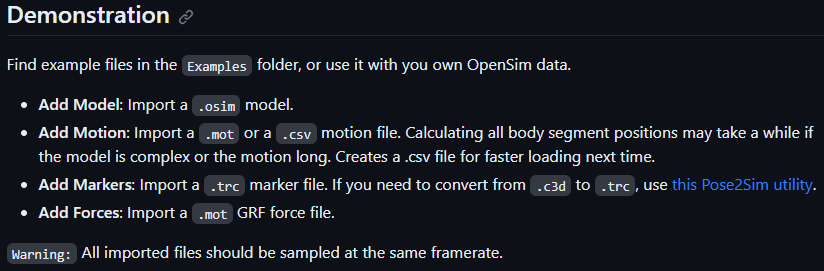
Import Markers:
Import a .trc or a .c3d marker file, e.g., generated by Pose2Sim triangulation.
-
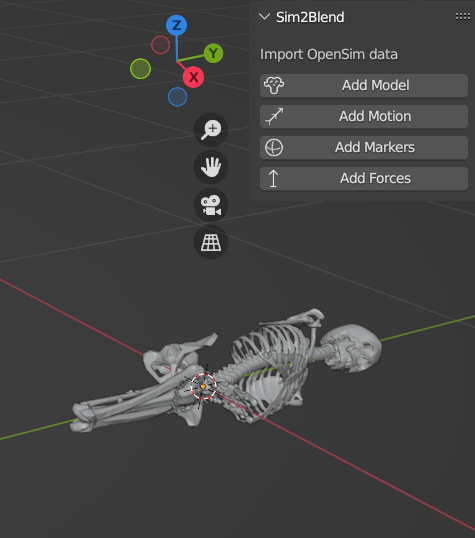
Import Model:
Import the "bodies" of an .osim model.
If you did the full install and some Geometry files exist only as .vtp, they will automatically be converted to .stl.
-
Import Motion:
Import a .mot or a .csv motion file.
- If you did the full install, you can import a
.mot file. Calculating all body segment positions may take a while if the model is complex or if there are many time frames. Creates a .csv file for faster loading next time.
- If not, you will have to install the OpenSim API outside of Blender and use bodykin_from_mot_osim.py to convert it to .csv.
-
Import Forces:
Import a .mot GRF force file.
Import a
.trc or a .c3d marker file, e.g., generated by Pose2Sim triangulation.Import the "bodies" of an
.osim model.If you did the full install and some Geometry files exist only as .vtp, they will automatically be converted to .stl.
Import a
.mot or a .csv motion file.- If you did the full install, you can import a
.motfile. Calculating all body segment positions may take a while if the model is complex or if there are many time frames. Creates a .csv file for faster loading next time. - If not, you will have to install the OpenSim API outside of Blender and use bodykin_from_mot_osim.py to convert it to .csv.
Import a
.mot GRF force file.Other tools
-
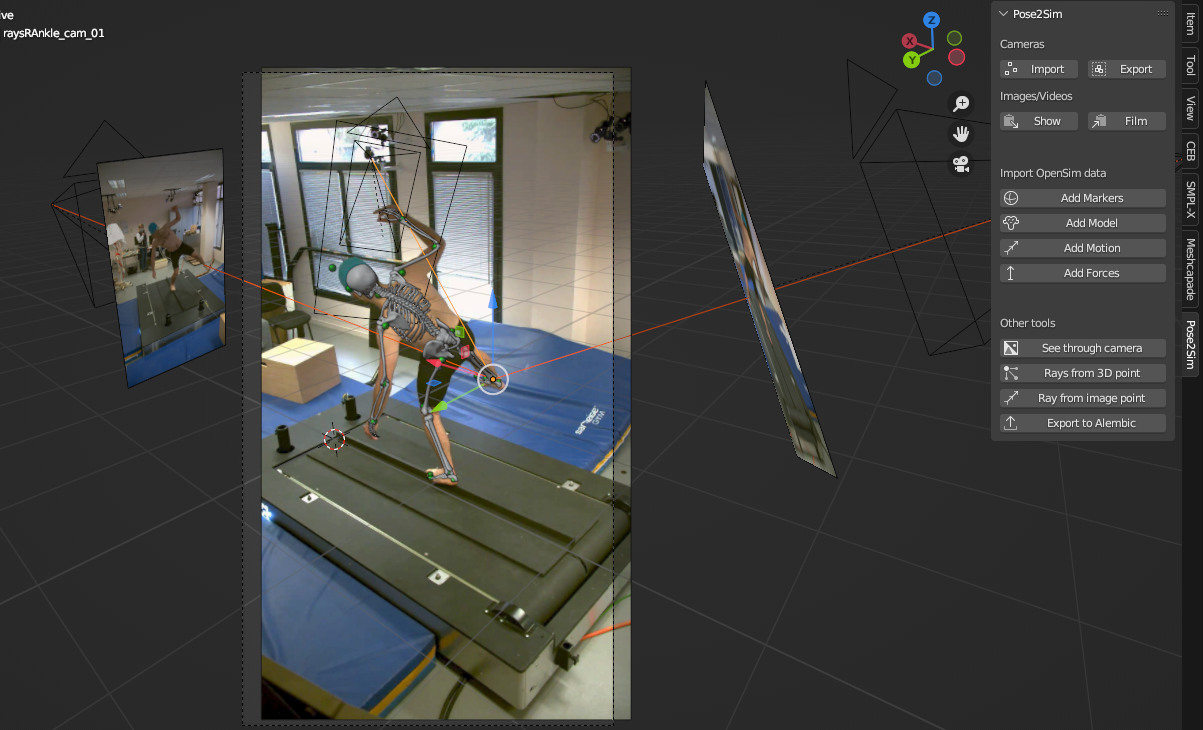
See through cameras:
View from selected camera, with markers and OpenSim model overlay.
-
Rays from 3D point:
Trace rays from one or several selected 3D points. This can help you verify if a triangulated point correctly meets 2D keypoints on image planes.
-
Ray from image point:
Coming soon! Trace ray from a point selected on an image plane. This can help you see if rays intersect correctly.
-
Export to Alembic:
Export to an .abc Alembic "baked" file, for fast import into other softwares.
View from selected camera, with markers and OpenSim model overlay.
Trace rays from one or several selected 3D points. This can help you verify if a triangulated point correctly meets 2D keypoints on image planes.
Coming soon! Trace ray from a point selected on an image plane. This can help you see if rays intersect correctly.
Export to an
.abc Alembic "baked" file, for fast import into other softwares.
How to cite and how to contribute
How to cite
If you use Pose2Sim_Blender, please cite [Pagnon, 2023].
 @misc{Pagnon2023,
   author = {Pagnon, David},
   title = {Pose2Sim_Blender - Visualize Pose2Sim data},
   year = {2023},
   doi= {10.5281/zenodo.8421820},
   publisher = {GitHub},
   journal = {GitHub repository},
   howpublished = {\url{https://github.com/davidpagnon/Pose2Sim_Blender}},
 }
How to contribute
I would happily welcome any proposal for new features, code improvement, and more!
If you want to contribute to Sports2D, please follow this guide on how to fork, modify and push code, and submit a pull request. I would appreciate it if you provided as much useful information as possible about how you modified the code, and a rationale for why you're making this pull request. Please also specify on which operating system, as well as which Python, Blender, OpenSim versions you have tested the code.
Here is a to-do list. Feel free to complete it:
- Import data from standard OpenSim data files (.osim, .mot, .trc, grf.mot)
- Import c3d files (borrowed and adapted from io_anim_c3d )
- Save segment position and orientation to .csv files for faster loading of motion next time
- Import multiple persons in the same scene
- Create Example data
- Convert .vtp files to .stl if .stl not found on disk
- Rig from OpenSim model and/or imported markers
- Import .sto motion and force files
- Import .c3d and .trc files with the same appearance
- Install OpenSim (for motion .mot files) with a click within the addon (create a venv with the right Python version cf CEB, install OpenSim and the other dependencies)
- Import cameras from .toml calibration file
- Export cameras to .toml calibration file
- Import images, image sequences, and videos in the camera view
- Viewport render to film with selected cameras
- See through camera and overlay model and markers
- Reproject rays from selected 3D points to image view
- Trace rays from camera to selected image point
- Export to .abc Alembic files
- Write documentation
- Create video tutorial