Moody’S Sash Window
MOODY'S SASH WINDOW 2.0
Moody’s Sash Window, 2.0! For Blender 4.2 and up! Upon purchasing the item you will receive links to a file, "Moody's Sash Window, 2.0". Please save the file to your Assets Library; it should be available as an asset.
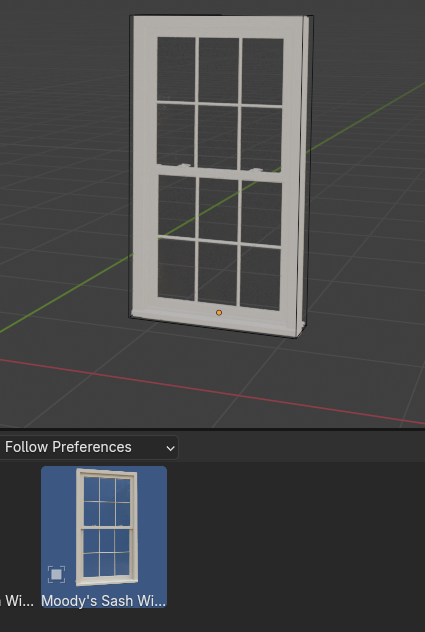

You can use the “Moody’s Hole Cutter for 4.2” box as a boolean. Place the window by adjusting the “depth” controls. The most important one is “Jamb Back Depth”, but experiment with the other ones to see what they do.
There are many, many options with “Moody’s Sash Window, 2.0”. You should experiment with them to see what they are! The default window should work well if you just want a window somewhere!
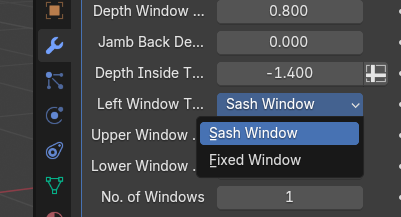
Each window comes with an option as a “Sash Window”, or a “Fixed Window”:
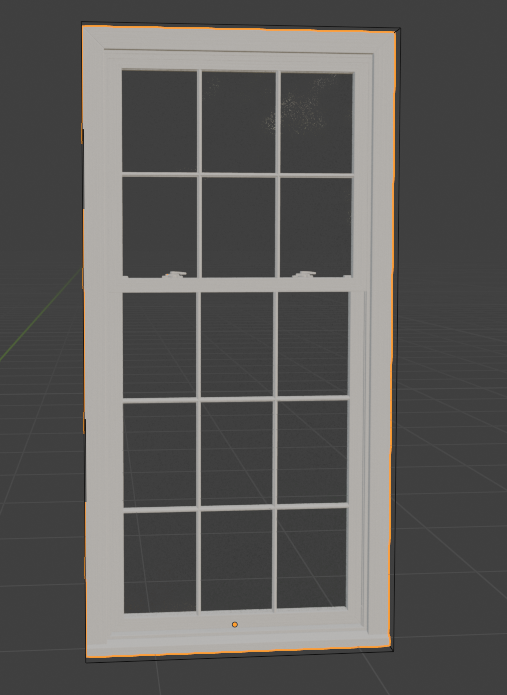
You can change the height, the width, the frame size, the number of sash bars, etc. You can even have a different number of sash bars per sash window!
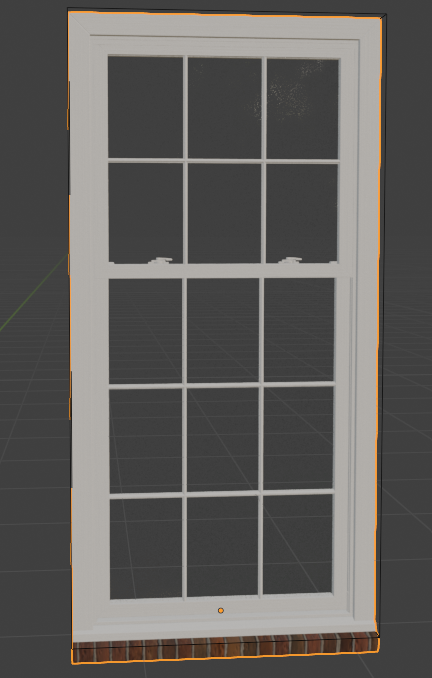
You can add a brick or concrete sill:
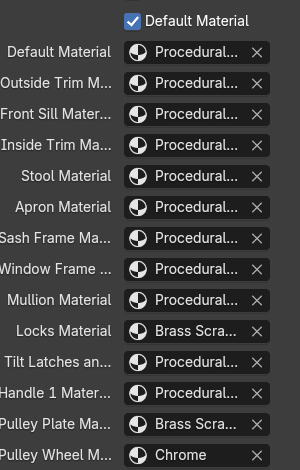
To quickly change material settings, keep the “Default Material” switch on. You can easily change the default material. If you want to have more control over your materials, uncheck the “Default Material” tab, and you can control all of the rest of the materials:
I recommend that you keep the Subdivision Surface settings at “0” for the Viewport and “2” for the render. You can bump it up to 1 or 2 in the viewport to see what it looks like, but it will slow the computer down. In order to make changes to the window, I recommend keeping it at “0” for the viewport.
I am making both version 1.0 and 2.0 available, as the 2.0 can only be used in Blender 4.2 and up. The 4.2 version is created using SubD modeling. All the edges are beveled, and great care was taken to keep a quad topology. However, it does run a bit slower than version 1.0. Version 2.0 has four distinct areas:
The Outside Trim
The Window Frame (and window)
The Jambs
The Inside Trim
Gradually, I will be able to add different styles of windows to the 2nd area, the Window Frame (and window). I suppose a different name will have to be given once more styles are added! However, the plan is to update this product with other types of windows!
Many tutorials will become available (currently there are two) at the following YouTube playlist link:
MOODY'S SASH WINDOW 1.0 DOCUMENTATION:
Upon purchasing the item you will receive links to a file, "Moody's Sash Window".
To use "Moody's Sash Window" you should append it to a file. Append the collection, "Window Collection".

Once you append the collection you should hide and collapse the collection within it called "Frame Parts". This collection contains the building blocks of the window, and these parts should be hidden.

For the "Options Collection" please hide it from the viewport, and make sure it won't render (by clicking the camera icon).

Move the window into place, then select the wall where it will go and add a boolean modifier to the wall. With the eyedropper select, "Moody's Hole Cutter" as your boolean object.

Sometimes the boolean works better with the "Solver" set at Fast. If it works with "Exact", I keep it there. . .
"Moody's Hole Cutter" comes with "Moody's Sash Window". This is a geometry-node-based bounding box that automatically wraps around the window like a glove. The default setting has the length set to .971. This is so the tapered edges at the bottom of the inside sill will work. . .

. . . without displaying a triangular hole, which is what you see in the following illustration with the length set at 1.000.

"Moody's Sash Window" is found in the collection, "Windows (Wooden House)". You can duplicate the window (Shift D), adding as many windows as you would like, and you could make changes to each one. Here I have three windows selected, and the different windows are opened in various settings. I also added the screen option!

You can substitute a "Fixed Window" for the middle window. You can also make the middle window wider than the other windows. The controls are at the bottom of the "Middle Window" section, and right above the checkbox for "Fixed Window". If both "Middle Window" and "Fixed Window" are checked, the "Fixed Window" will be chosen.

If you need more than three windows, uncheck all windows other than "Moody's Sash Window", and include how many windows you want after "Number of Windows". Here are six windows in the following example. Please note, these are clones - so, if you open up a window, they all open up.

There are different problems when dealing with brick or stone houses. In these cases, the window is inset within the structure. After duplicating a window, move it into the "Windows" collection. This actually adds TWO hole cutters to the object. Notice, there is a "Moody's Hole Cutter.In" enveloping the window. Its length is set to .971, and it works for the inside of the window in a similar manner as described before for the Wooden House window.

There is also a "Hole Cutter.Out" that is active, and it is set for the outside of the window.

Add TWO booleans - one for "Moody's Hole Cutter.In" and one for "Moody's Hole Cutter.Out".

Place the window so it is inset, as the above picture indicates. Then adjust the depth of the window so it looks right on the inside. Avoid the following illustration where the square shape from the outside is visible on the inside.

Adjust the "Outer Frame Depth" so that the square section is hidden within the wall.

Looking back at the outside view, notice that the inset section doesn't look like bricks!

The solution for this will be provided by adding a material to the "*HoleCutterMaterial" slot. Unfortunately, it's even more complicated, because we will have to adjust the material, so that it works with the geometry nodes of "Moody's Hole Cutter"! In order to do this add a material slot to your main house material, and duplicate that material.

Make the material "unique" by pressing the area circled in the above picture.

In the above picture, the material was originally named "Red Brick.001", and I changed the name to HoleCutter. The important thing is to remember that you now have a separate material. Next, we go to the Shading tab and make sure you are editing your new material (in this example Red Brick.HoleCutter) and DELETE the "Texture Coordinate".

Replace the Texture Coordinate with MSW Shader.HoleCutter, and connect it to Mapping as indicated in the following picture.

Now go back to the Layout tab. Make sure you are working with "Moody's Hole Cutter.Out" and assign your new material (Red Brick.HoleCutter in this case).
Once this is done, you need to line up the brick material using "UV Scale through UV Y Location" as indicated in the picture below.

THIS CAN BE TEDIOUS! I usually focus on the top right, and match the scale to the brick lines.

For instance, in the above picture the mortar lines look right at the top of the picture, but they are slightly over too big on the bottom part. The UV Scale is now set to .418. The following picture shows that the slight adjustment to .415 fixes it. These adjustments are made with UV Scale and UV Y Loc. By adjusting UV X Loc we can line up the top bricks.

Now the top bricks are in alignment, but there is a weird mortar problem with the side bricks. This can be changed by moving the Y Translation of the hole cutter.

We can do the same thing with the "Brick/Concrete Sill". It is set by default to "Concrete". Notice there are several adjustments that can be done with length, width and depth. In the following picture I changed the width to extend over the width of the window.

Please note, that materials with an asterisk next to them need to include the MSW Shader.HoleCutter! You can modify materials as described with the hole cutter boolean. For concrete sills, I recommend the default settings listed above for B/C Sill Lip Angle, -0.040, and the B/C Sill Rotation set to 0 degrees.
If you want to use the same material as your house just get the material you made for the hole cutter. Change B/C Sill Lip Angle to 0.000, and the B/C Sill rotation to -7 degrees. Also, change the UV Stretch to about 2.5. Here is what I got with those settings:

Now, using UV Scale through UV Y Location you can adjust the bricks to your liking. The bricks should be more narrow than the bricks on the wall, and watch out for the mortar lines on the sides.

Now you can duplicate your window and add it to your house. The bad news is that if you make any modifications to the size of the window, it will affect the UV adjustments! Therefore, I have several collections of windows already available, and it is rather easy to add more collections. Just make a copy of the Holecutter.In, and another copy of the Holecutter.Out and assign it to a new collection. Another issue is that if the window is wider than it is tall, you will have to change the rotation of the UVs to 90 degrees. Here's a couple houses with with all kinds of windows!

On a final note, the material can quickly be changed with "Frame Material". That gives you an overall material. If you want more control you can check the tabs for various materials. If you don't check the tabs, the default "Frame Material" will be chosen. There are options for the objects of "Handle" and "Sash Horn". Those can be observed by going to the object tab and pressing the eyedropper on the options collection that we hid earlier. You can keep it hidden, but just go through the options with the eyedropper. In the following picture you can see how I opted for Sash Horn 2, and selected if from the Sash Horn Options collection.

The window is totally adjustable. I suggest playing with the different settings. I have several tutorials available, and I will answer FAQs as I become aware of what they are. Here is a link to the various tutorials:
PLEASE DOWNLOAD MOODY'S HOLE CUTTER FOR BLENDER 4.2 IN ORDER TO UPDATE TO BLENDER 4.2!
Here is a tutorial for this Hole Cutter Update:
Thanks!