Configurable Dynamic Jet
Installation
Main Installation
Blender 4.2 and Above
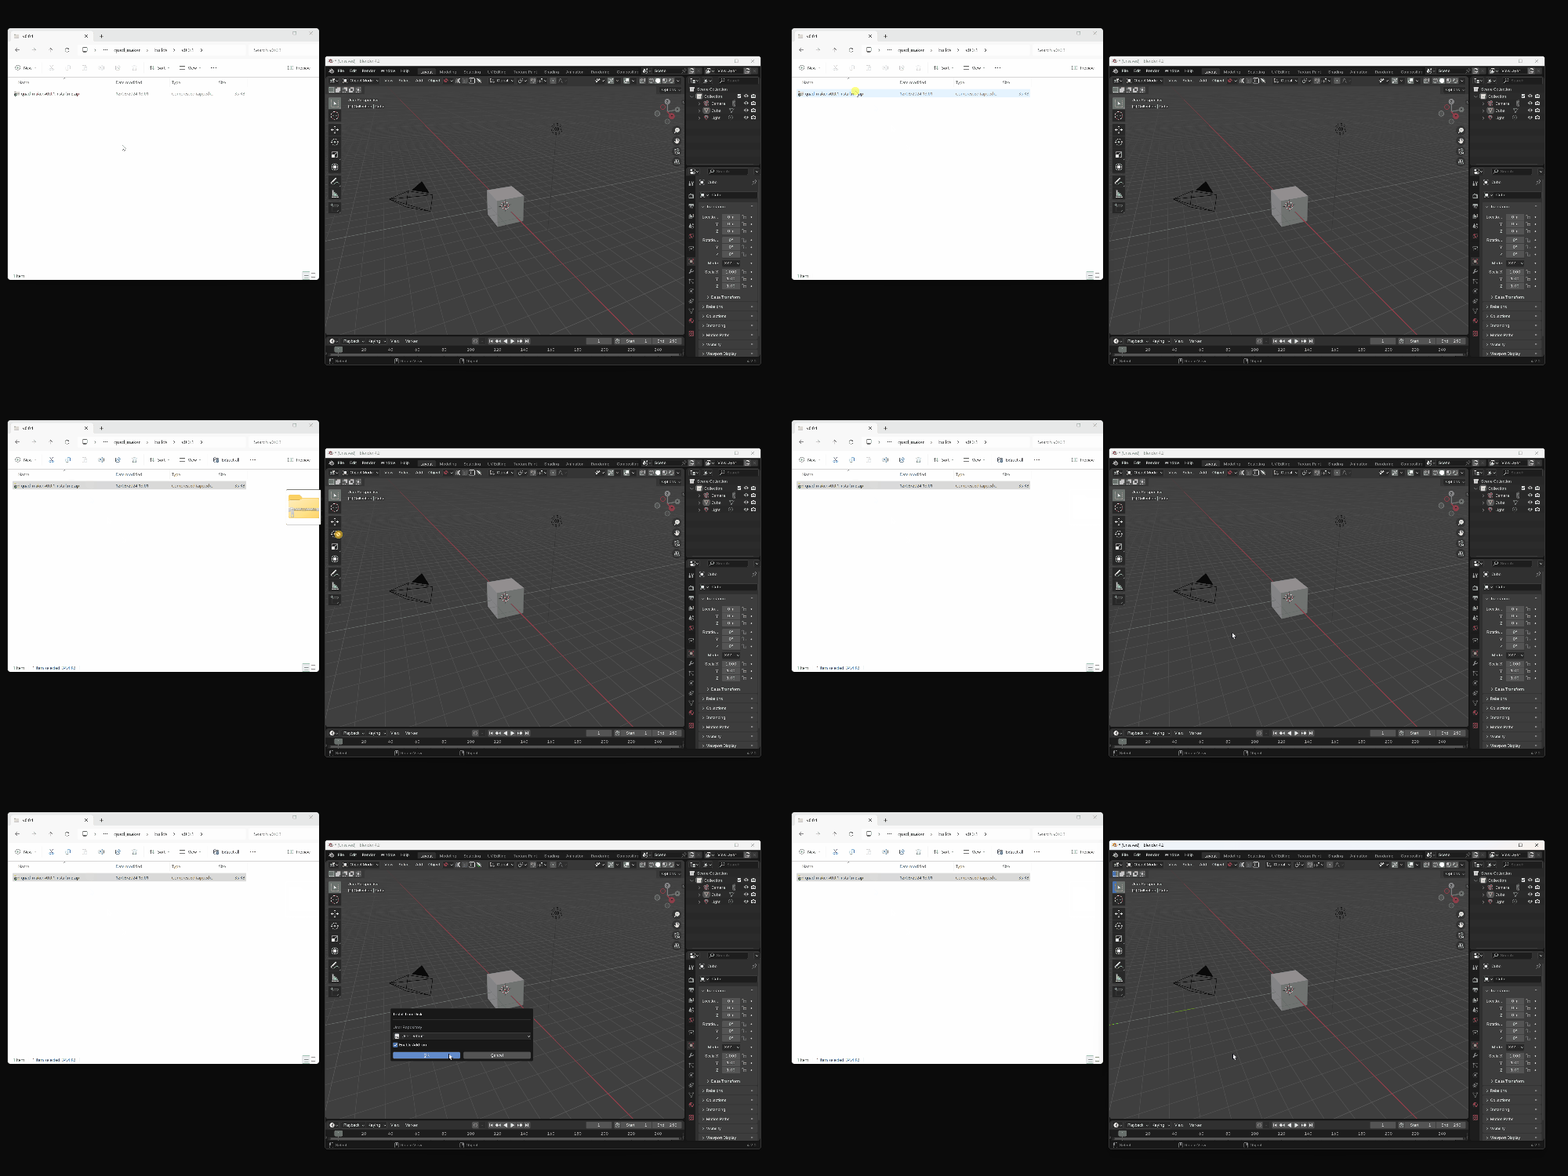
Drag and drop the installation zip file into Blender to install the add-on.
If you have any issues do not hesitate to get in touch via info@configurate.net.
Previous Blender Versions
Use the dynamic_jet.zip file for the instructions below:

- Go to Edit -> Preferences.
- Select the Add-ons section.
- Select the Install Add-on from File... button along the bottom.
- A file dialogue will pop up. Navigate to the file location where you downloaded the zip file and double click it.
- Search for the add-on by typing "jet" in the search box. Make sure the checkbox next to the Add-on (Add Mesh: Dynamic Jet Primitive) is ticked.
- Click the Save Preferences button to make sure the add-on is installed next time you open Blender.
- Close the Preferences dialog box and enjoy!
Creation
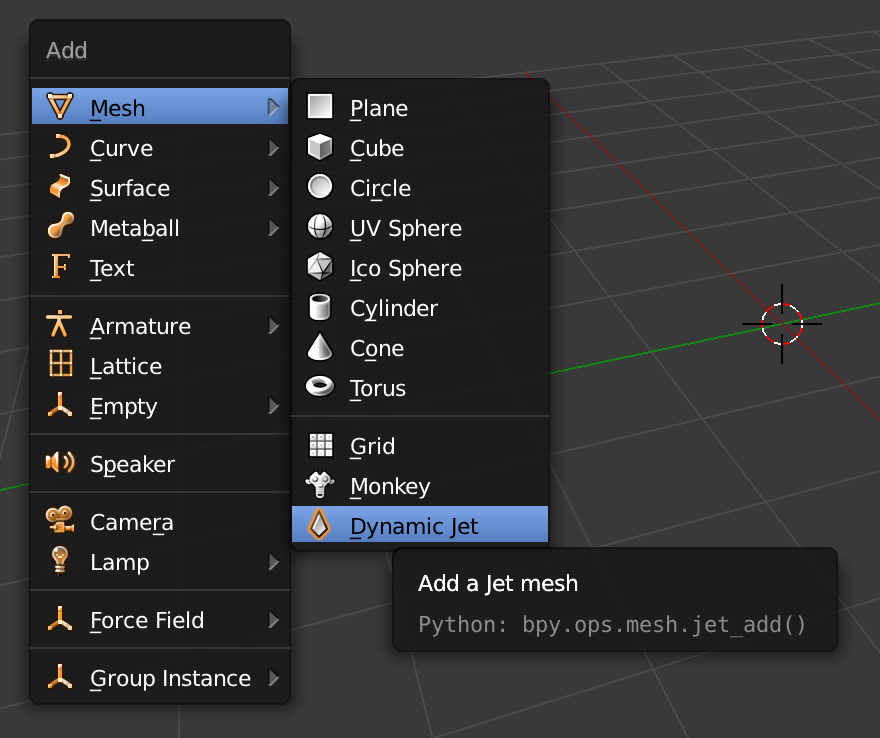
You can create a Dynamic Jet object from the standard add menu, which is accessible either:
- Under Add -> Mesh -> Dynamic Jet in the 3D view, or
- By pressing shift + A in the 3D view and selecting Mesh -> Dynamic Jet in the menu that appears.
Use
The object is created relative to the 3D cursor.
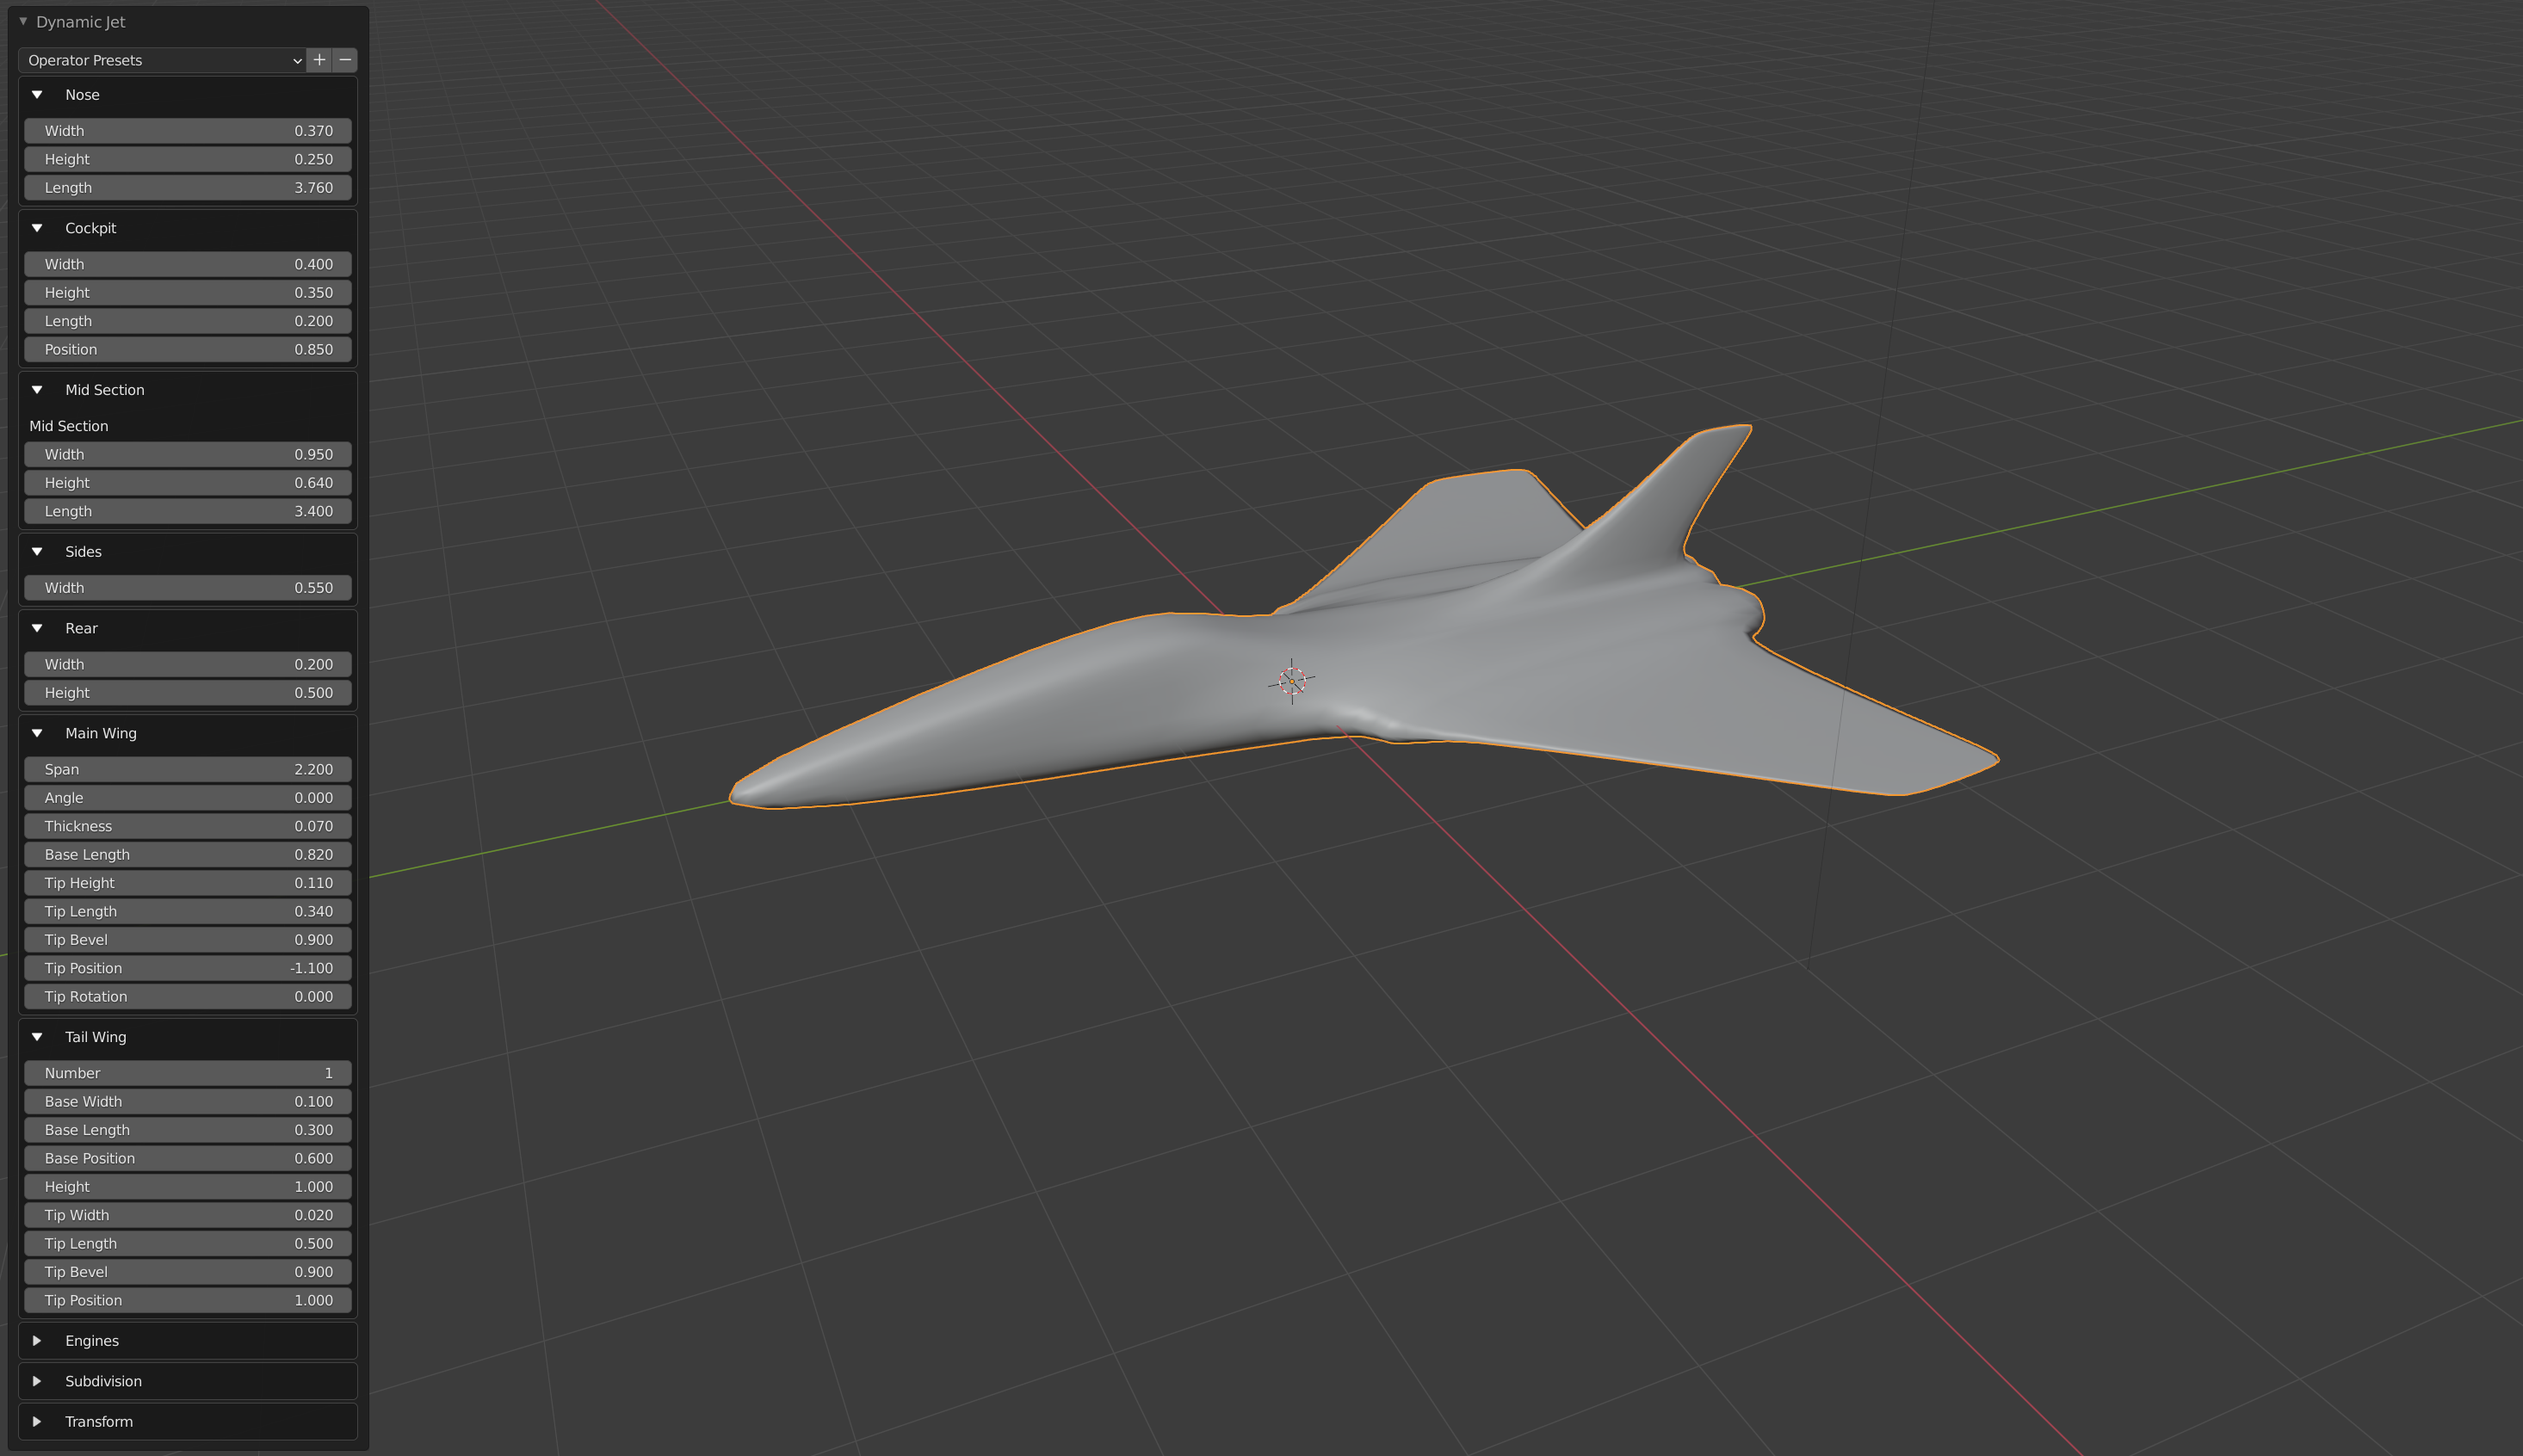
Once added to the scene, a menu will appear in the bottom left hand of the 3D view. Expand this panel to access the options.
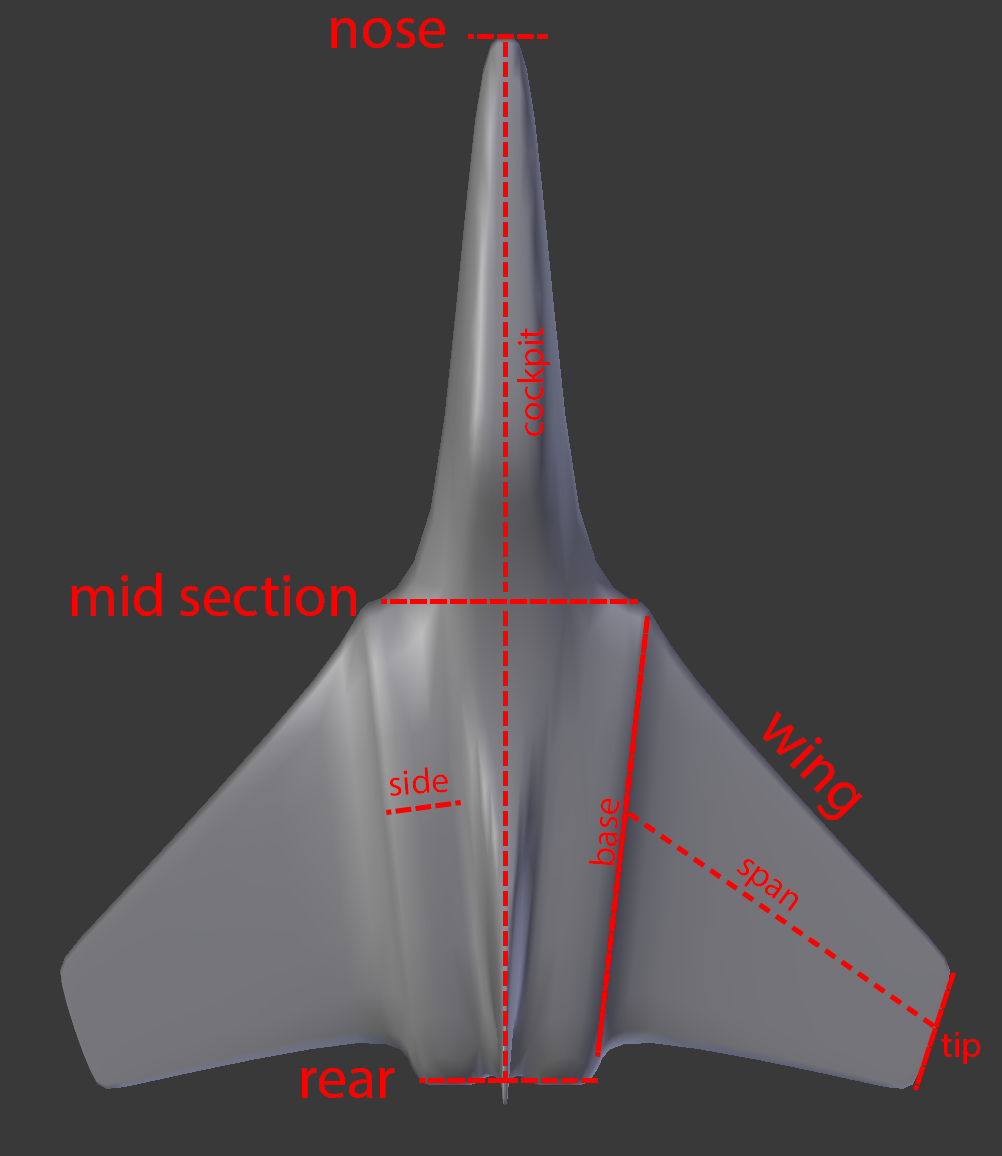
The shape of the plane is controlled by adjusting the parameters summarised in the diagram above. To start, a set of default parameters are used to create the basic shape shown. A close-up of all the parameters are as follows and described below:
Nose
- Width: the end width of the nose.
- Height: the end height of the nose.
- Length: the length of the nose from the mid section of the object.
Cockpit
- Width: the width of the top of the cockpit.
- Height: the height of the cockpit.
- Length: the length to the top of the cockpit.
- Position: the position of the cockpit, relative to the nose.
Mid Section
- Width: the width of the mid section.
- Height: the height of the mid section.
- Length: the length between the mid section and the rear of the plane.
Sides
- Width: the width of the sides of the main section.
Rear
- Width: the width of the rear of the main body.
- Height: the height of the main body.
Main Wing
- Span: the length of the wing.
- Angle: the up/down angle of the wing.
- Thickness: the thickness of the wing.
- Base Length: the length at the base of the wing, relative to the length of the mid section.
- Tip Height: the height, or thickness, of the tip.
- Tip Length: the length of the tip relative to the base length.
- Tip Bevel: how bevelled, or smooth, the end shape of the wing tip is.
- Tip Position: the forward position of the wing.
- Tip Rotation: the rotation of the tip around the z axis.
Tail Wing
- Number: the number of tail wings, currently between 0-2.
- Base Width: the width of the base of a tail wing relative to the mid section width.
- Base Length: the length of the base of a tail wing relative to the mid section length.
- Base Position: the position of the base of a tail wing relative to the mid section.
- Height: the height of a tail wing.
- Tip Width: the tip width relative to the base.
- Tip Length: the tip length relative to the base.
- Tip Bevel: how bevelled, or smooth, the shape of the tip is.
- Tip Position: the forward position of the tip relative to the base.
Engines
- Number: number of rear engine shapes, currently between 0-2.
- Width: the width of the rear engine hole, relative to the mid section shape.
- Height: the height of the rear engine hole, relative to the mid section shape.
- Depth: how deep the engine hole goes into the body.
Subdivision
- Levels: the number of levels of the sub-division modifier that is added.
Transform
- Location: the location of the jet relative to the 3D cursor.
- Rotation: the rotation of the jet.
Next steps
Once you are happy with the overall shape, you may choose to press tab to enter object edit mode. This will allow you to edit the underlying base mesh, which has had Mirror and Subdivision Surface modifiers added to give the overall shape:
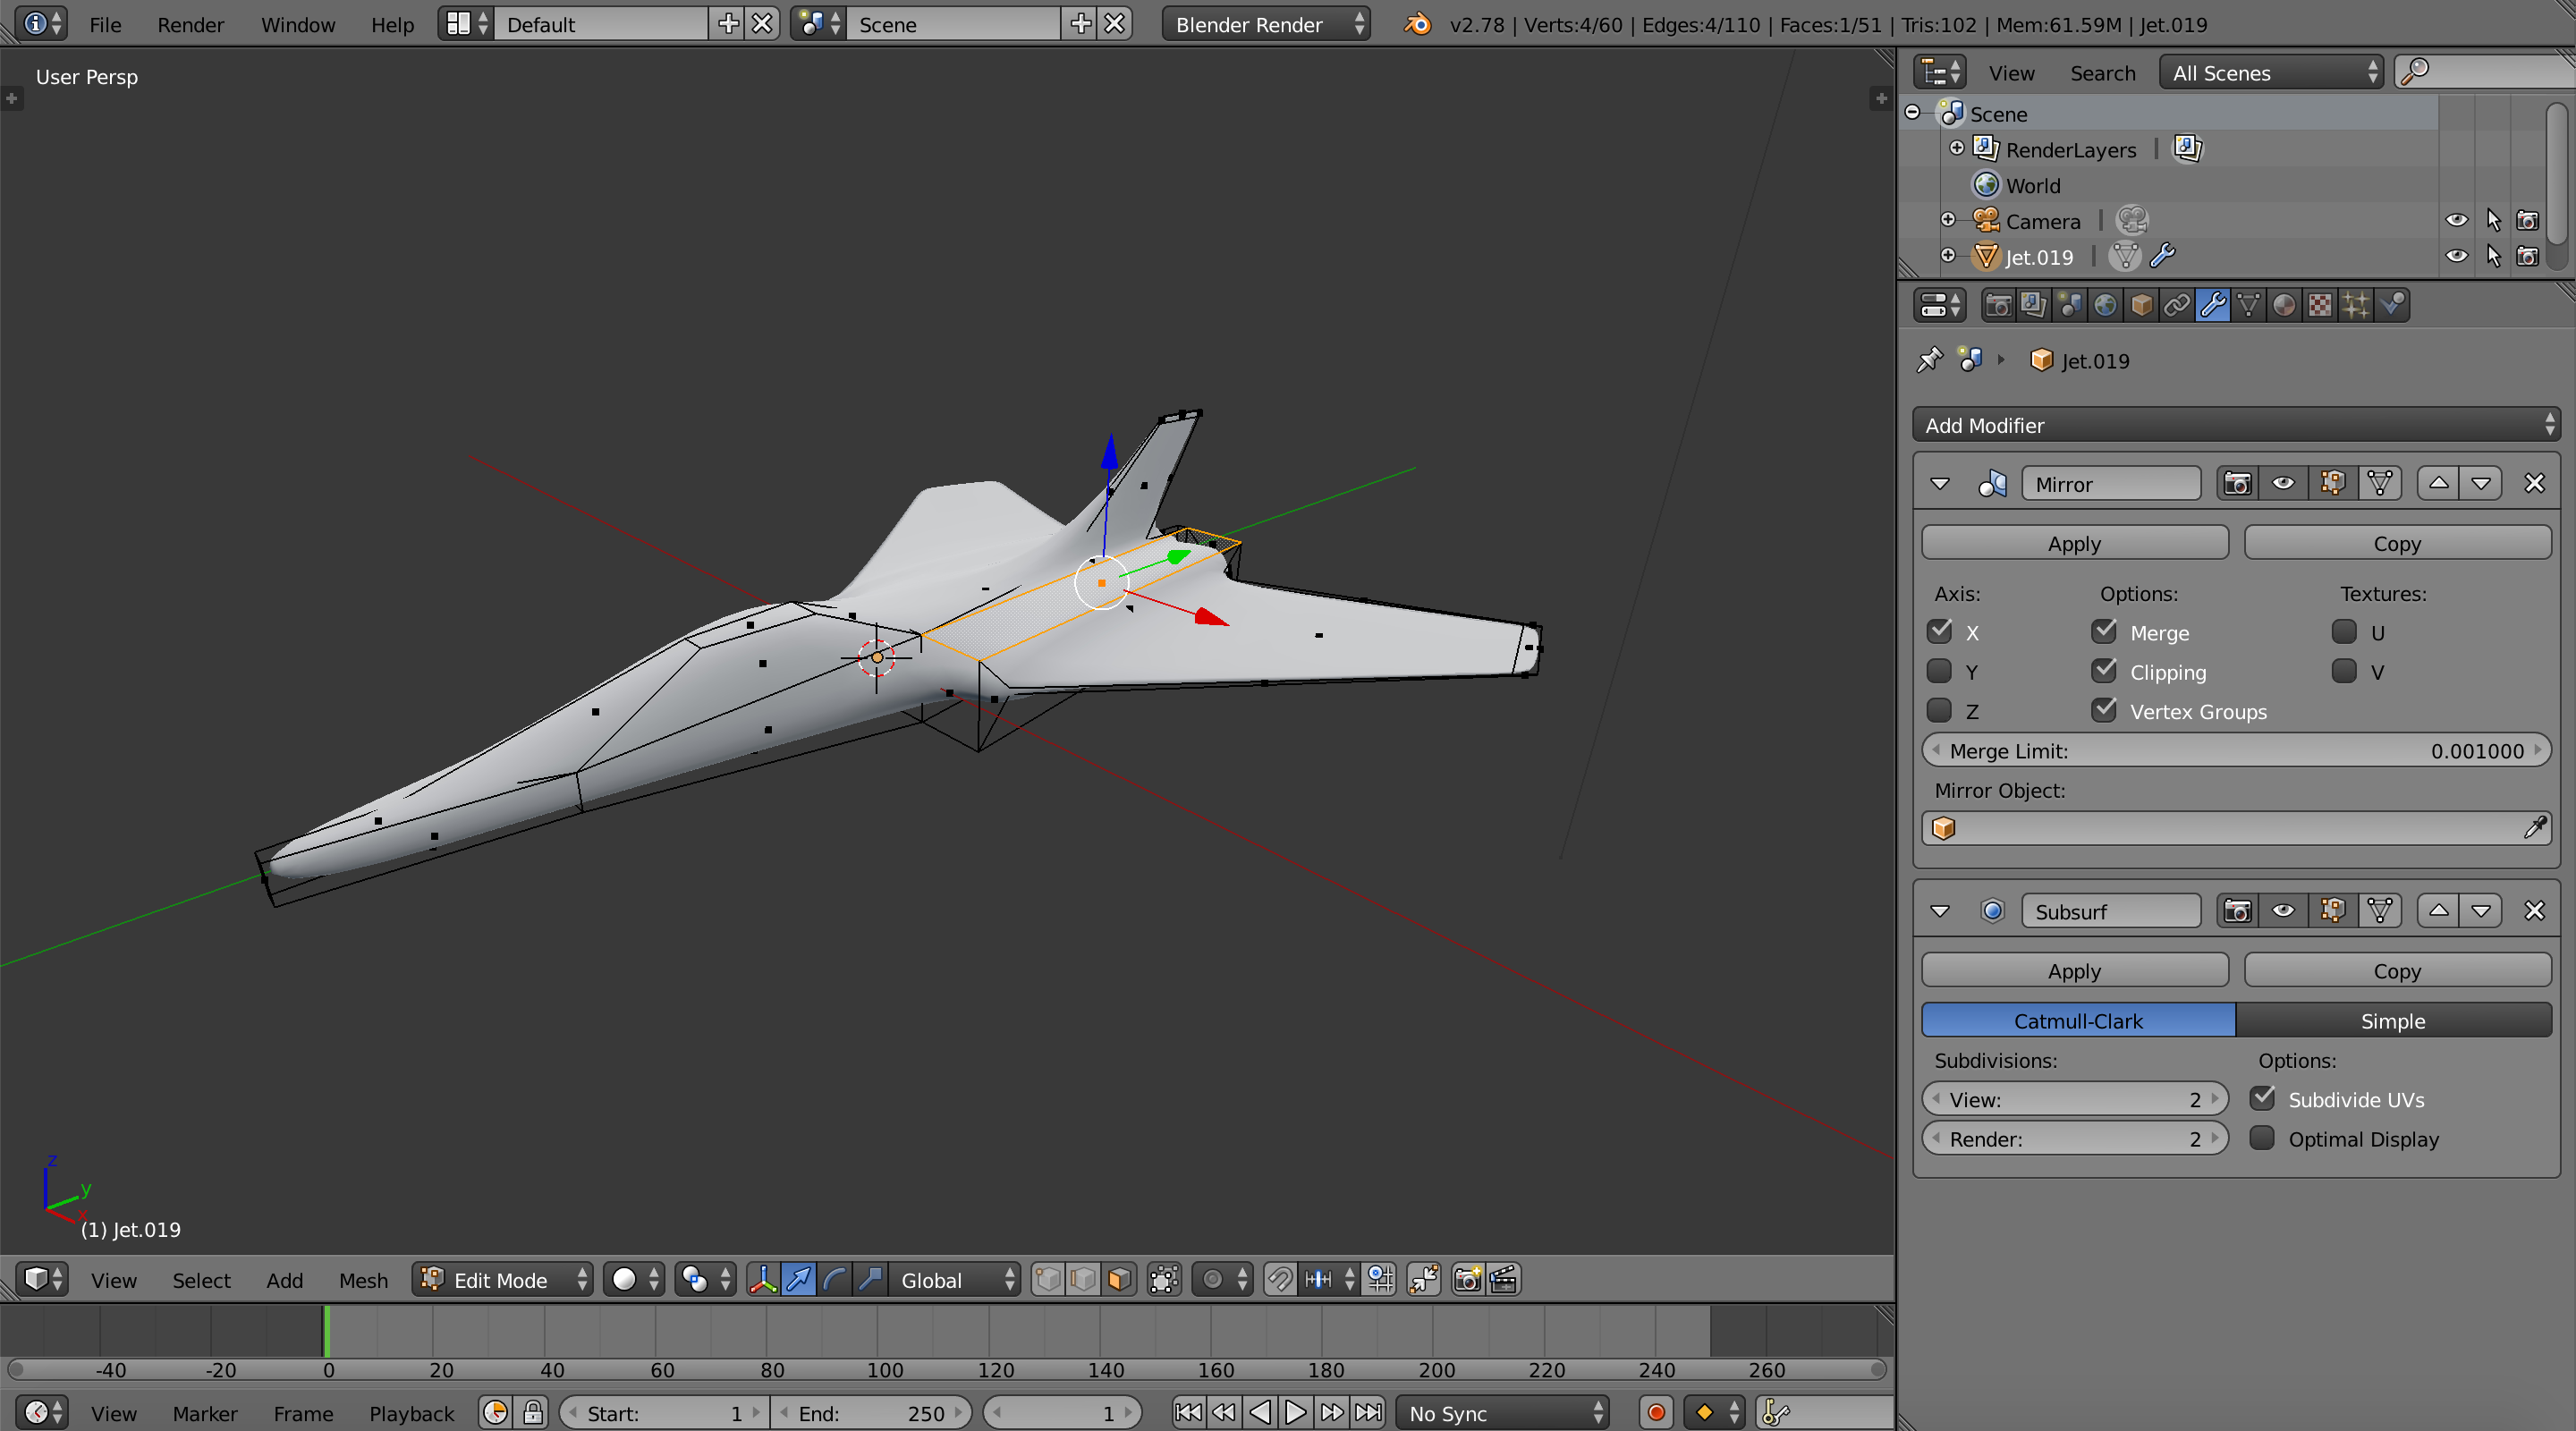
You can now continue customising the shape for your needs, adding more detail, and applying modifiers to complete your object to your satisfaction.
This is completely compatible with my Plating Generator.
Discord
Share your work and get support through the Configurate support channel here.
Discover more products like this
customisable bfcm18 spring24 bcon19 build your own spring20 3Dmodel plane summer20 jet fall18 mesh bfcm22 spring21 spring22 winter24 aircraft loveblender summer22 spring18 customise bfcm20 bfcm19 summer24 fighter model dynamic bfcm24 summer23 bfcm21 summer21 spring23 bfcm23 spring19 bcon22
