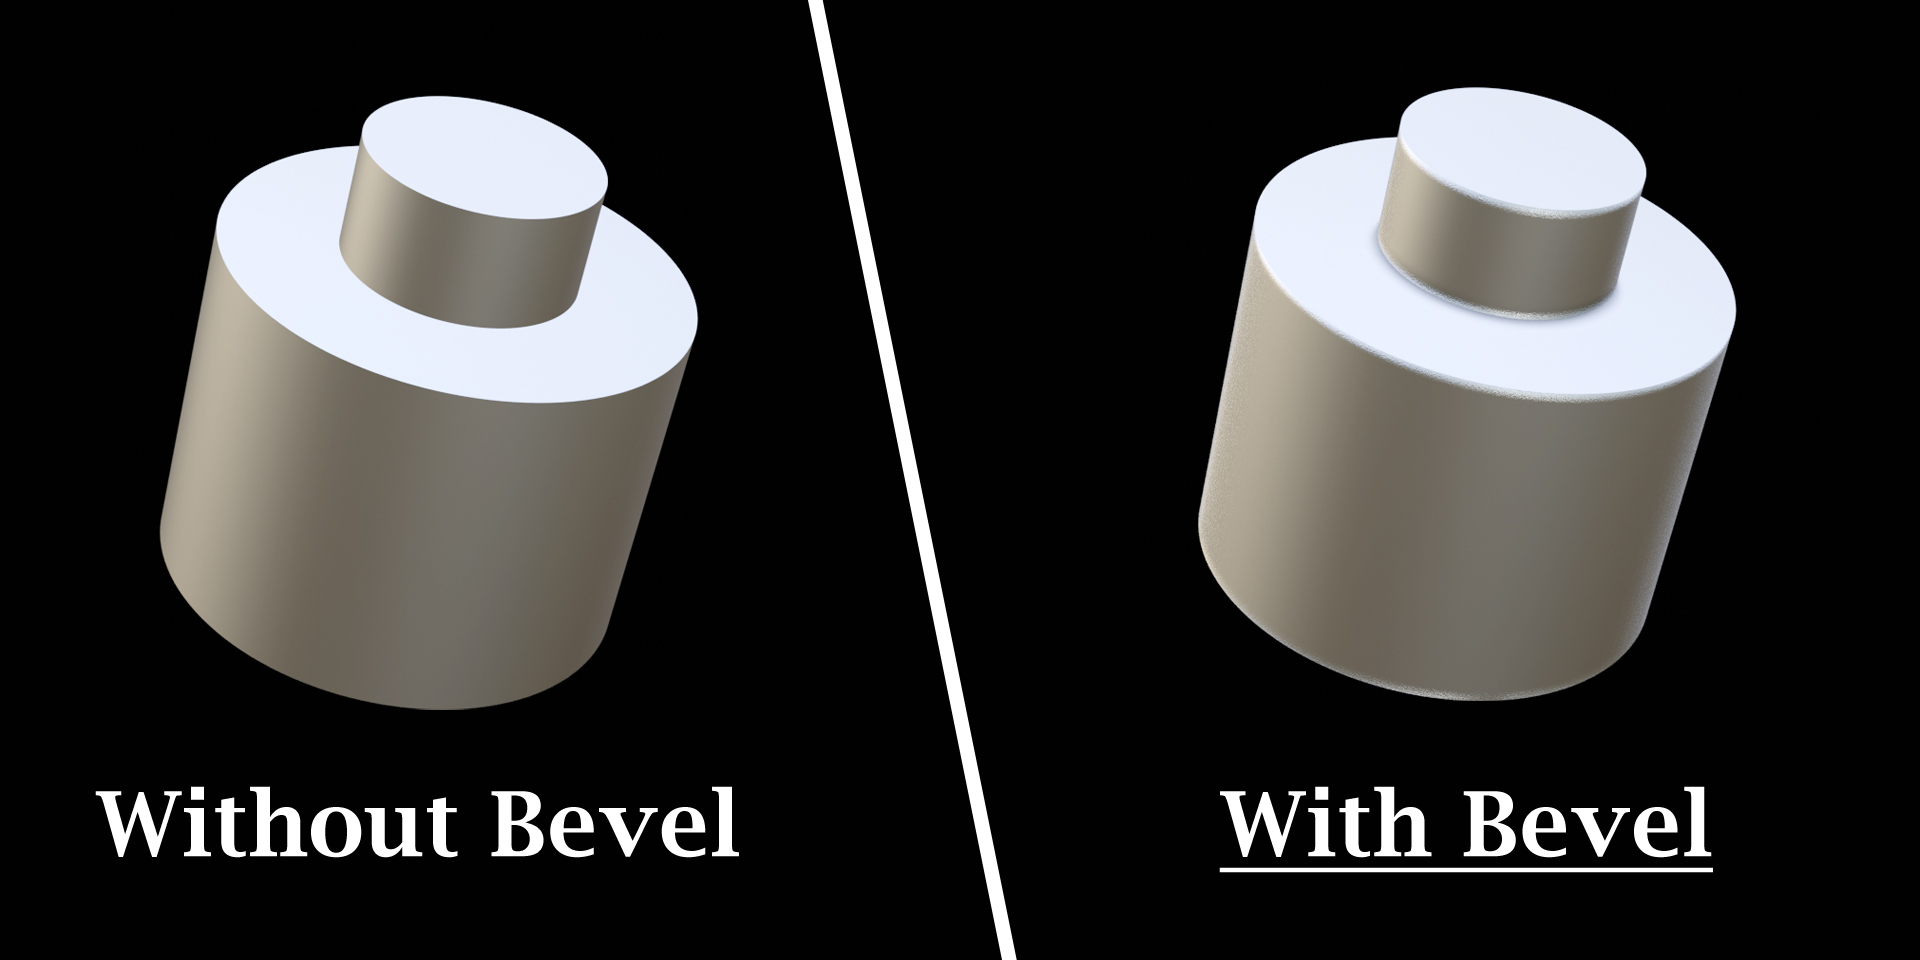
Bevel For Eevee
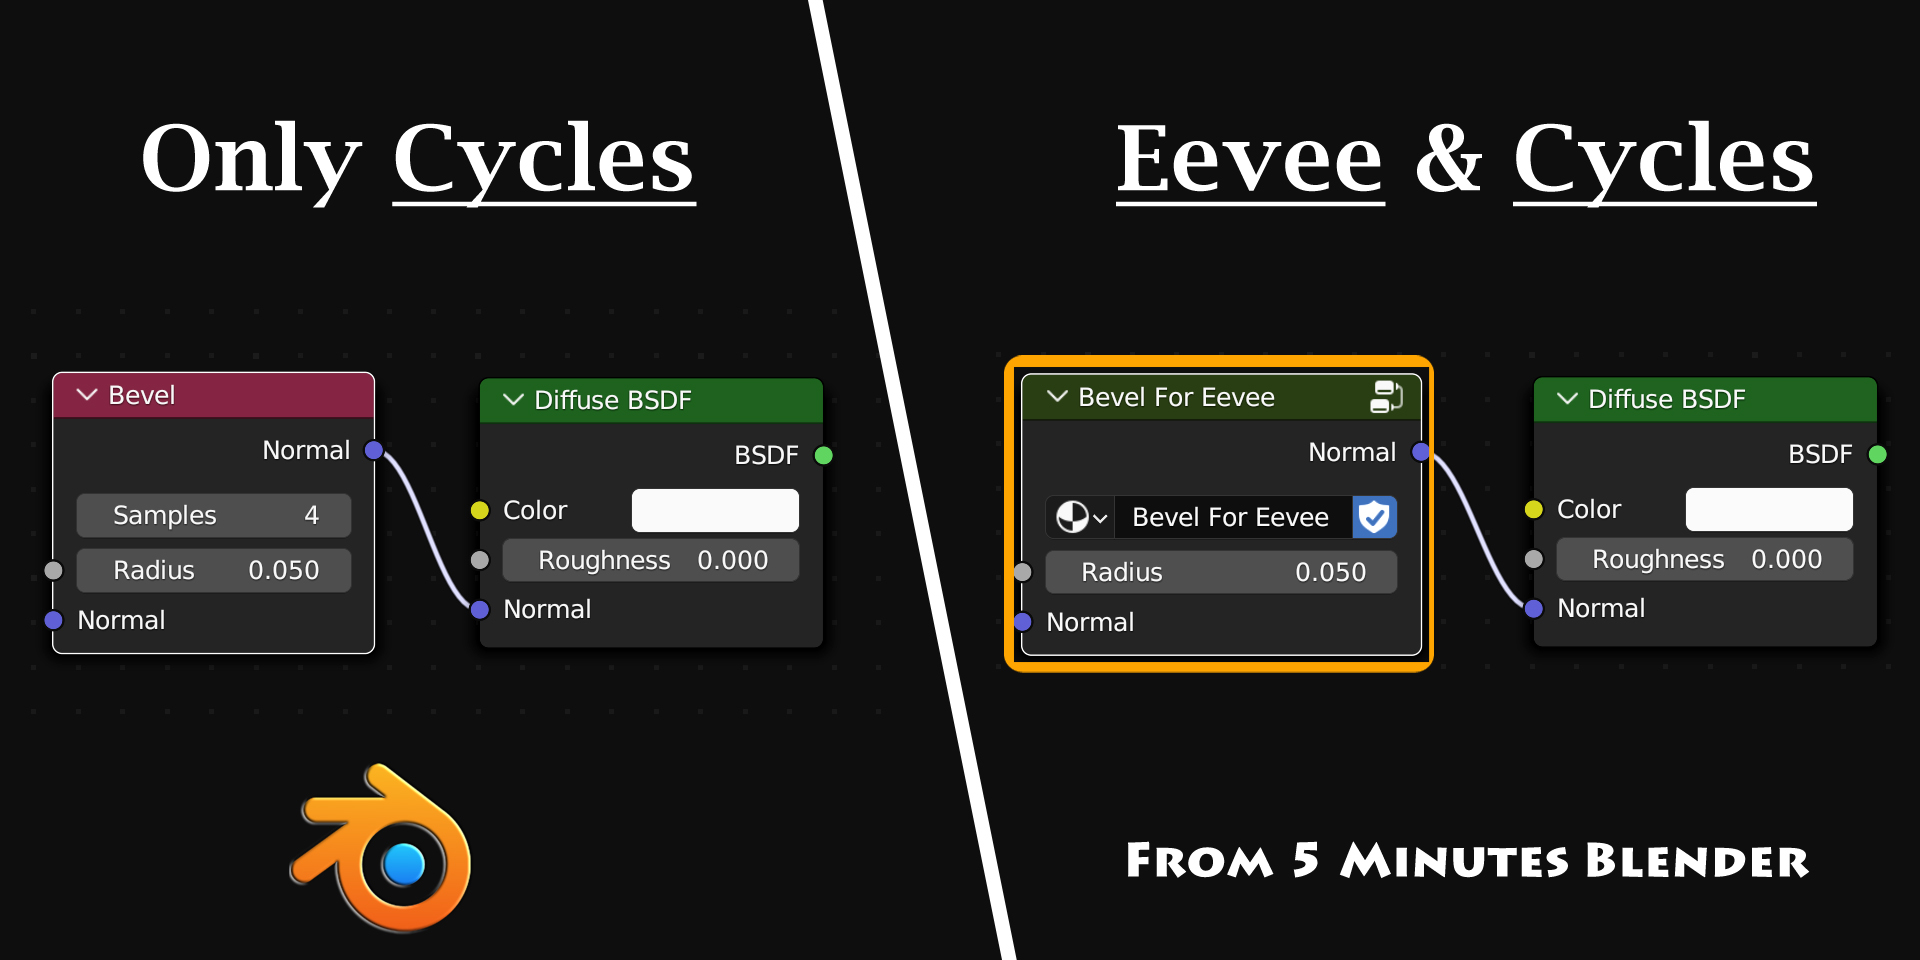
Blender comes with a Bevel node in the Shader Editor that only works for Cycles. So we thought of creating a similar node that works for Eevee. And finally, here is that node: Bevel For Eevee. It actually works both for Eevee as well as for Cycles!
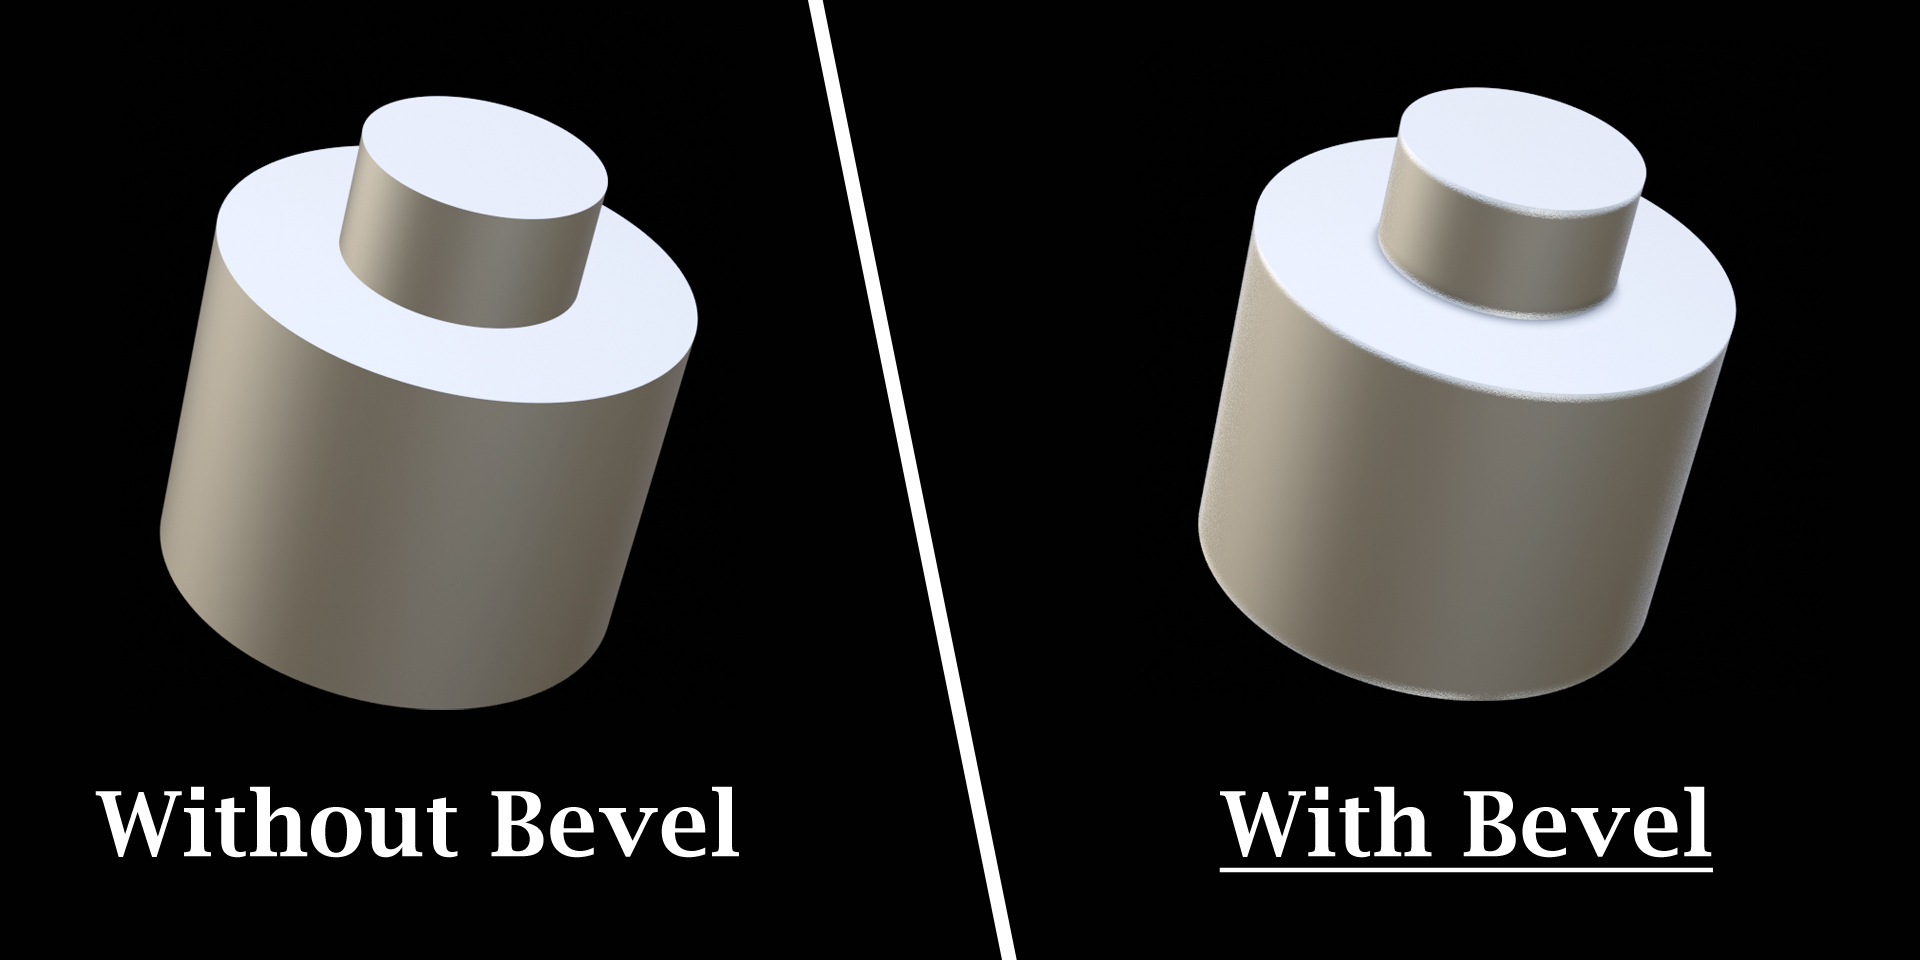
But how does it work?
We can add bevel it two ways:
1) By modifying the actual geometry, through mesh editing or using a Bevel modifier. This is a perfect solution, but it can create issues if the underlying geometry is not well designed. Everyone working with Blender has often experienced this.
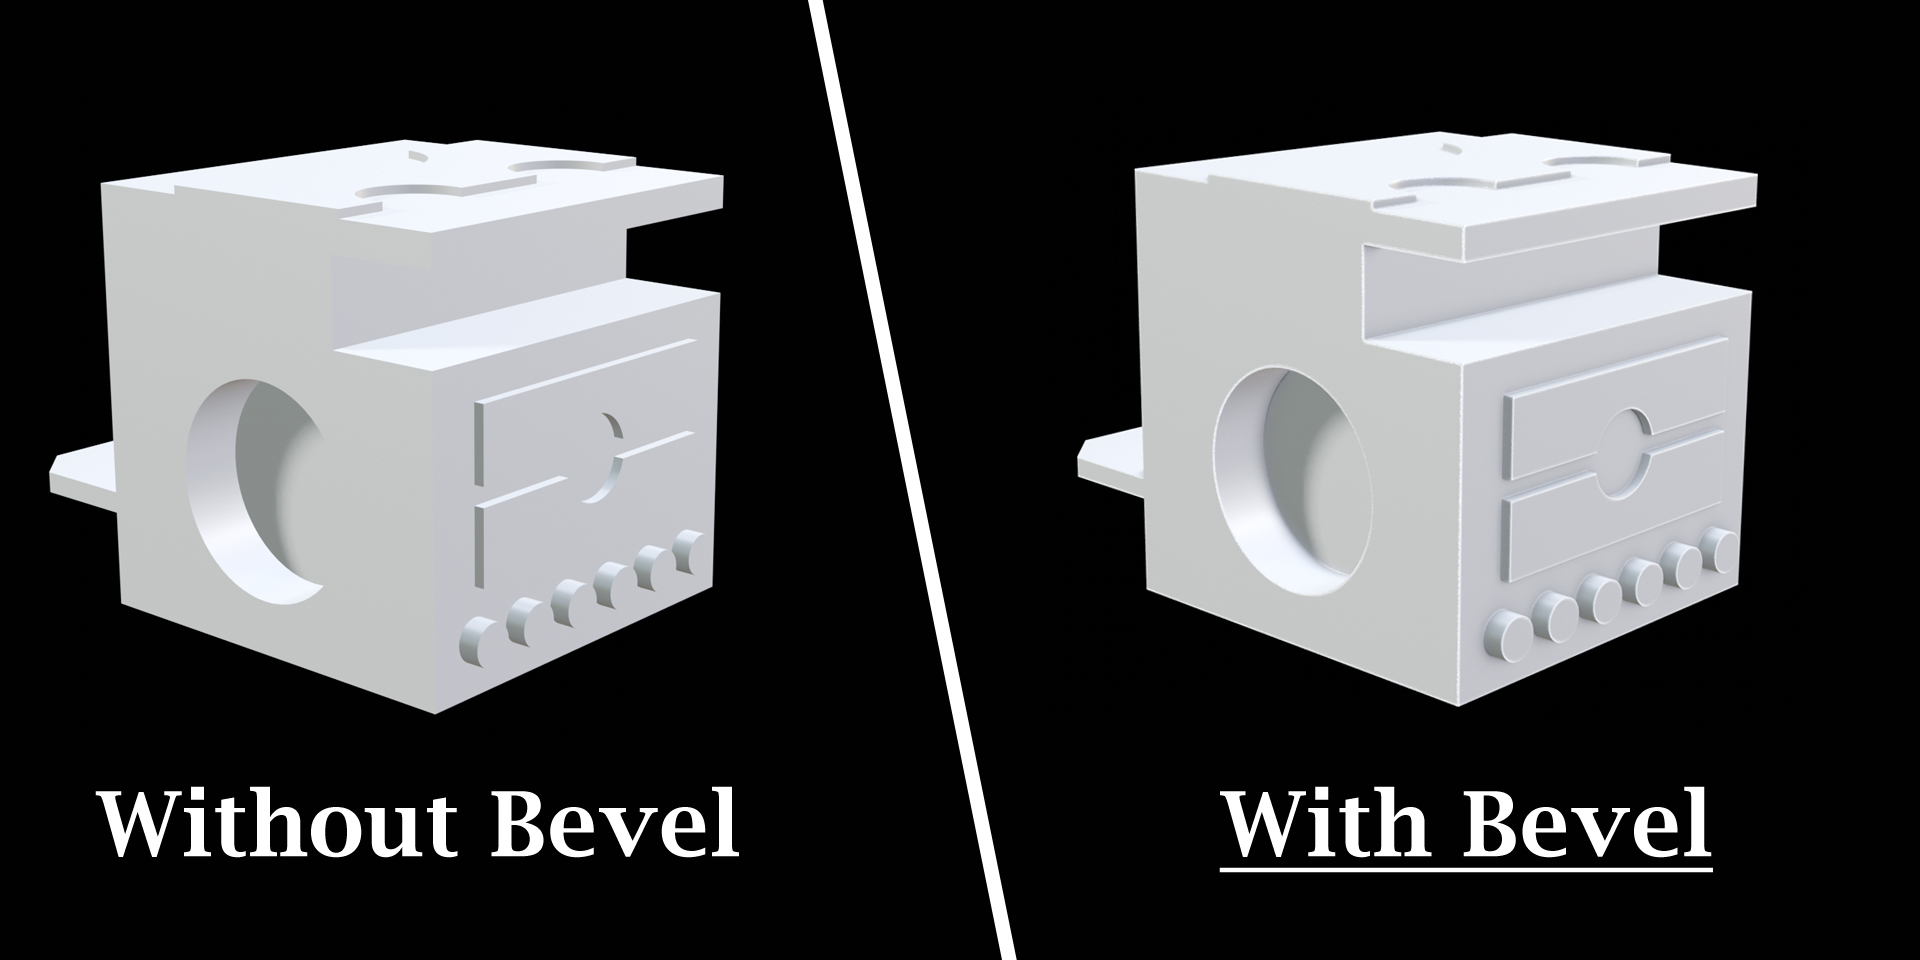
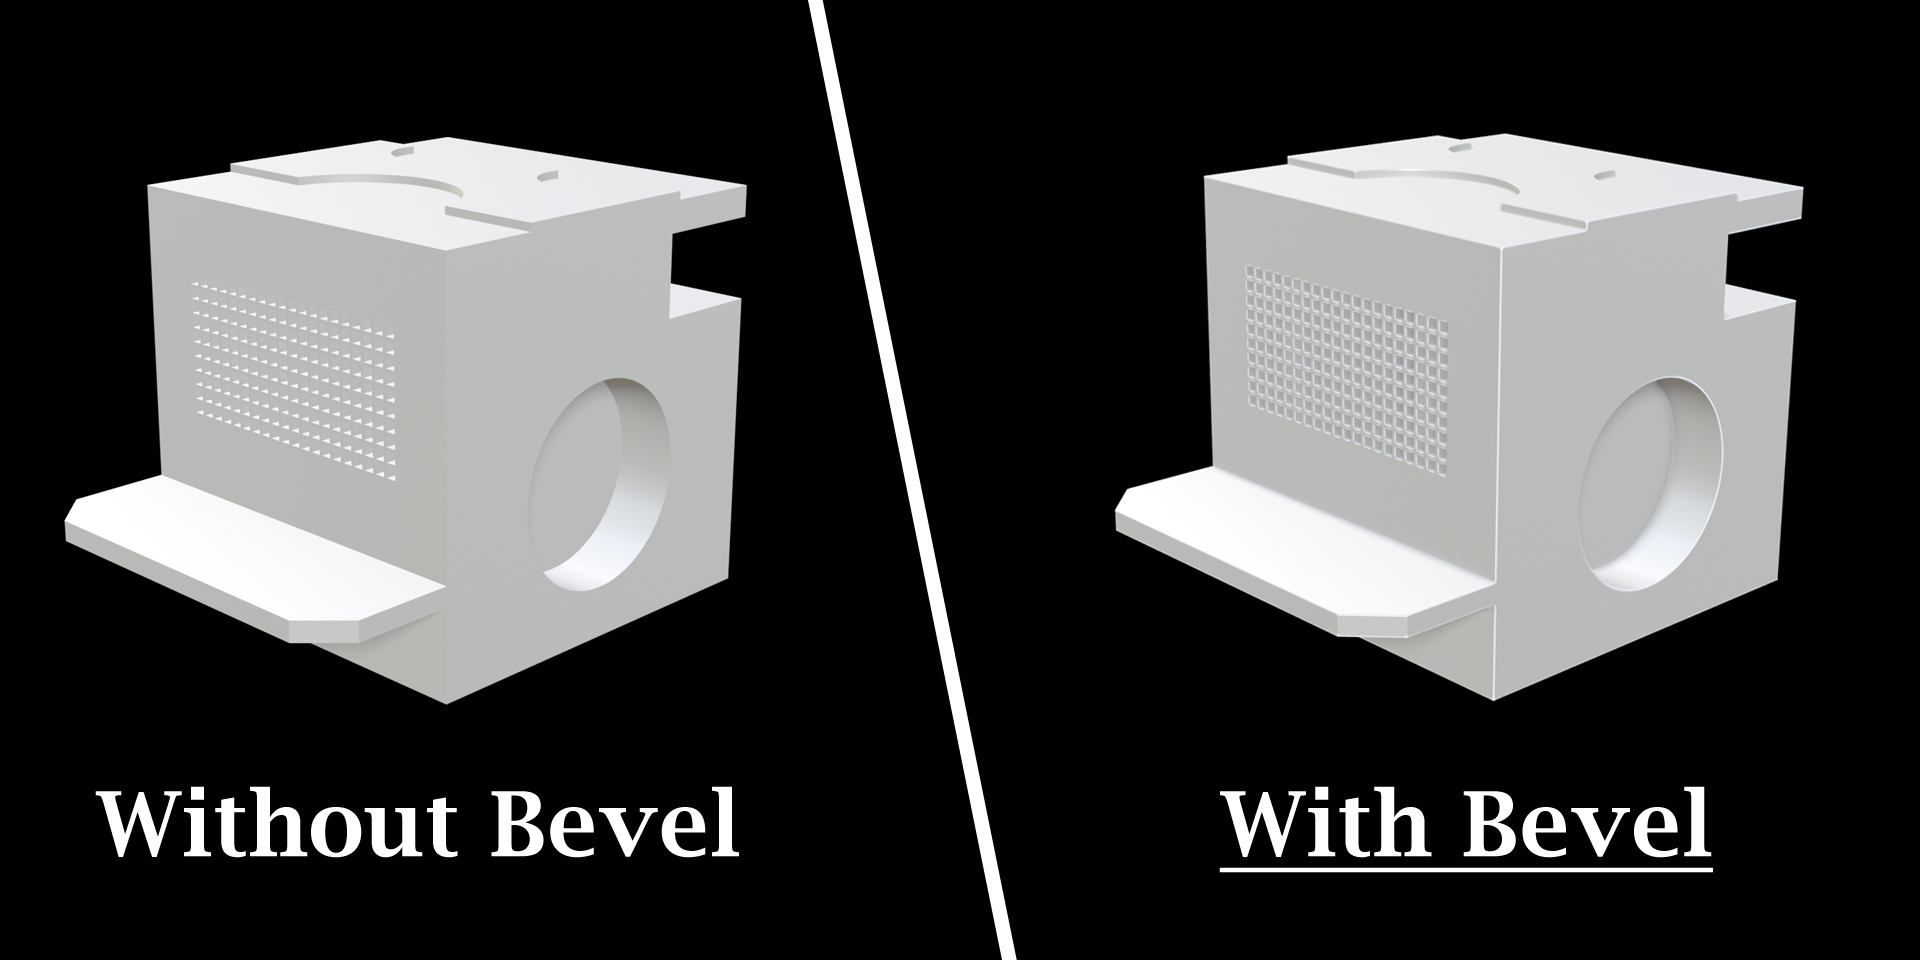
2) By creating a fake bevel effect in the render output. This is done by manipulating the surface normals in the shader editor. It does not need any changes in the geometry, so it never fails. And the results are reasonably good, if not excellent. This is perfect for quick results without investing a lot of time.

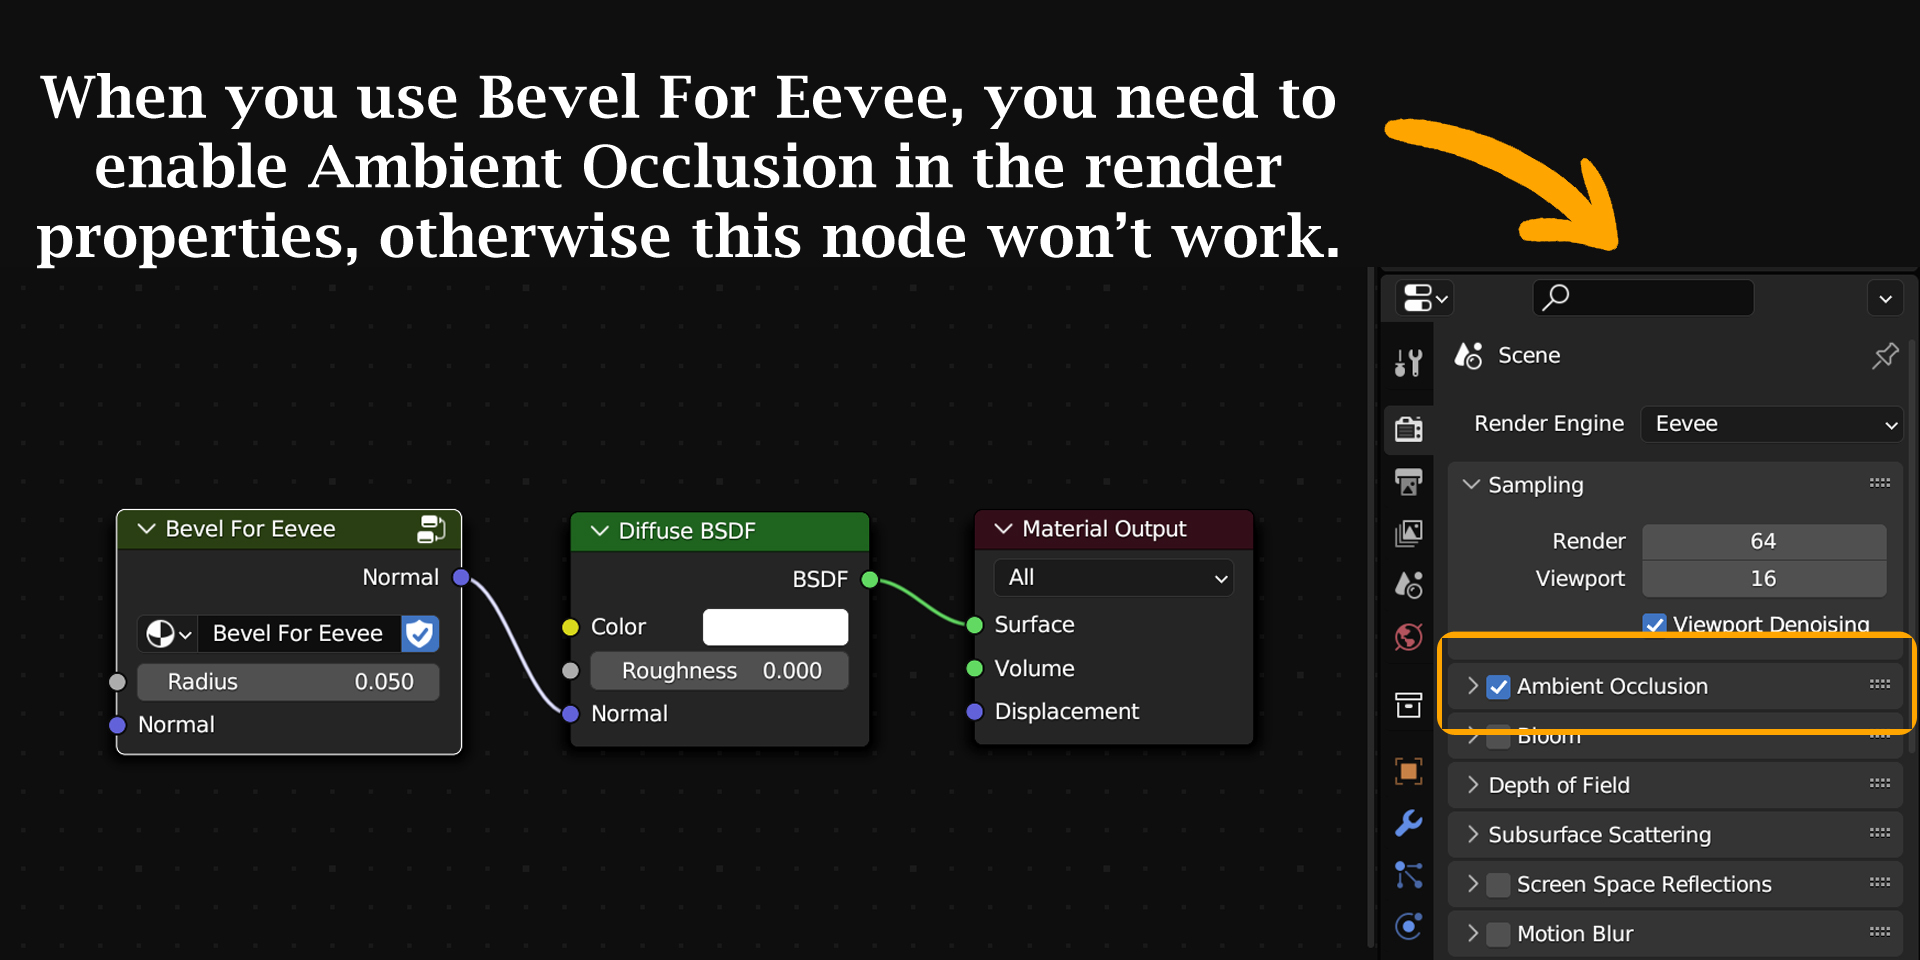
The Bevel node in the shader editor does this job, but it is designed only for Cycles. Our node "Bevel For Eevee" does the same thing for Eevee, but you need to enable Ambient Occlusion in the render properties. It works based on the ambient occlusion values.
How to install & use this node?
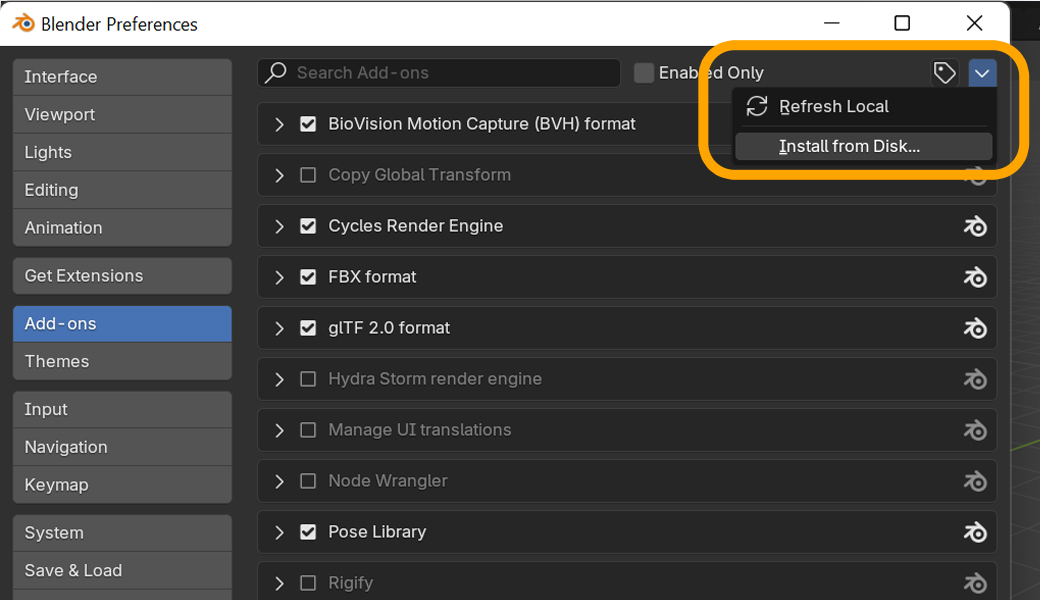
Step 1: Install the zip file from Edit > Preferences. Click on the dropdown arrow as shown below and select "Install from disk". Then select the zip file that you have downloaded (no need to unzip the file, install the zip file directly).
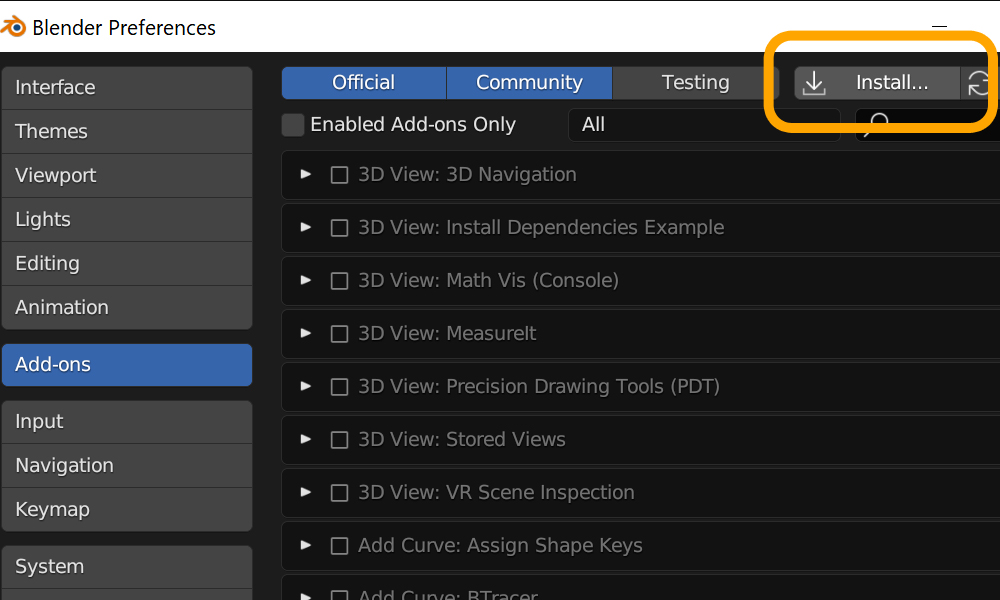
For older versions of Blender, the Install button is here as shown below. Click on it, and then select the zip file that you have downloaded (no need to unzip the file, install the zip file directly).
Step 2: Enable the add-on by selecting this checkbox (if not already selected).
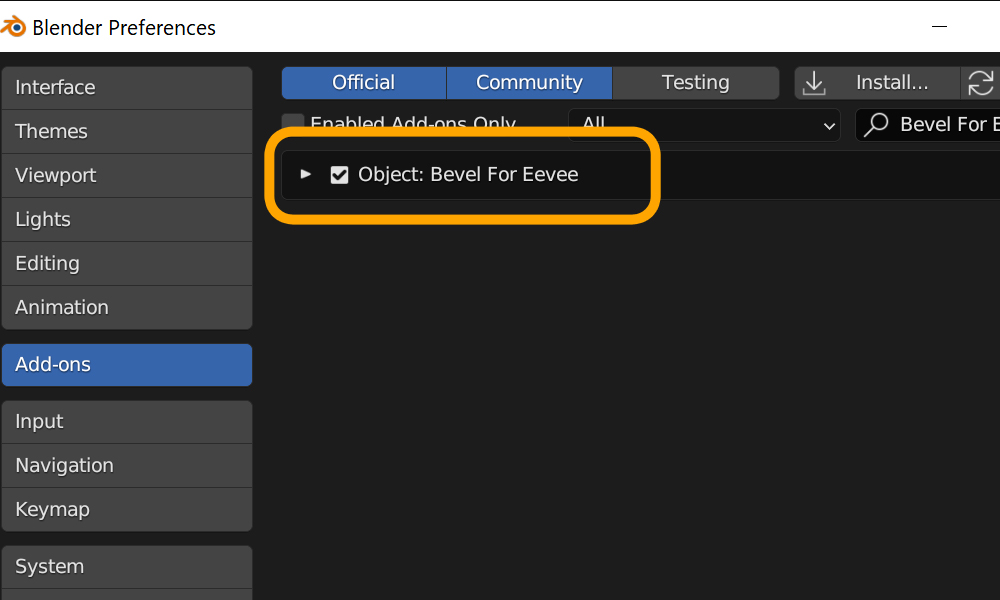
Step 3: Re-open the current blend file or start with a new project, so that the menu options get refreshed.

Step 4: If you are using the latest version of Blender, you can skip this step. For older versions of Blender: enable ambient occlusion in the render properties as show below.

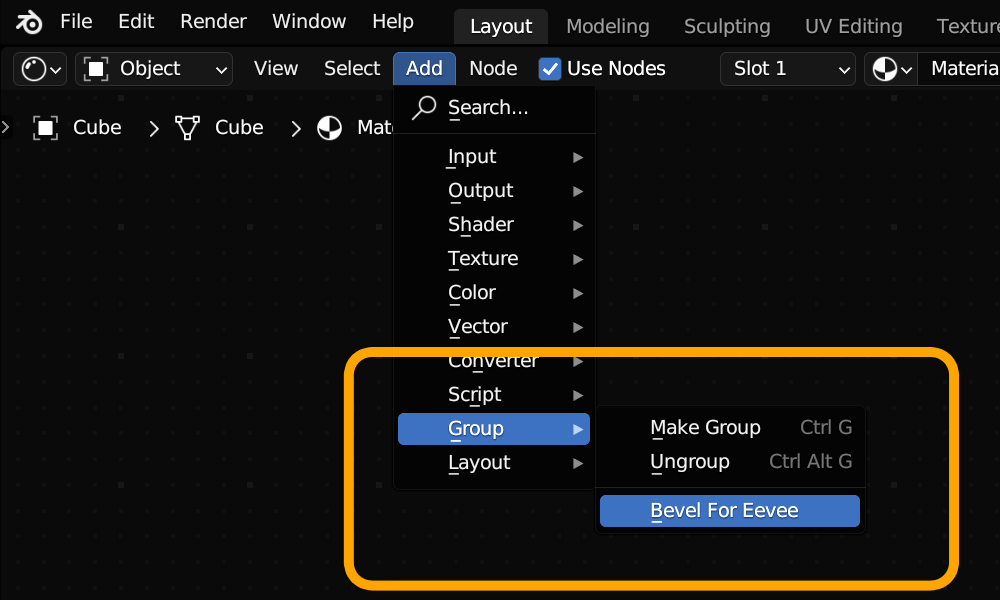
Step 5: Go to the shader editor. Then go to Add > Group, you'll see the new node called Bevel For Eevee.
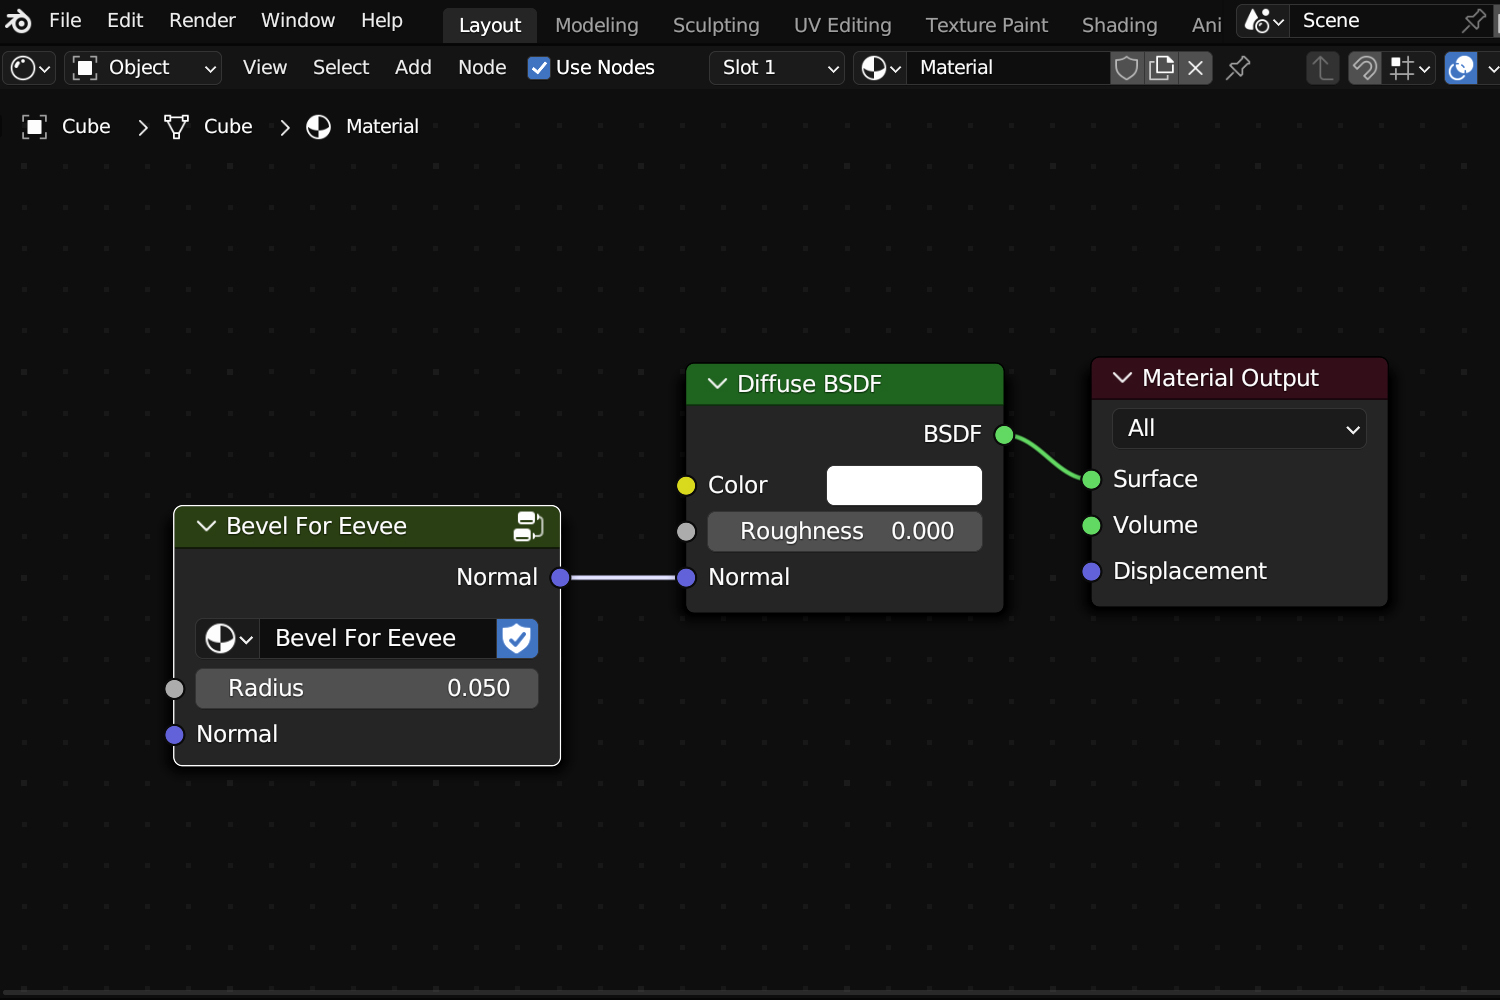
Step 6: Connect it to the Normal input of any shader. It can be a Diffuse BSDF, or a Principled BSDF, or a Glossy BSDF or any similar shader that has a Normal input.
Important Note:
Let's say in your node structure, you already have some node connected to the Normal input of your primary shader. For example, a Bump node may be already connected like below.
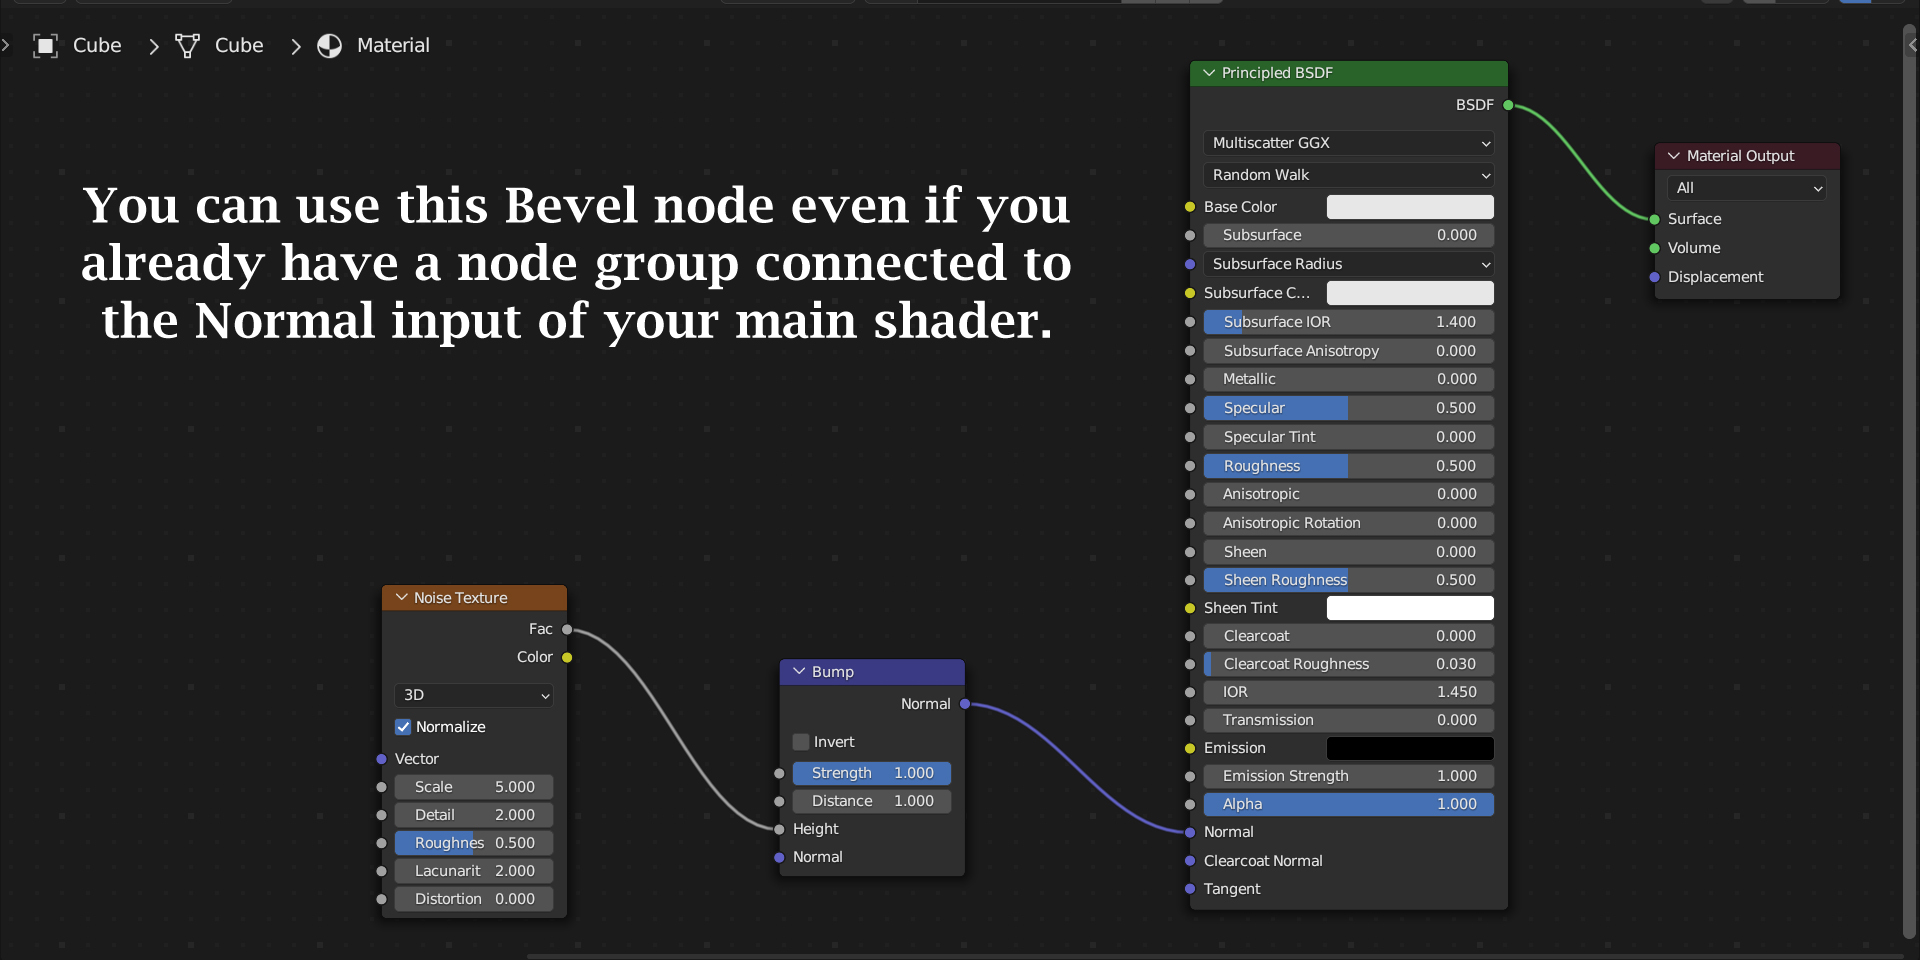
You can still use Bevel For Eevee in this case. Just place our node immediately before the final shader with the correct Normal input coming from the Bump node (or any such node prior to the shader). It will look like this for the above example:

Limitations: We know that Cycles is totally different from Eevee, and it gives brilliant results. Same is true for this node as well. If we compare the Cycles output with Bevel node, and the output from Bevel For Eevee, we will see a change in quality - Cycles looks superior. While our node works both for Eevee and Cycles, if you can use Cycles - go for the Bevel node that comes with Blender, it will give you slightly better results.
Please read the documentation included in the package, it has a step by step guide (with screenshots) on how to install this node. For any assistance or any bug reporting, please feel free to send a mail to 5minblender@gmail.com or connect to us via our YouTube channel. We are always there to help you!
Discover more products like this
easy-bevel Bevel Tool bevel bevel-for-cycles bfcm23 spring24 bevel shader beveling winter24 bevel-for-eevee summer24 bevel node bfcm24
