Align Cursor


What is it?
Blender only has options to move the cursor to the selection. But being able to align the cursor to edges, or vertex clusters is super handy when modeling.
This is a small add-on that simply takes your current selection and then aligns the cursor to it. It gives you the option to use each axis for both position and rotation. The cursor can be aligned to objects, vertices, edges, faces and even spline knots.
It will work with single and multiple selections, and it will work with :
Having a cursor aligned to anything you like can make straightening, flattening and moving things much easier.
UI
Here is what all the options do and how to use them.
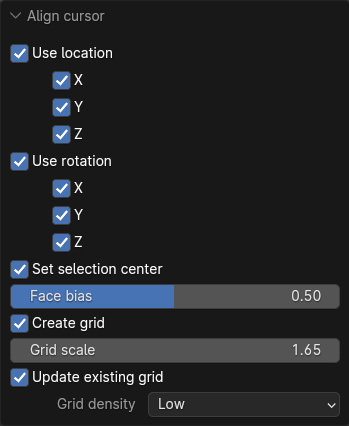
Use Location
Sets the location of the cursor based on the selection.
Location X,Y,Z
Each separate axis for location.
Use Rotation
Sets the rotation of the cursor based on the selection.
Rotation X,Y,Z
Each separate axis for rotation.
Set Selection Center
Sets the “Selection center” on Blender’s UI. Sometimes you may want to keep to the current transform center point and only set the transform alignment.
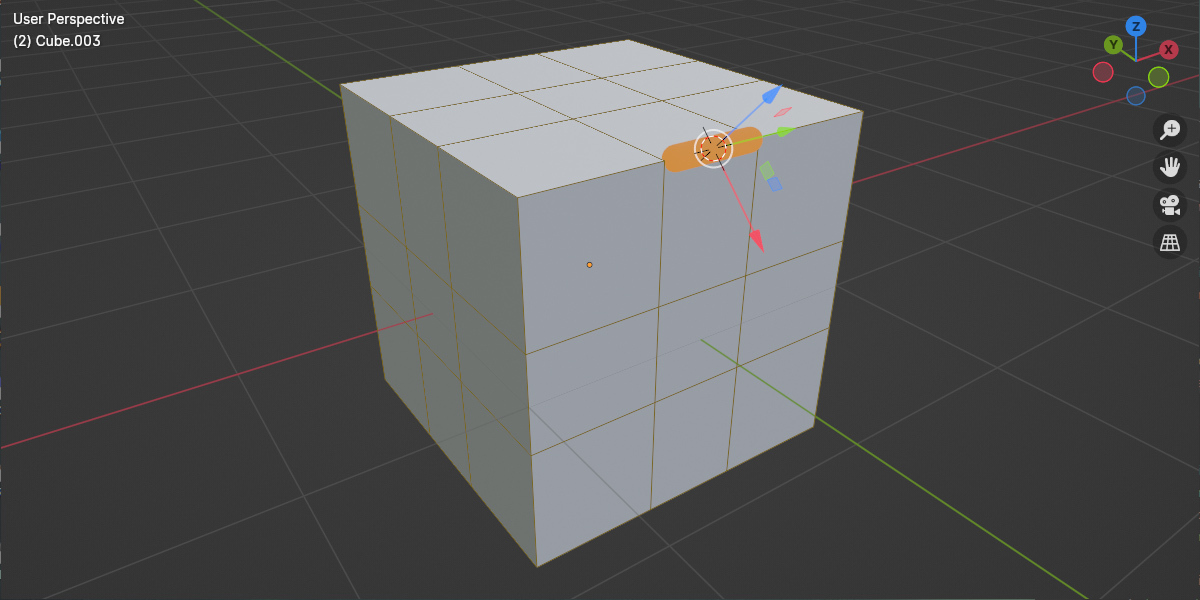
Face Bias
When only one edge is selected, then the bias control is enabled. When it’s enabled, you can bias which of the connected faces the cursor aligns to. Default is 0.5 or 50%.
Create Grid
This option allows you to create a grid object (grid based mesh) at the same time as aligning the cursor. This can be useful if you’d like to remember this orientation for later use. It’s handy as it gives you points to snap to as well.
Grid Scale
Enabled when the grid option is invoked, this changes the scale of the grid.
Grid Density
Enabled when the grid option is invoked, it allows you to change the grid density. Choose from Low, Medium or High. Equates to a grid line every 1/0.1/0.01 (1m, 10cm, 1cm if using metric)
How to use
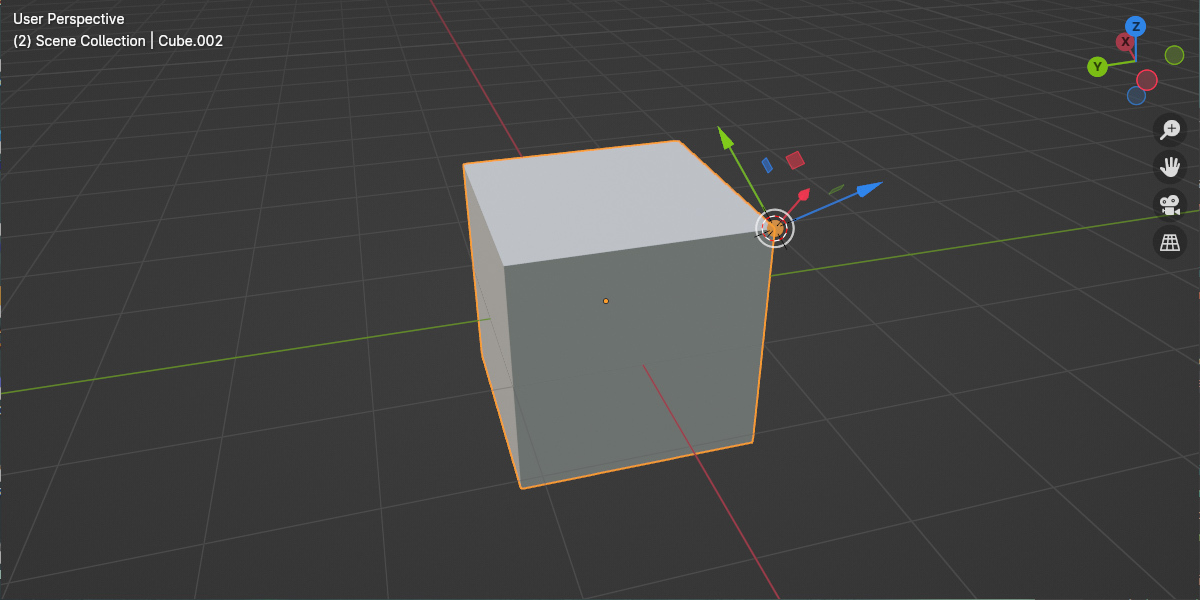
Select one or more objects, or if you are in edit mode, then select one or more mesh components. Then run the operator.
When in object mode, selecting:
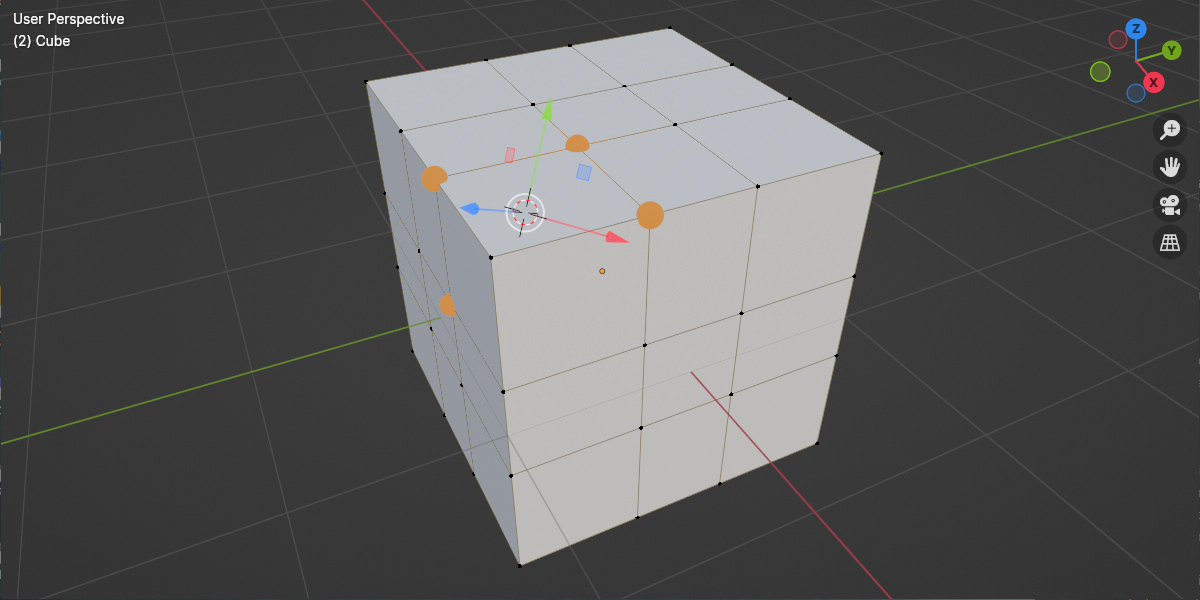
When in edit mode, selecting:
The above alignment rules also apply to curve knots and to multiple selections of objects in edit mode.
Using the options, you can choose to use the position or partial position and/or the rotation or partial rotation.
You can also choose to create a grid like object at the cursor location/orientation. This will allow you to store the alignment longer term. You can use it to snap objects to and build upon.
Some examples
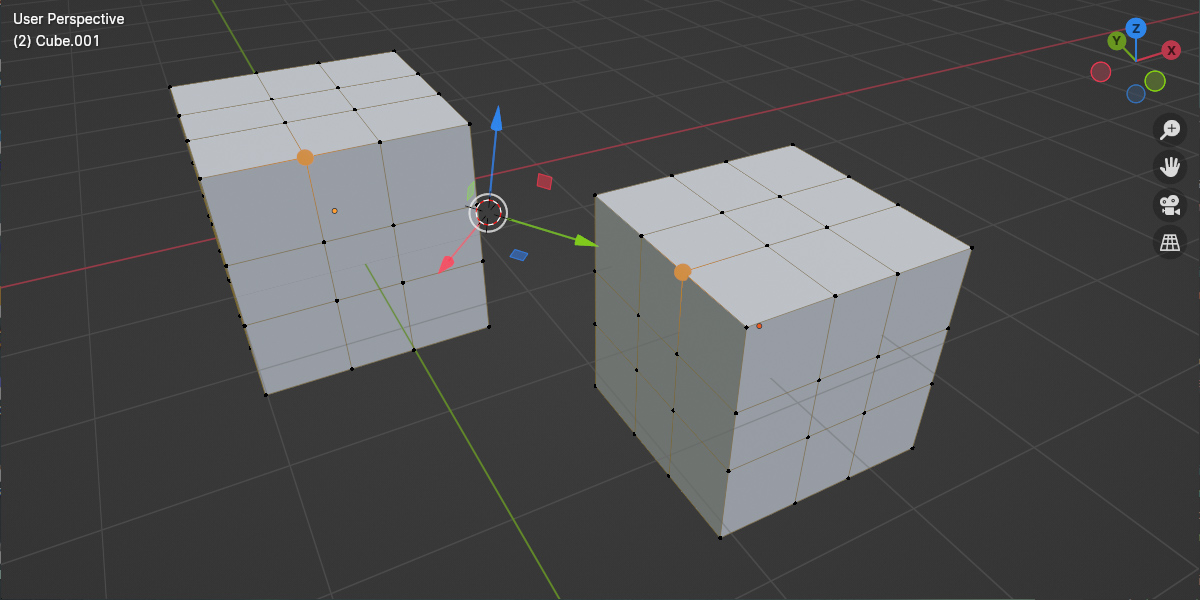
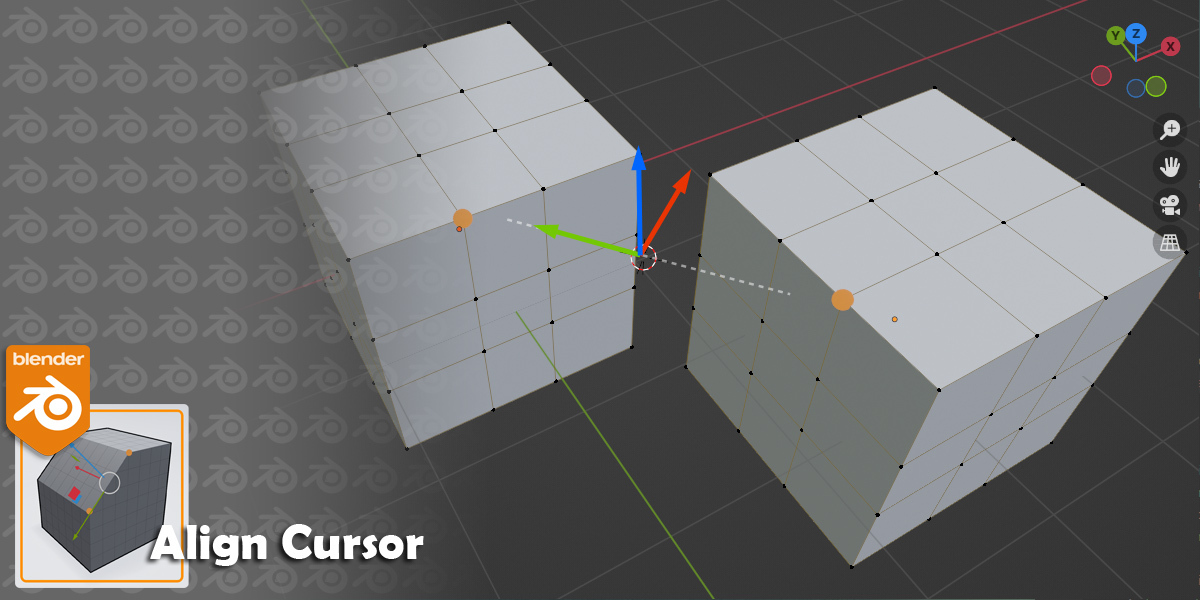
Aligning cursor between two objects in edit mode.
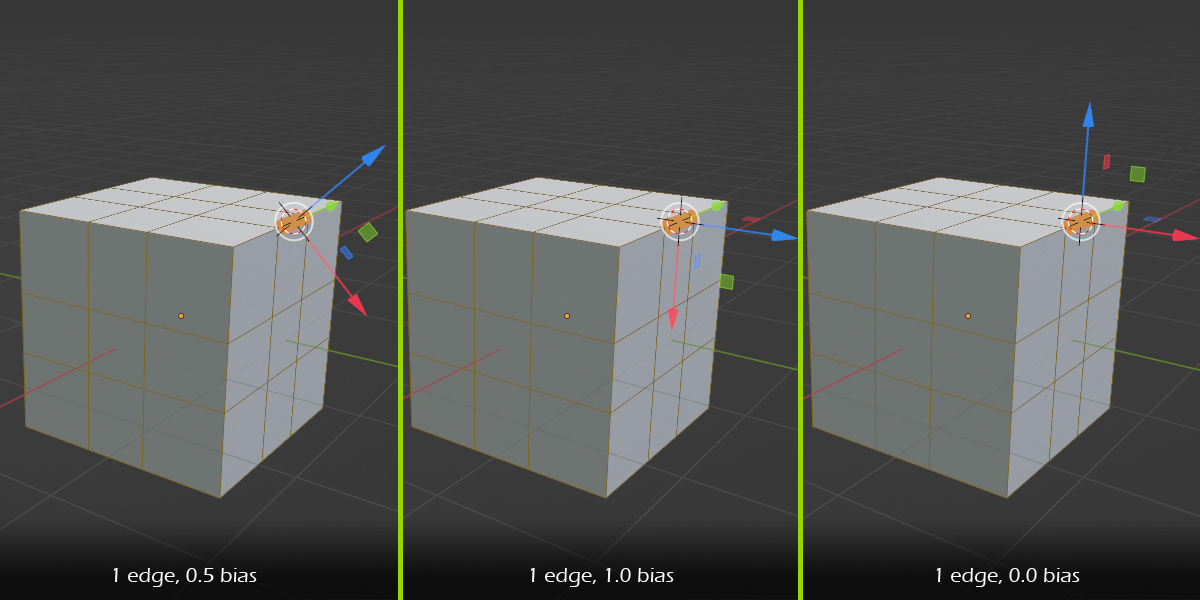
Adjusting the face bias between 0.0 and 1.0 when only one edge is selected.
Version History
- 1.0.0 initial release1.0.0 initial release
- 1.0.1 fixed issue when aligning between two objects
- 1.0.2 added ability to align to armature bones in edit and pose modes. corrected version string to avoid warning in 3.6.17.
- 1.0.3 Moved to its own sub directory to avoid conflicts. Please remove the old version before installing this one.
Documentation and help
If you would like to read the documentation, then please visit Here
If you have questions/bugs/suggestions, please contact me Here
Objects (any type)
Verts
Edges
Faces
Spline knots
1 object will align to the objects transform.
2 objects will align one axis (Y) to the line between objects and the midpoint of the positions.
3 or more objects will align to the best fit plane of all the object positions.
1 vertex will align it to the vertex position and align one axis to the vertex normal.
1 edge will align to the edge midpoint and align one axis (Y) along the edge.
2 vertices will align to the midpoint of the positions and align one axis (Y) to the line between them.
3 vertices or 2 or more edges or one or more faces will align to the best fit plane of all the positions.