Advanced Array Tool


The Advanced All-in-One Set of Tools for Procedural Instancing of Objects in Blender
Advanced Array Tool is a comprehensive set of tools and features designed for procedural instancing/cloning of objects in Blender. It has lots of customization settings and includes a wide range of features spanning from randomization to an excellent set of Instance on Curve/Object tools, making it ideal for rendering, level/environment design, game development, architectural visualization, and more. You can also use it for animation, and motion graphics. (Note: If you're using the AAT for animation, a fairly capable CPU is recommended)
Powered by Geometry Nodes and neatly organized within a single node group to keep your project clutter-free. It delivers impressive performance, even with over 16000 nodes packed within. There's no Geometry Nodes knowledge required. It's user-friendly and has all the controls you need right in the modifiers panel.
Current Version: 2.3.5 🚀
See the documentation for more info.
Key Features
- Easy to Use
- Fully Procedural (Powered by Geometry Nodes)
- Highly Customizable
- Single Node Group (For a clutter-free project!)
- Performant (Over 60 FPS on a MacBook Air M1 during an animation)
- Instance From Object / Collection (Load instance(s) from either an object or a collection)
- Transformation Tools
- Full Set of Randomization Tools (Randomize location, rotation, and scale. Uniform Random Scale)
-
Random Stepped Rotation (This feature allows you to achieve randomized incremental rotations of the instances by specifying the number of angles)
- Advanced Arrays (Grid Array, Circular Array, Linear)
- Instance on Object (A variety of useful features that allow you to precisely position the instances on the surface of a selected object)
- Instance Along Curve (A set of powerful and essential features designed for the precise distribution of the instances along a curve)
- Look at Object & Repel (Align the orientation of the instances toward a specified object & control the repulsion and attraction forces)
- Texture Transform (Control the transformation of the instances using either a procedural noise, a custom image texture, or a combination of both)
- Variation Row (Modify the number of the instances within each subsequent row you add)
- Curve Profile (Convert all splines of a curve to a mesh using a profile curve, with an option to preserve scaling)
- Object Offset (Transformation of instances based on the attributes of a selected object)
- Effectors (Linear, Object, Proximity, and Noise)
- Delete Geometry (A range of features dedicated to precise instance deletion)
- Rarity Settings (Control the rarity or frequency of instances)
- And Much More!
What's inside?
- Advanced Array Tool
- Example scene with 400+ examples
- Over 20 unique 3D models
- Bonus Tool: Deform Along Curve v2.3
Example Scene
You'll receive an example scene with 400+ detailed examples organized into separate categories to help you get started quickly.
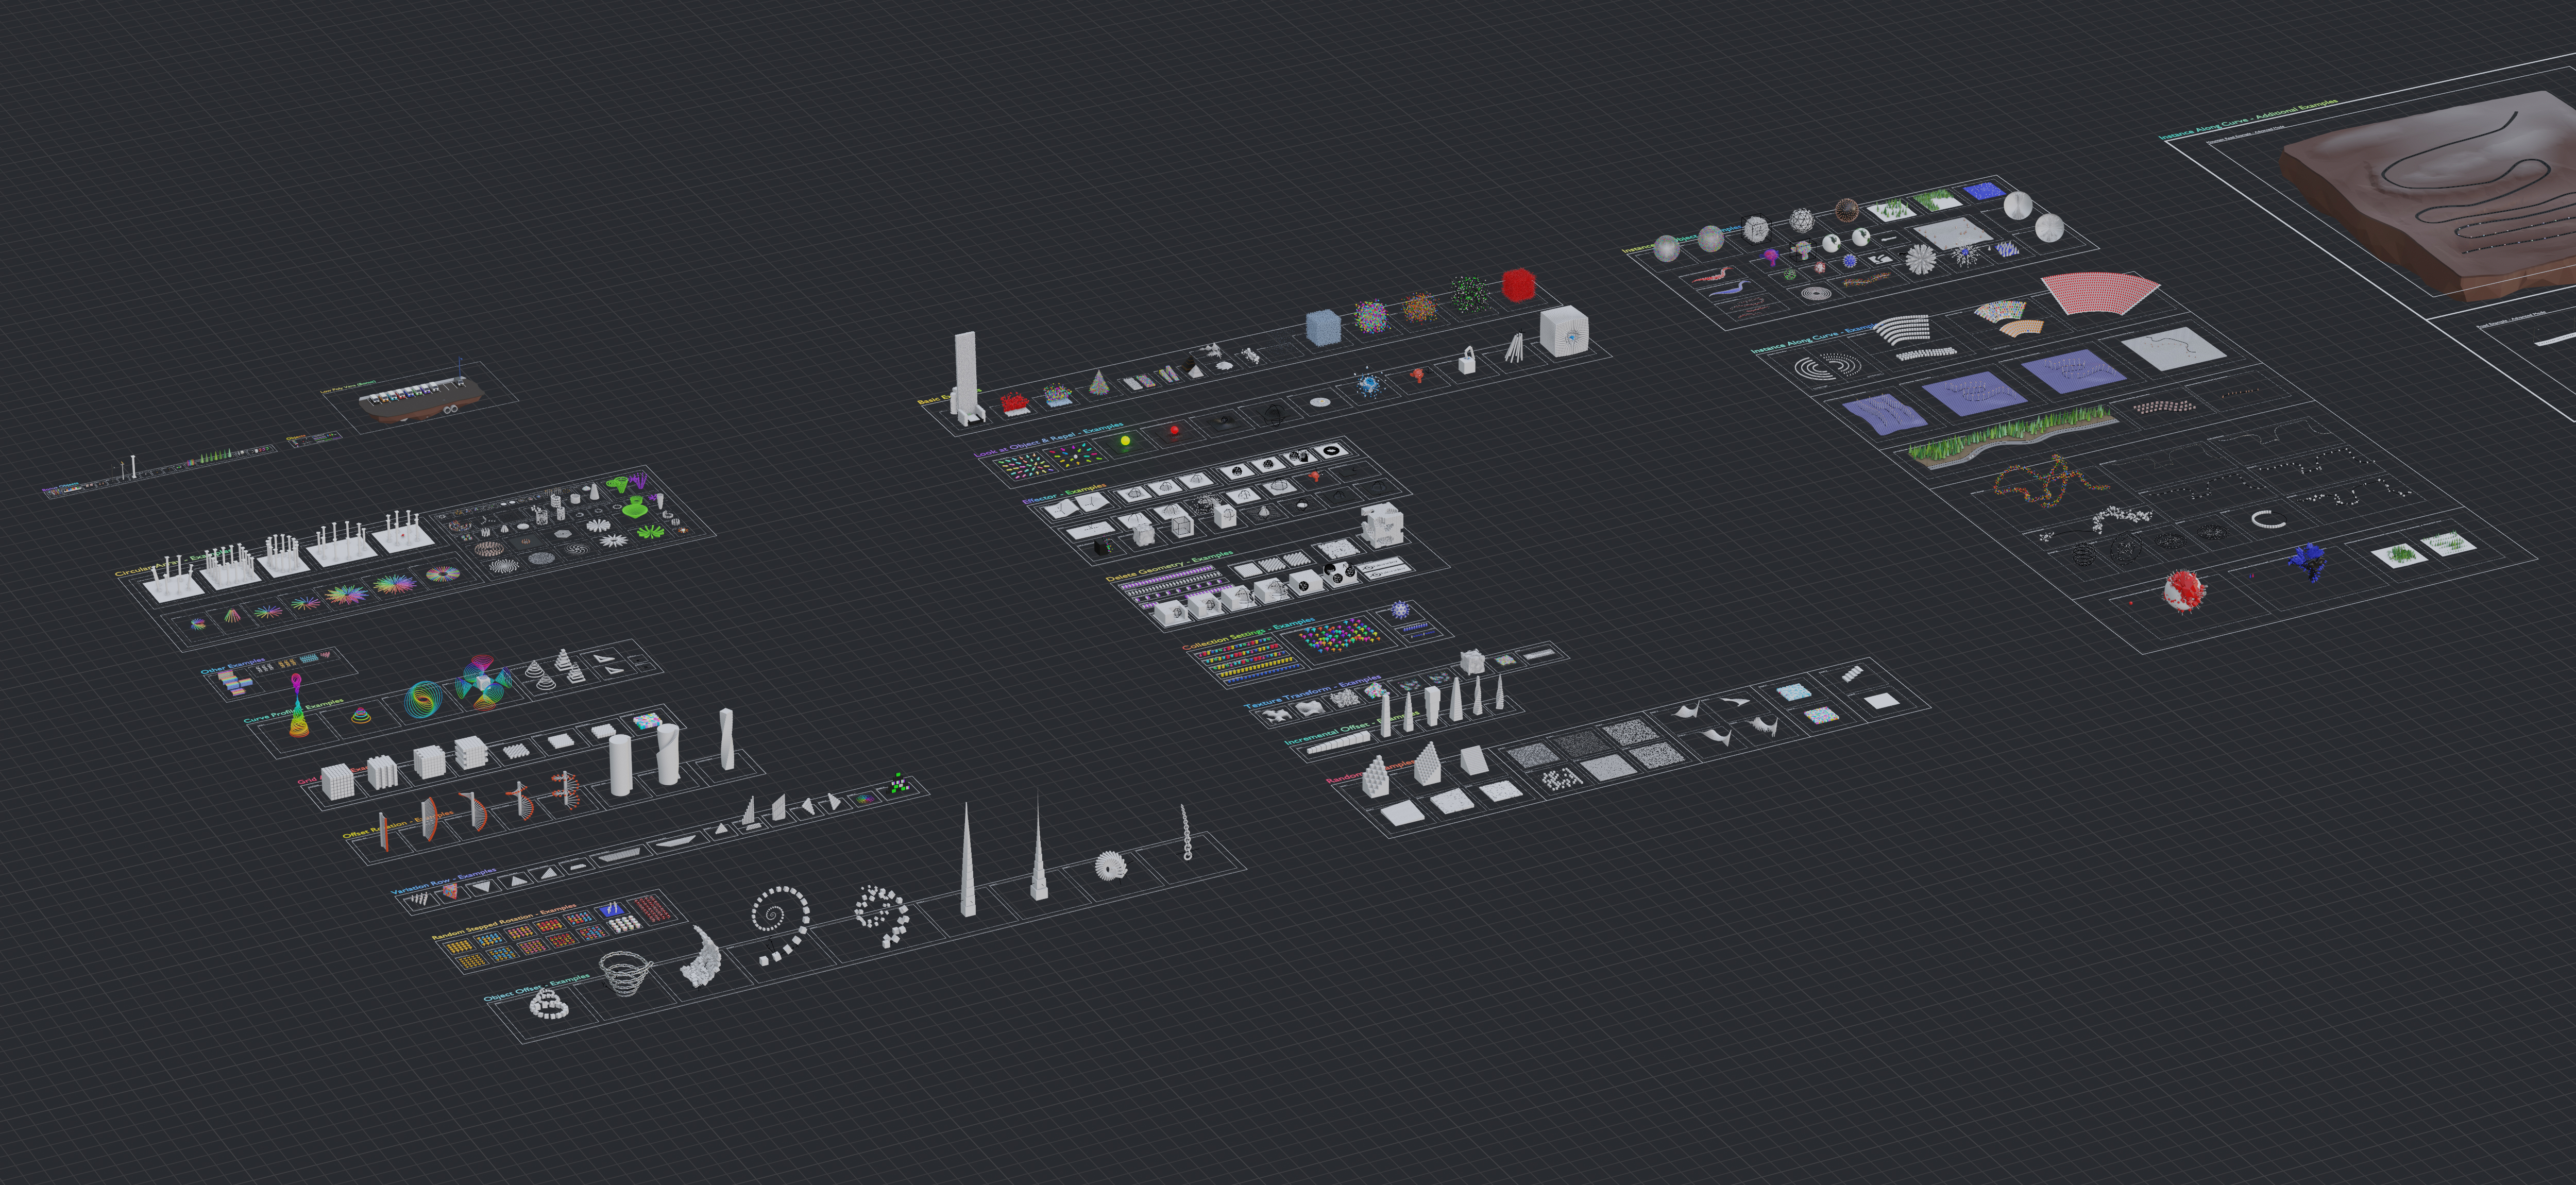
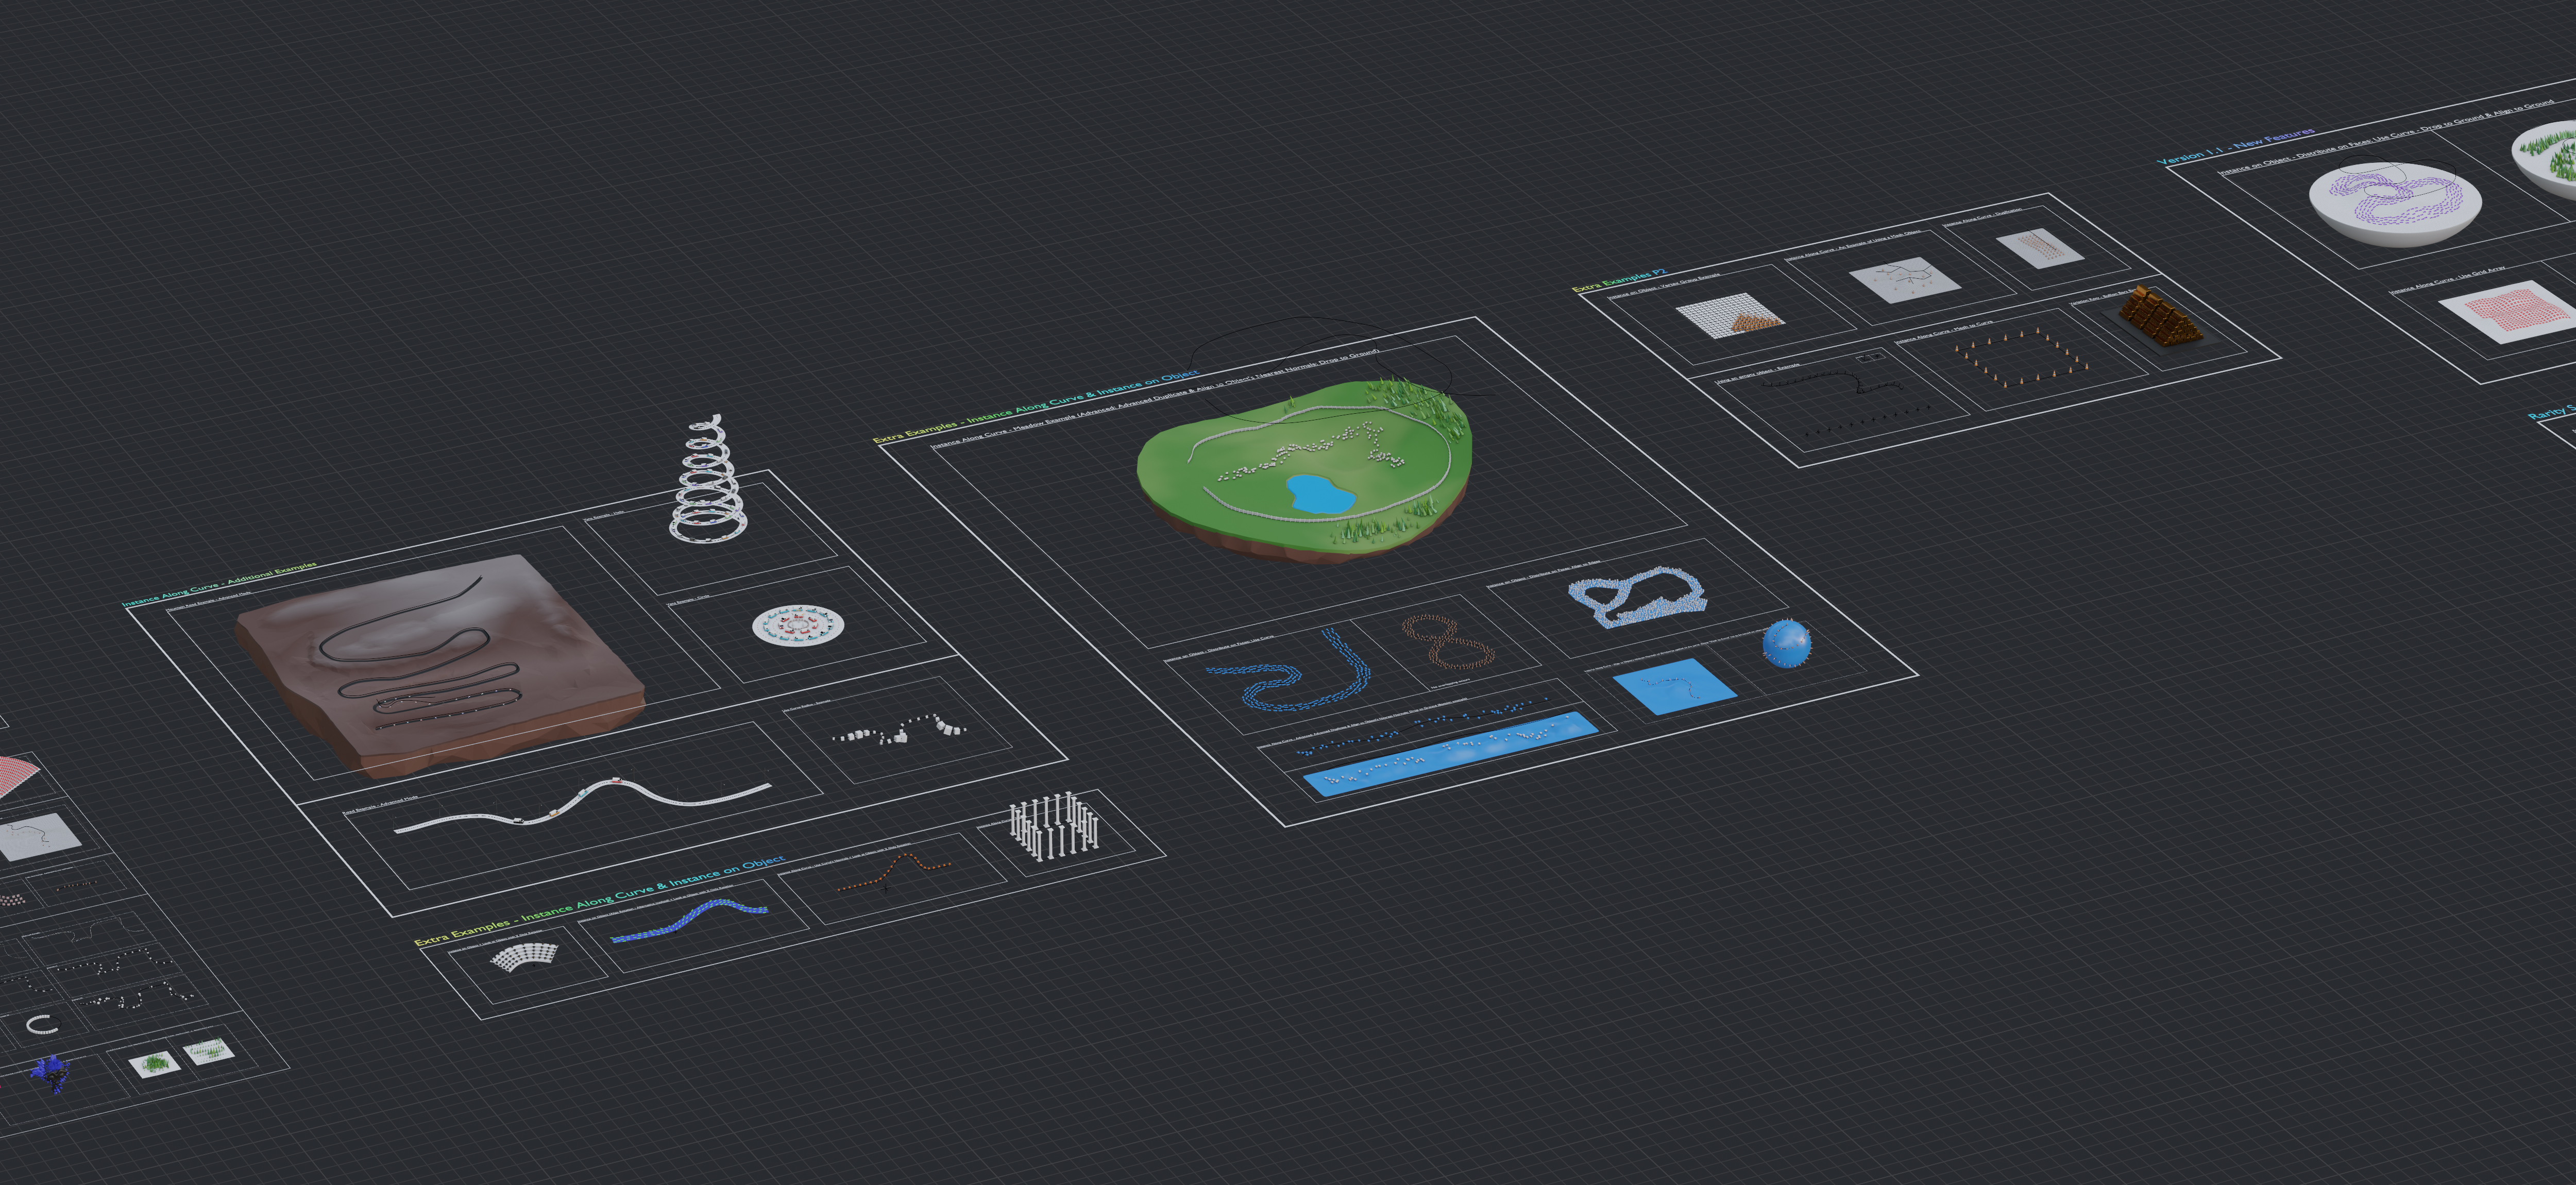
The included example scene with 400+ examples
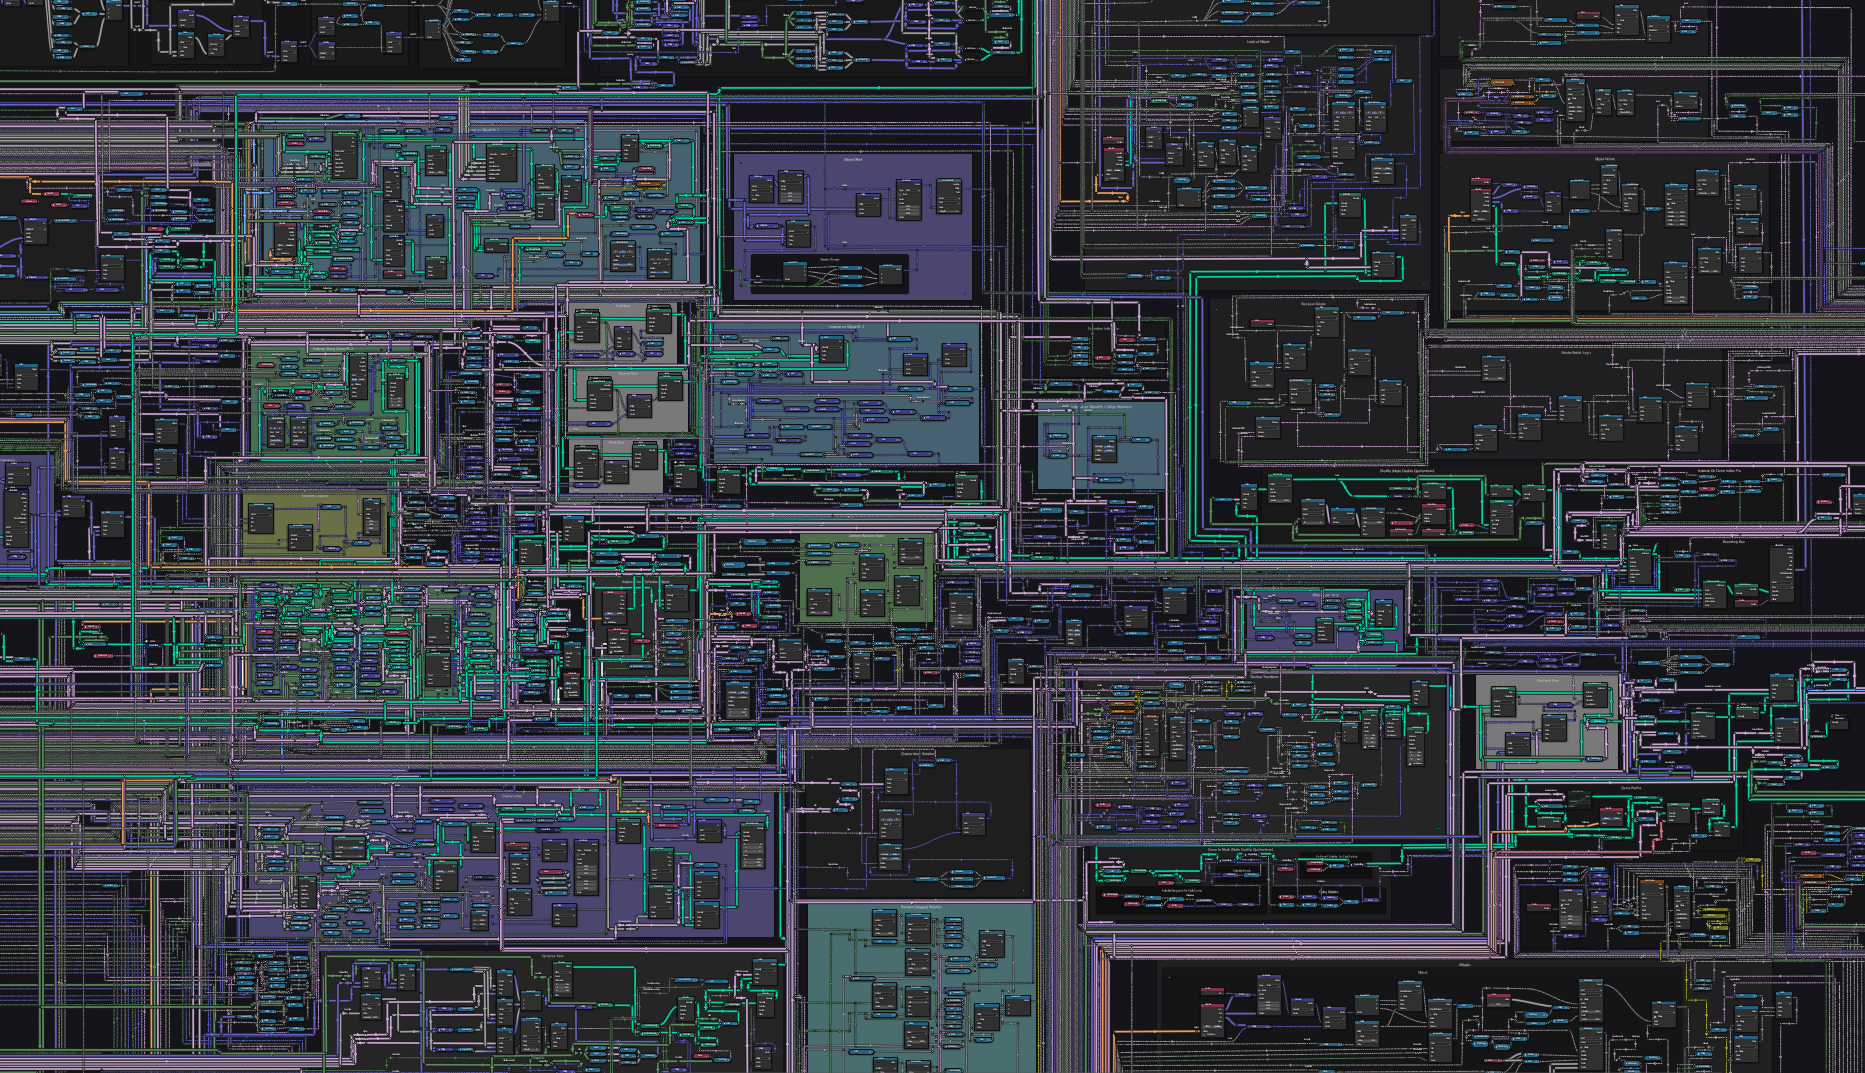
A quick peek inside Advanced Array Tool
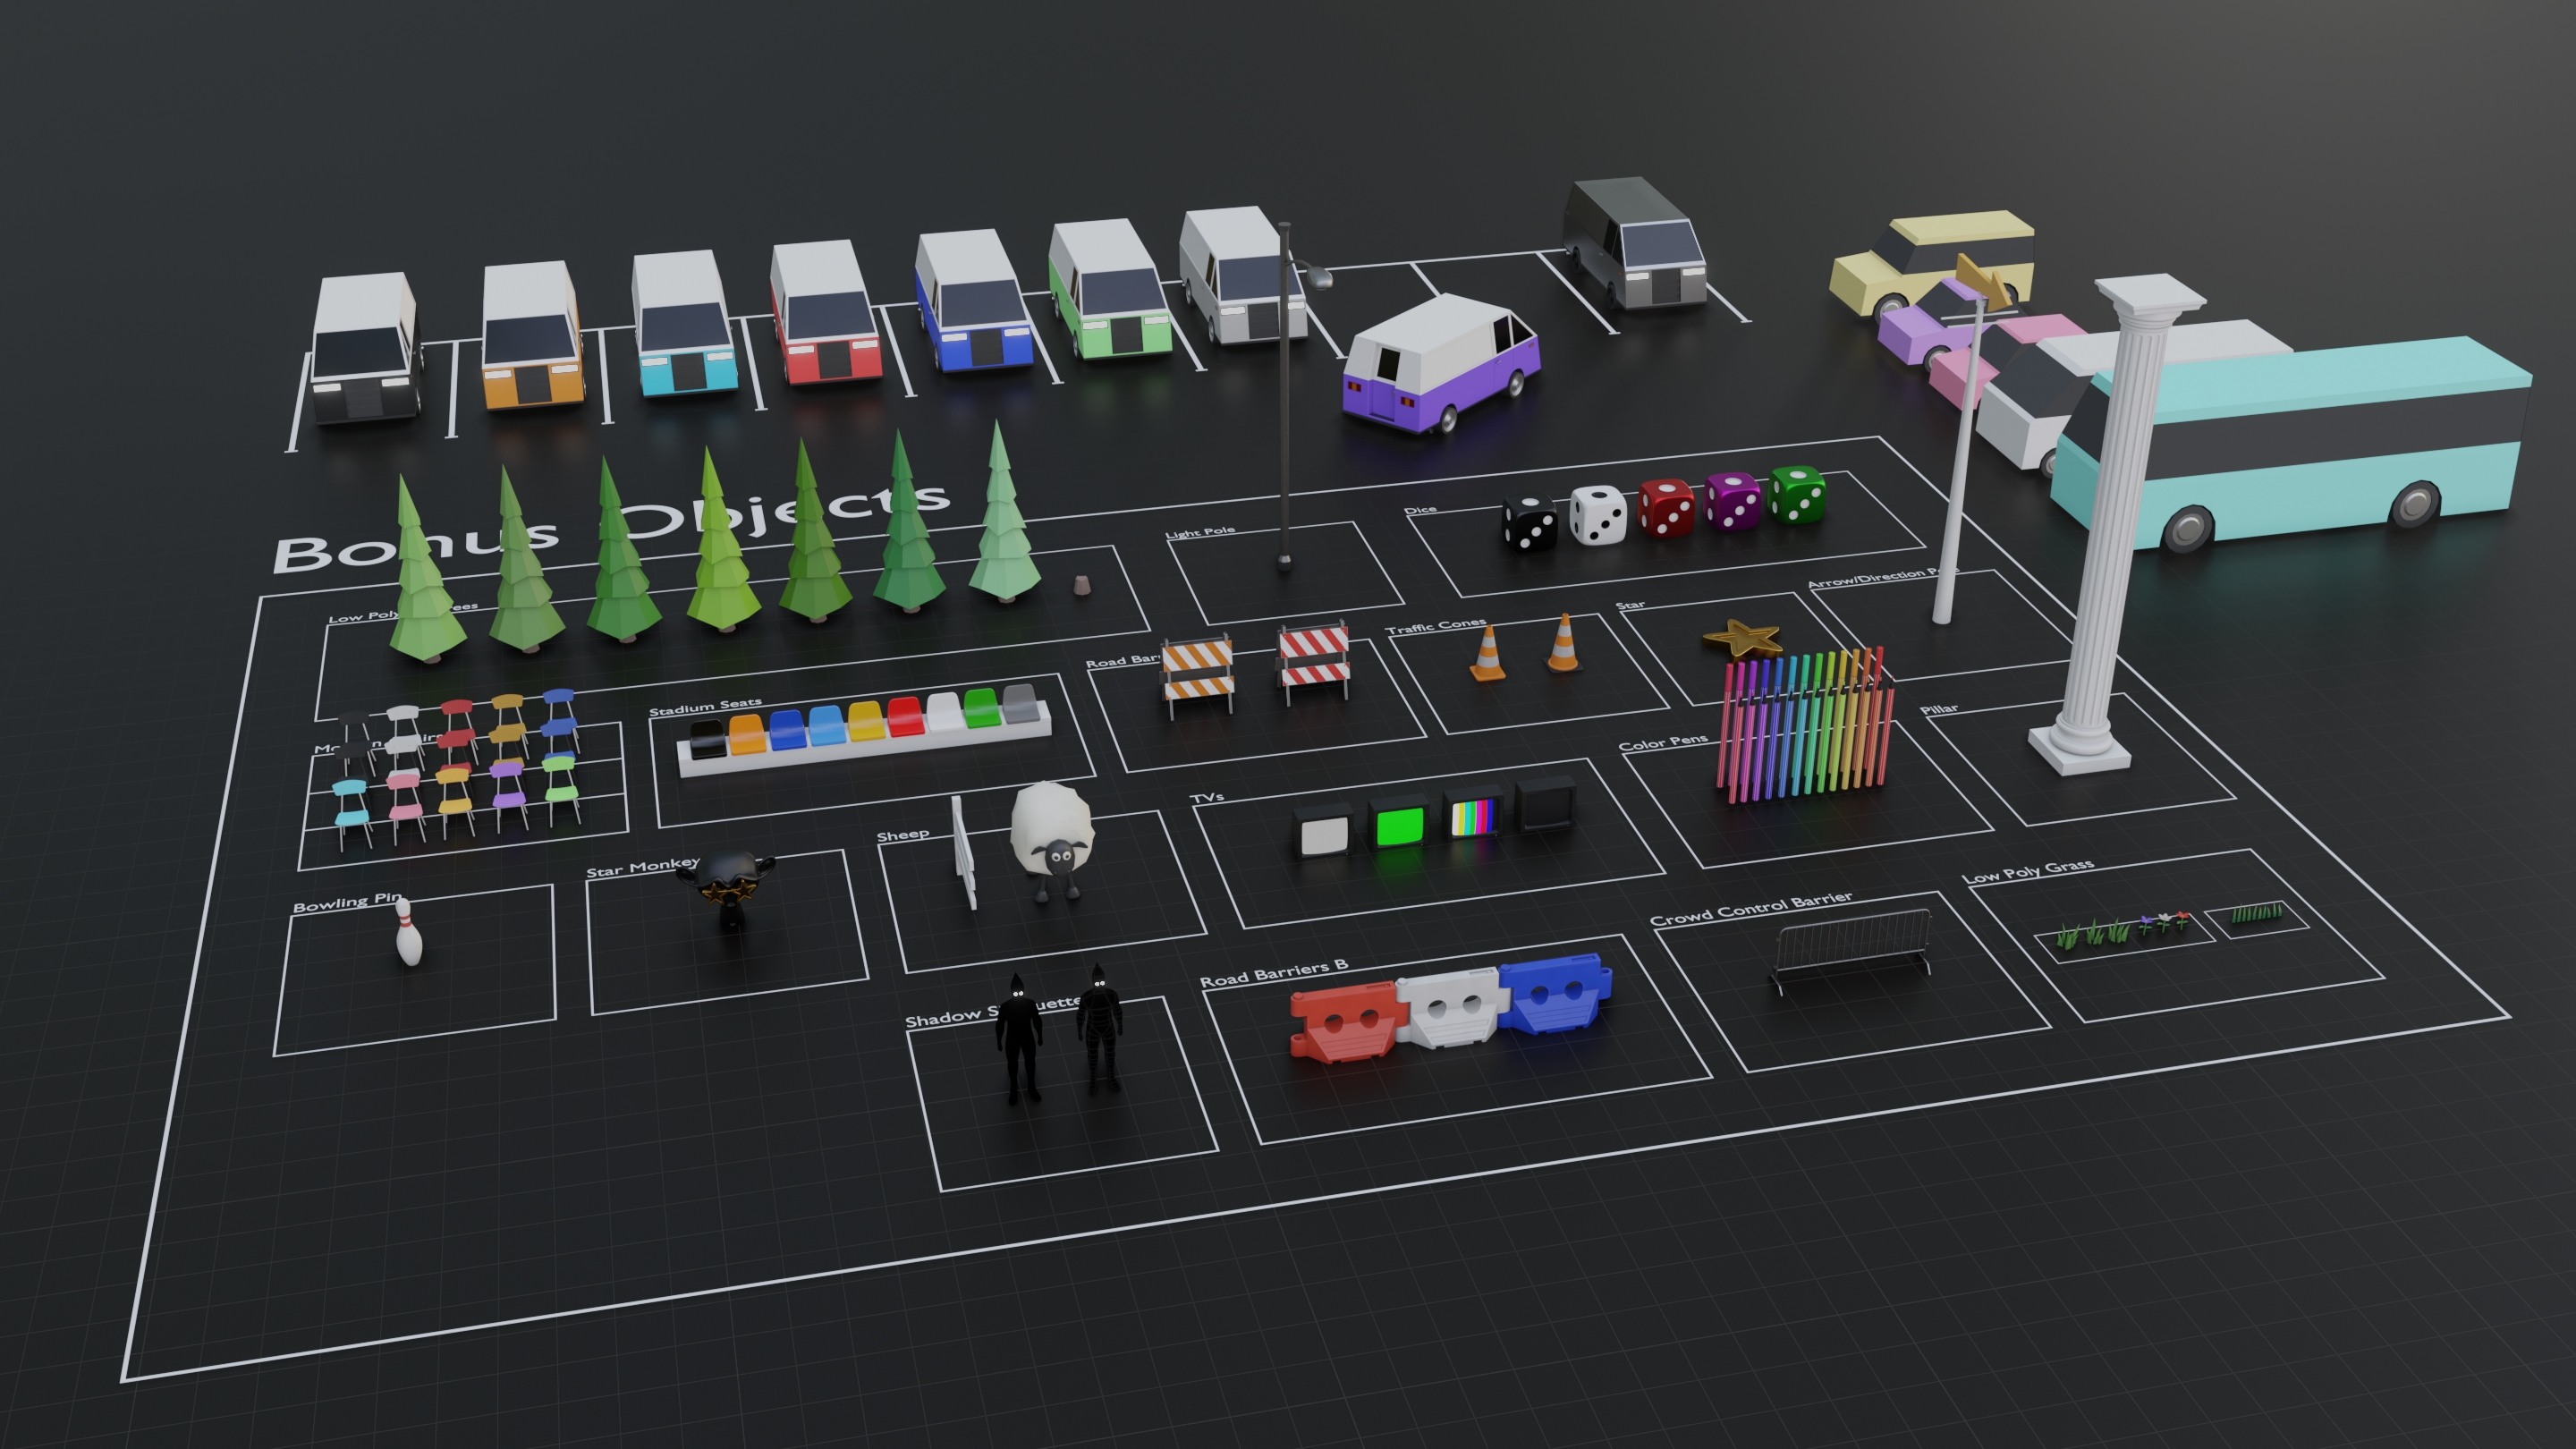
Bonus Models
As a bonus you get over 20 unique 3D models that you can use in your projects.
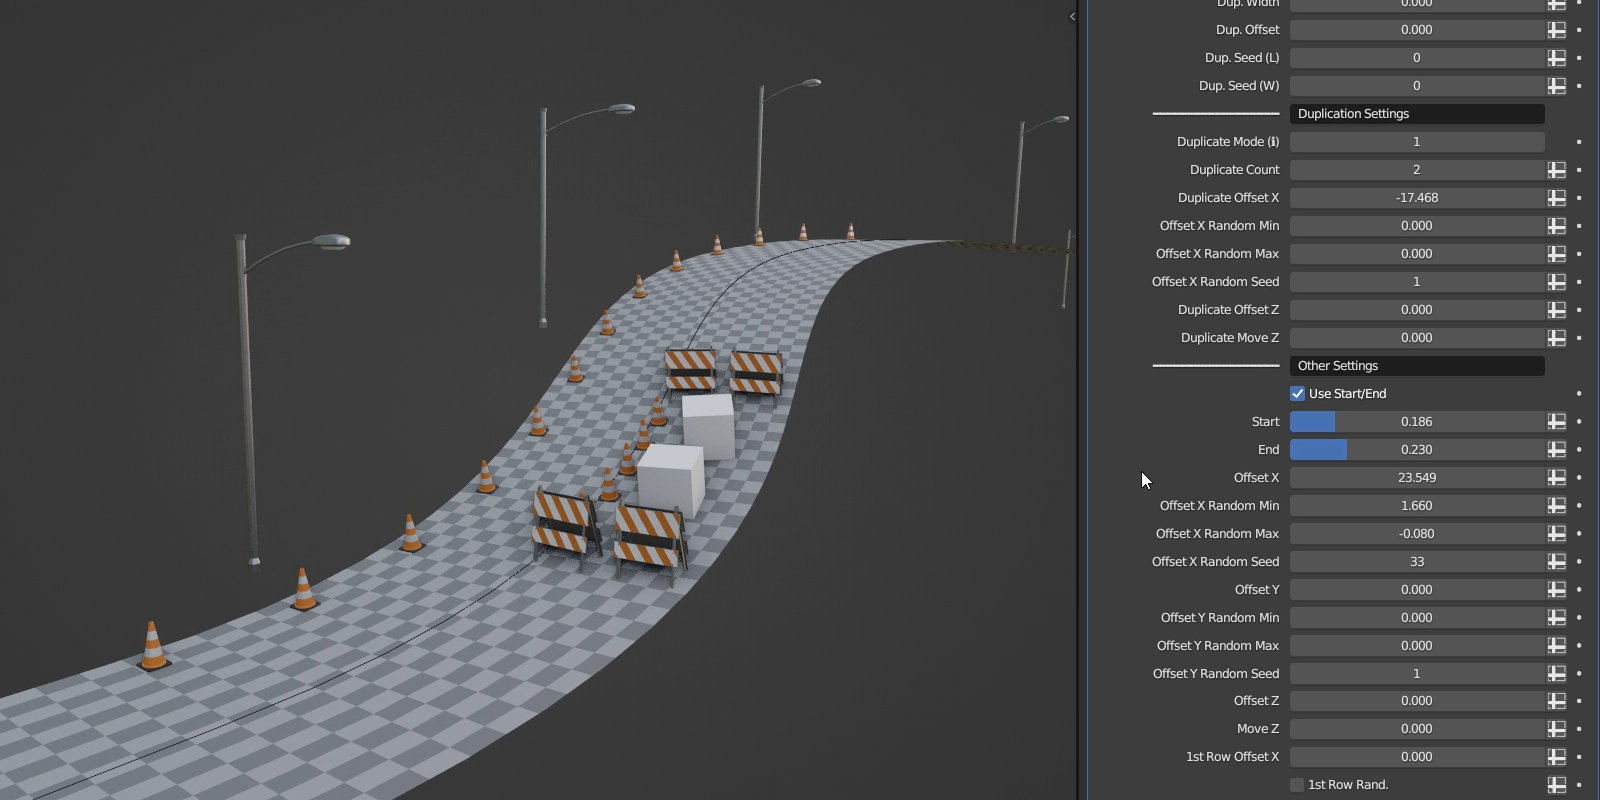
Settings
The settings are located in the modifiers panel, conveniently organized into separate categories, and many of them have useful tooltips. All settings have default values; simply press the backspace key while hovering over a value to reset it to default.
Since version 1.1 the Important categories are now color coded, significantly improving the user experience!
Starting with version 1.8, the UI now features collapsible panels!
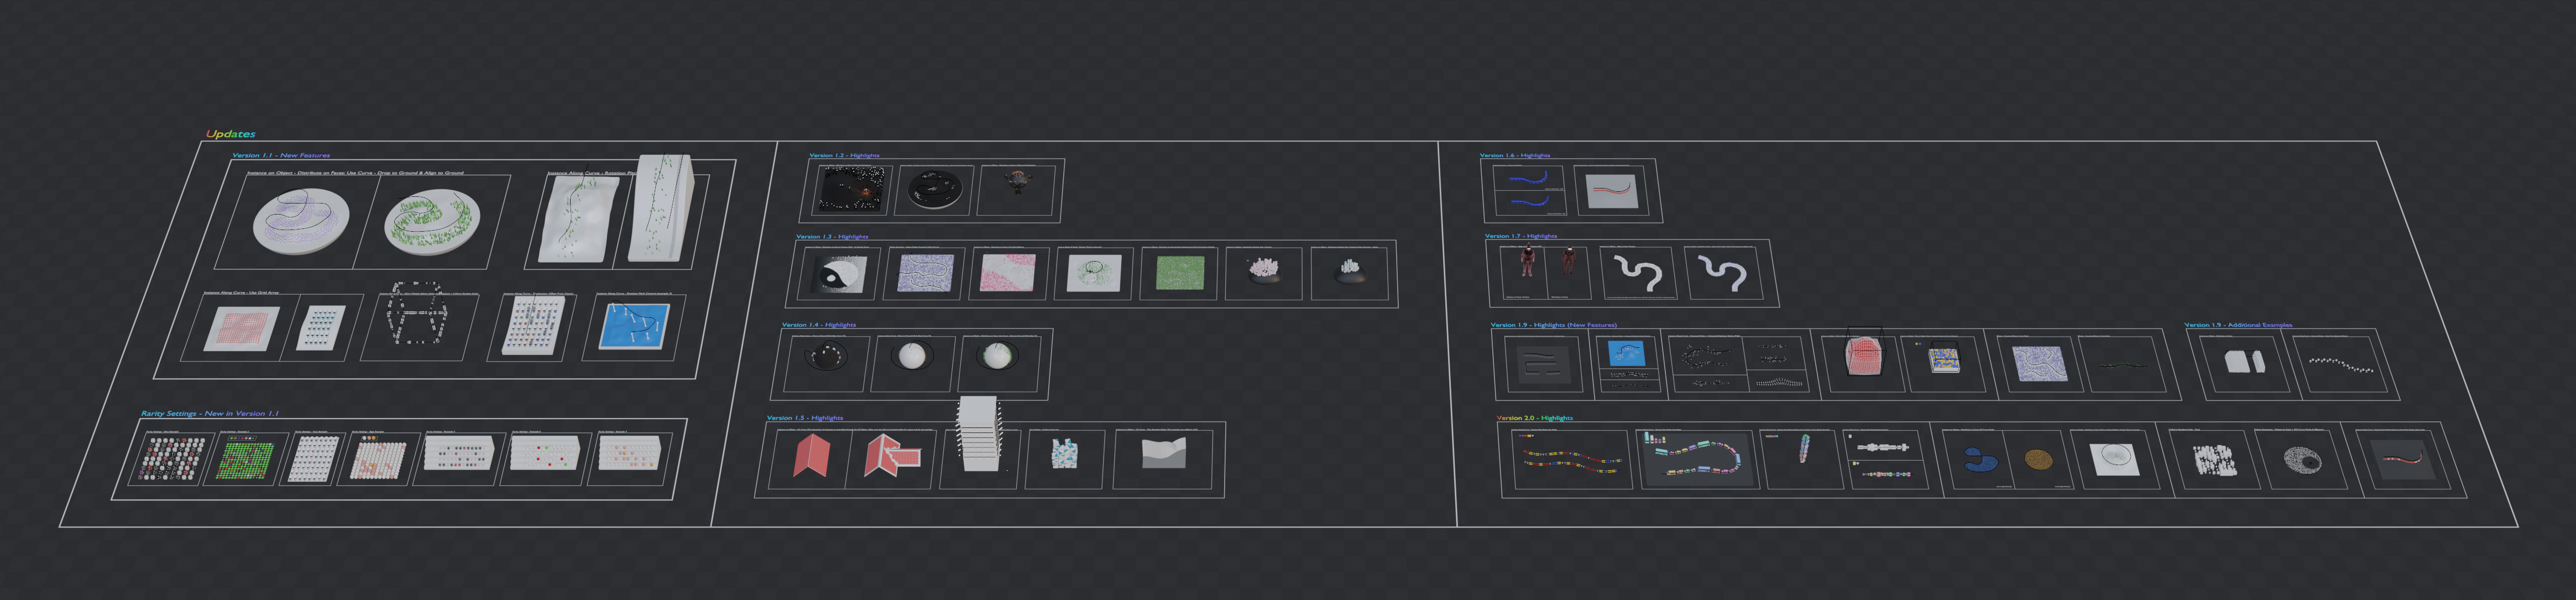
Recent Updates
This category highlights some of the key features added in recent updates.
New in version 2.1 - The much improved Index Mode now lets you order instances along the X, Y, or Z axis, or by each spline. It supports Grid Array, Row Settings, Variation Row, Circular Array, and Instance Along Curve, allowing for greater versatility in arrangement.
New in version 2.1 - The Increment Z option in Grid Array lets you add a vertical offset between rows, making it easy to create tiered or stepped arrangements. This feature is perfect for architectural layouts and stacked object setups.
New in version 2.1 - Circular Array now supports the Drop to Ground feature, allowing you to place and align instances directly onto a selected surface. This makes it simple to position objects accurately on uneven or sloped terrain.
New in version 2.1 - The Rings Phase feature allows you to alternate the rotation of rings in Circular Array.
New in version 2.1 - The Adapt Count to Length feature in Advanced Duplicate automatically adjusts the number of instances based on the length of the curve in Instance Along Curve, ensuring a balanced distribution.
New in version 2.0 - Instance Along Curve now features Respect Size Mode, a powerful new addition. This feature takes into account the sizes of objects when arraying them along a curve, ensuring that objects of different sizes are arranged without overlapping.
With Respect Size Mode, you can explore new possibilities in arranging objects of different sizes, offering greater flexibility and control in your designs.

You can choose the axis, move the objects along the curve, control spacing, and add randomness.
New in version 2.0 - With Fill Curve Mode, you can turn a curve into a surface and evenly distribute instances over it.
The Fill Curve Mode is also especially useful when combined with the Drop to Ground feature.
New in version 1.9 - The Pack in Object feature allows you to pack instances inside an object, with customizable settings for density, overlap, and seed.
New in version 1.9 - With the addition of the new Curve Mode, the Proximity Effector now supports curve objects.
New in version 1.9 - The Advanced Duplicate mode in Instance Along Curve now includes the option to reduce overlap.
New in version 1.7 - The Align to Face Tangent option allows you to align instances with the tangent direction of the faces they are placed on.

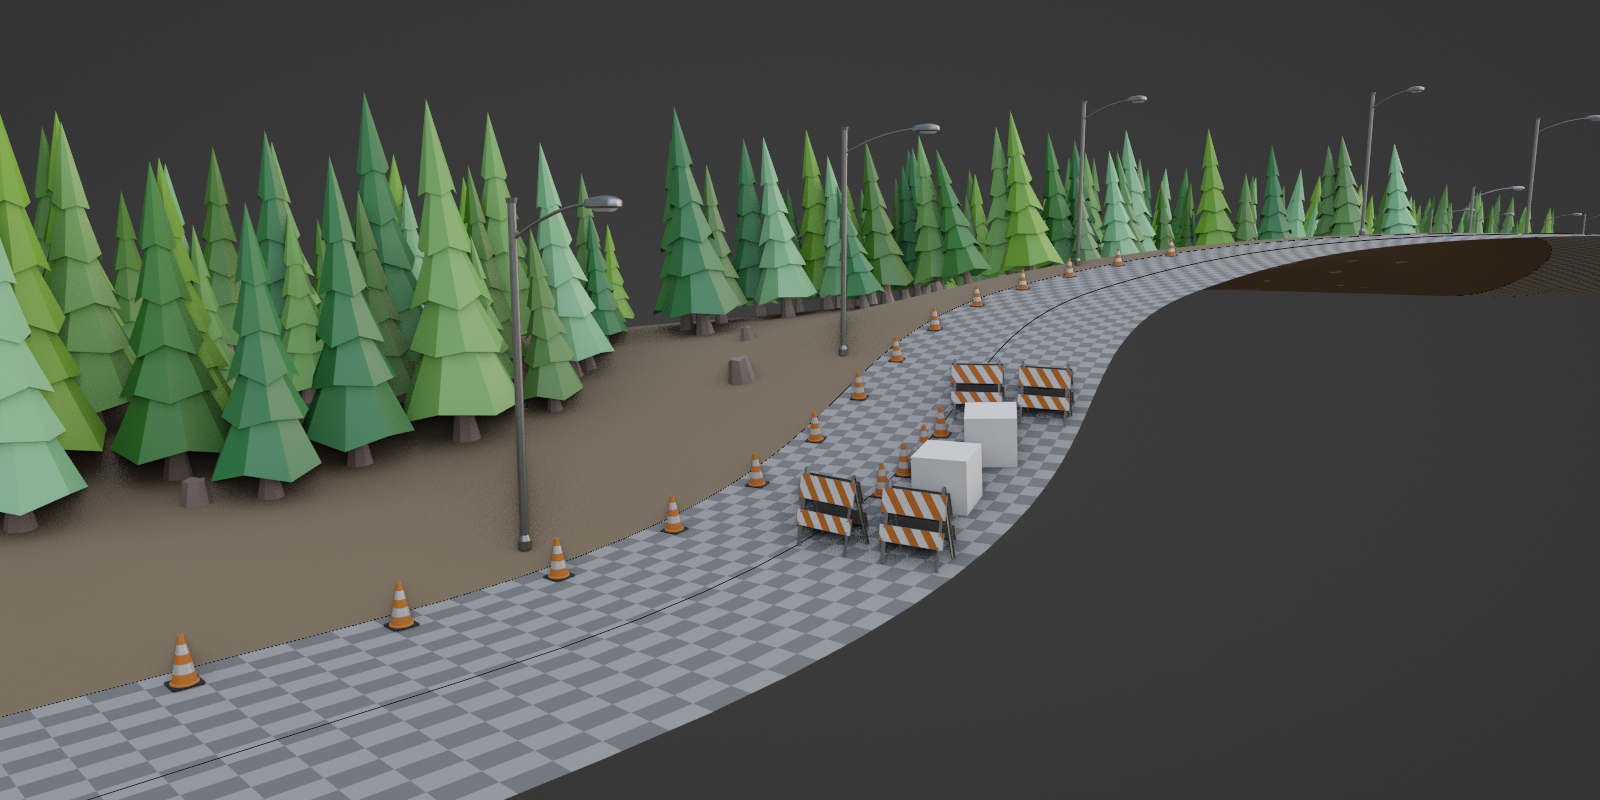
New in version 1.6 - The Orient to Next Point feature precisely aligns each object toward the next one along the curve. This is particularly useful for setups like barriers, walls, and other structures where consistent orientation is crucial.

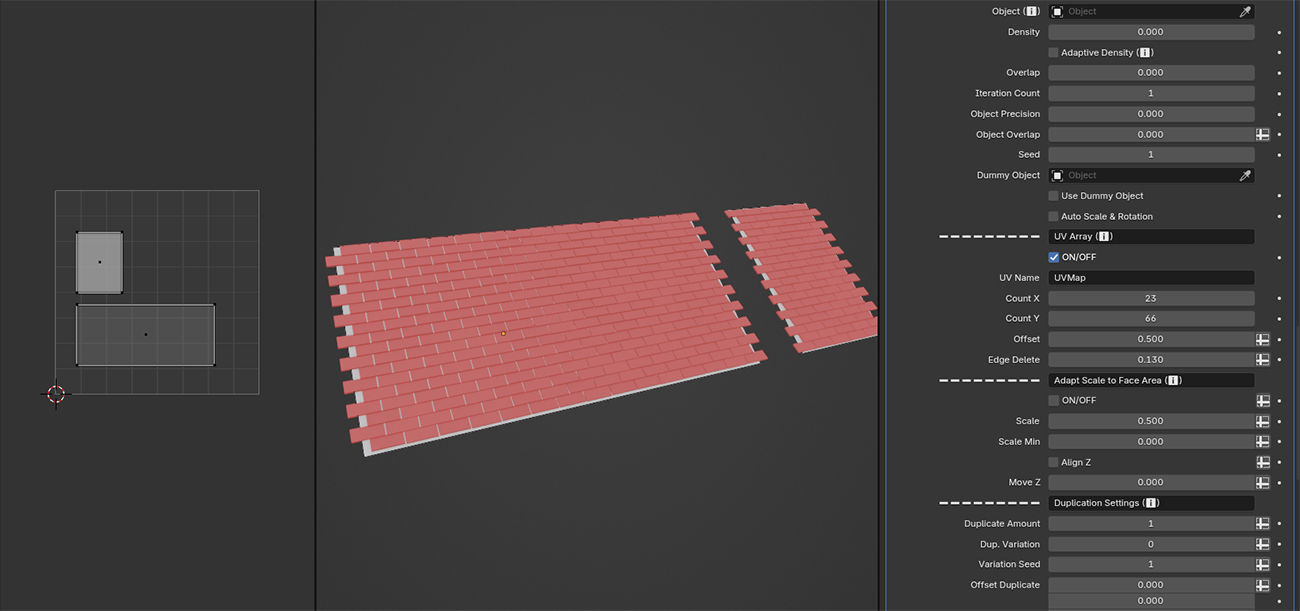
New in version 1.5 - The UV Array feature lets you array instances on a surface based on UV coordinates.
Since version 1.0, over 70 new examples, 170+ new settings, and countless improvements and bug fixes have been added.
Base Features
This category includes various transformation features (including randomization), the ability to load instances from an object/collection, and other useful settings. You also have the option to realize the instances.
Advanced Array Tool supports base object transformation features, including settings such as Offset Rotation, Offset Scale, and others.
You can randomize location, rotation, and scale. Additionally, you have the Influence Factor setting, which allows you to control the number of affected instances.
The Uniform Random Scale feature allows you to uniformly randomize the scale of the instances, and provides the functionality to affect specific axes as well.
You can also offset the instances along their local axes.

Demonstration of Offset Rotation.
Advanced Array Tool supports multiple ways to add rows, one of which is through Row Settings, which also allows you to control the scale variation for each row.
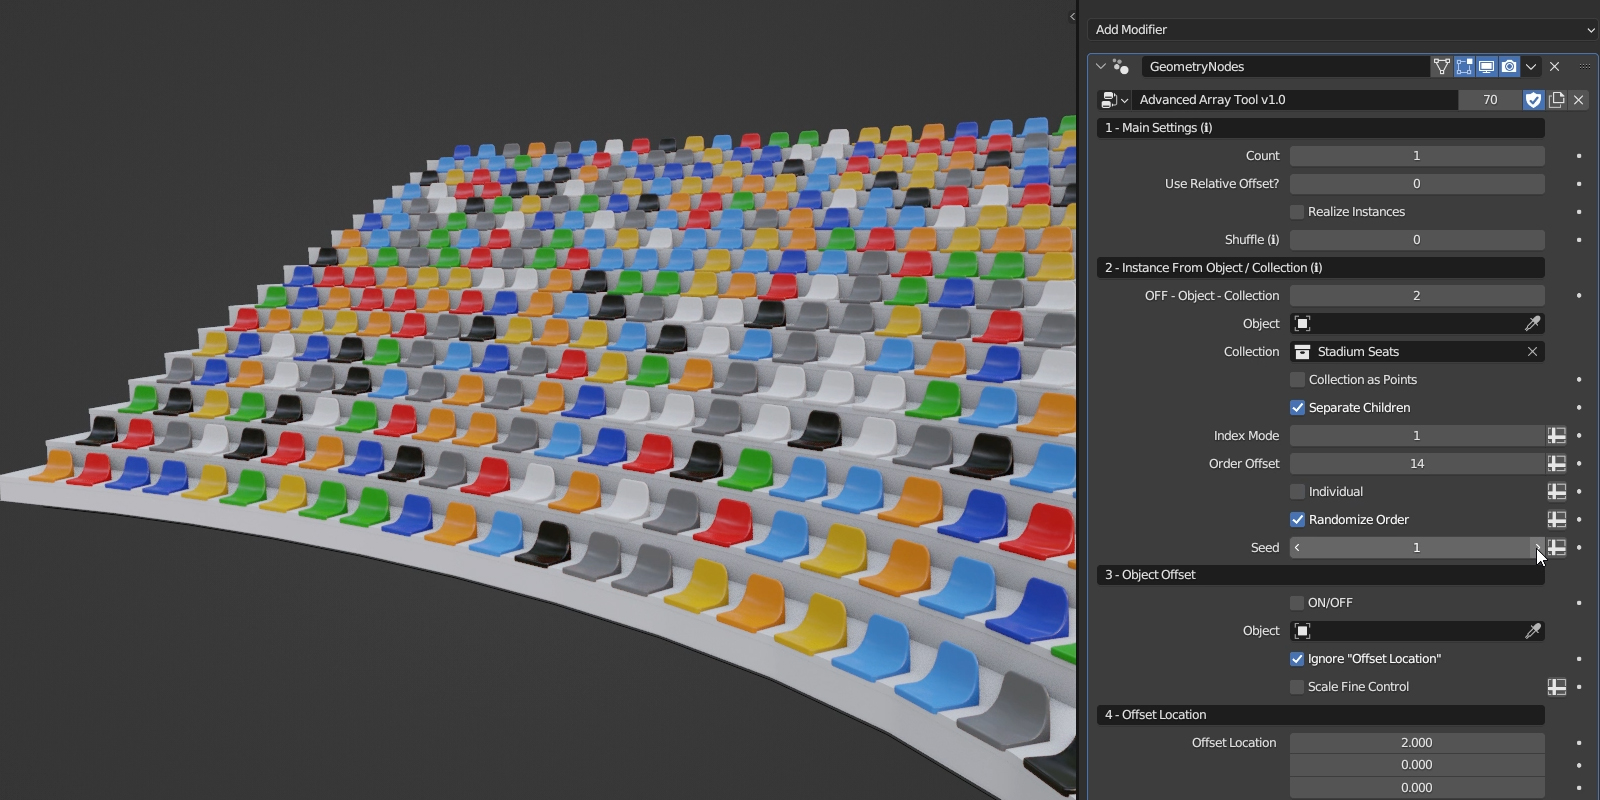
Instance From Object / Collection: This feature allows you to load instance(s) from either an object or a collection. When loading from a collection, you can randomize and offset the order of the instances, select individual elements, and separate children.
Instance From Collection

Instance From Object
Separate Children
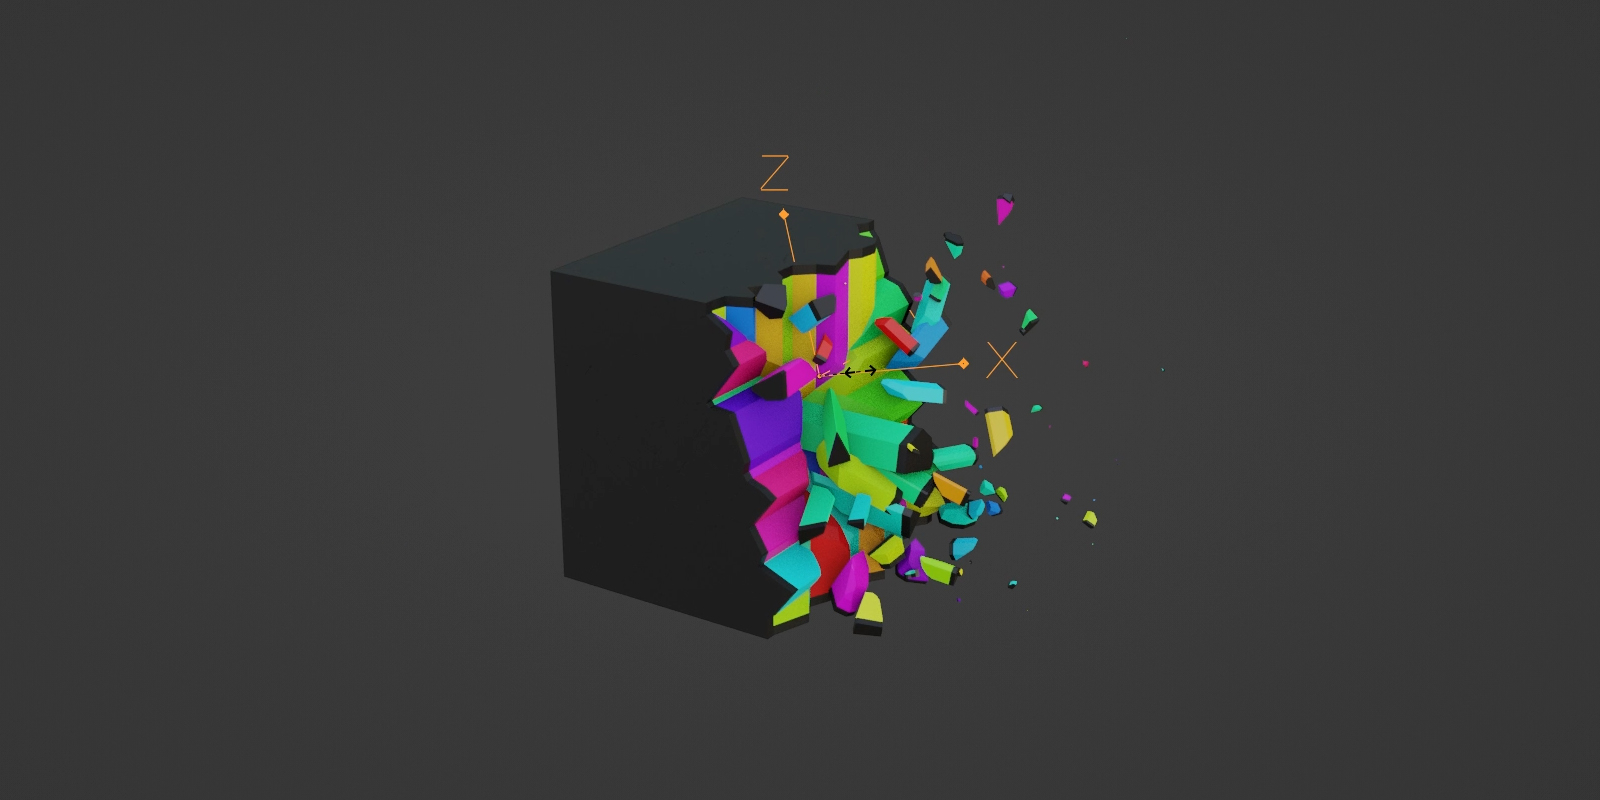
The Collection as Points option allows you to retain the original positions of objects as they are loaded from the collection, which is useful for loading fractured objects.
You can also use Empty Objects, which can be useful for exporting placeholders.
This feature is similar to Blender's Object Offset, but with the added benefit of incorporating randomization and more.
Rarity Settings
New in version 1.1
This feature allows you to control the rarity or frequency of specific instances, adding an element of randomness and variety.
Circular Array
This feature allows you to arrange multiple instances in a circular or radial pattern. It gives you control over the number of the instances, their spacing, rotation angles, and other parameters to customize the arrangement according to your needs.

The Circular Array offers many useful functionalities, including the capability to add, offset, and rotate the rings. Additionally, you have the option to adjust the circle's resolution.
You can rotate the instances along all three axes and also align them to face the center.
When enabled, Adaptive Mode positions the instances based on a specified length rather than a set count.
You also have the ability to scale the Circular Array along both the X and Y axes.
Angle Mode allows you to set the start and end angle of the circle.
In Spiral Mode you can set the height, specify the number of rotations, as well as the starting and ending radius. Turning on Adaptive Height will maintain the height difference when adding rotations.
The Adaptive Scale feature allows you to control the scale variation per each ring. The Circular Array also supports Incremental Offset which in combination with Adaptive Scale can lead to very interesting results.
You can also offset the instances along both the X and Y axes (including randomization).

Here's an example of using the Order Offset setting from the Instance From Object / Collection category to offset the order of the instances on the Circular Array:
This example uses the Delete Range feature from the Delete Geometry category to separate the numbers.
The following Circular Array example takes advantage of the Delete Every n'th feature from the Delete Geometry category to form a clock face.

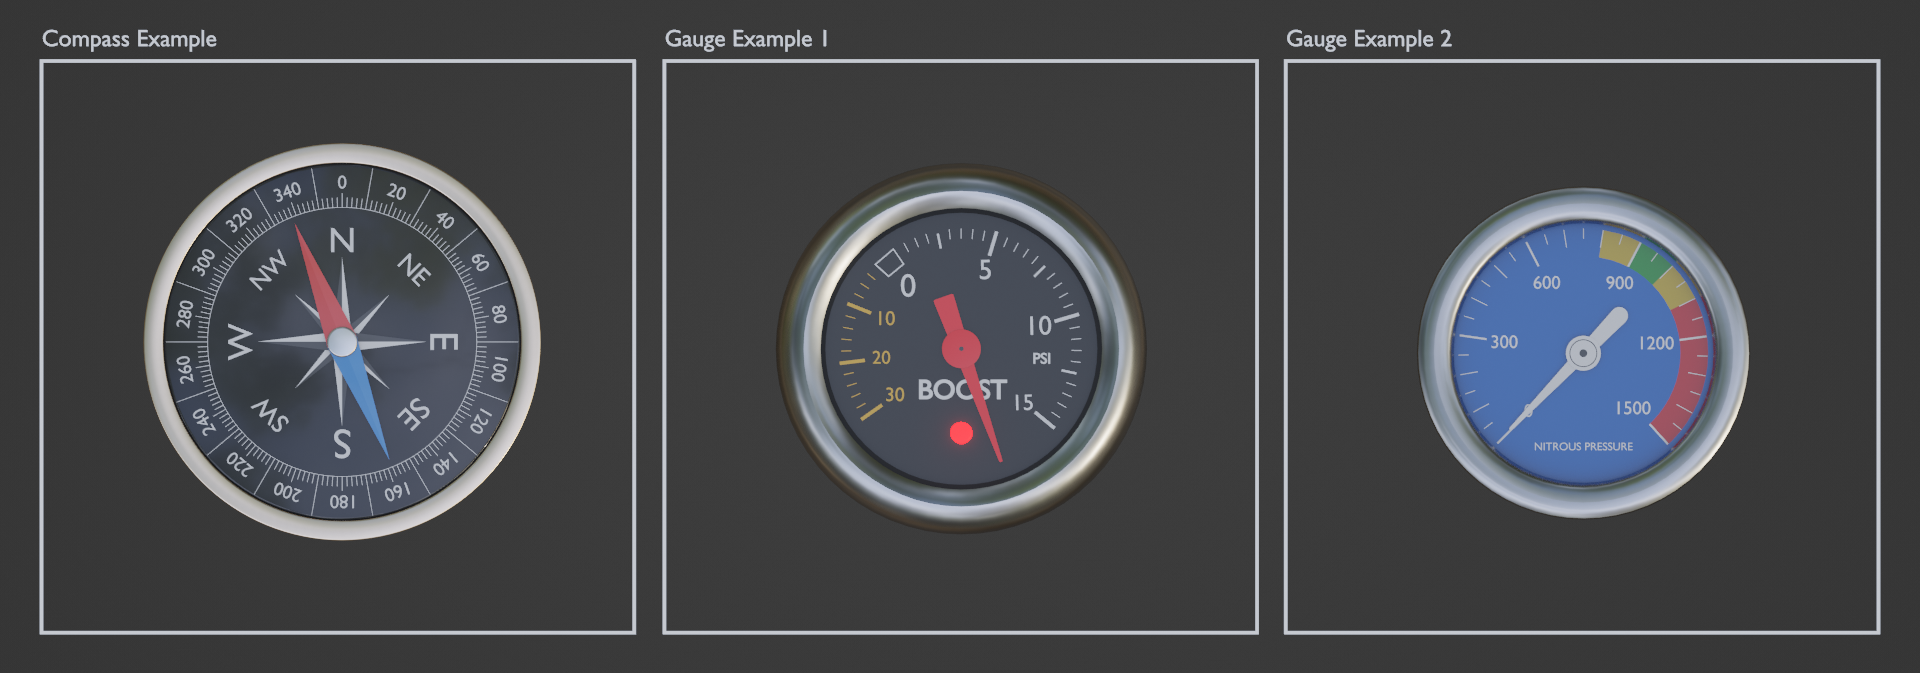
Similar Examples (Included in the example scene)
Compass Breakdown
The Use Object as Center setting can be used to center the Circular Array around the origin point of a selected object.
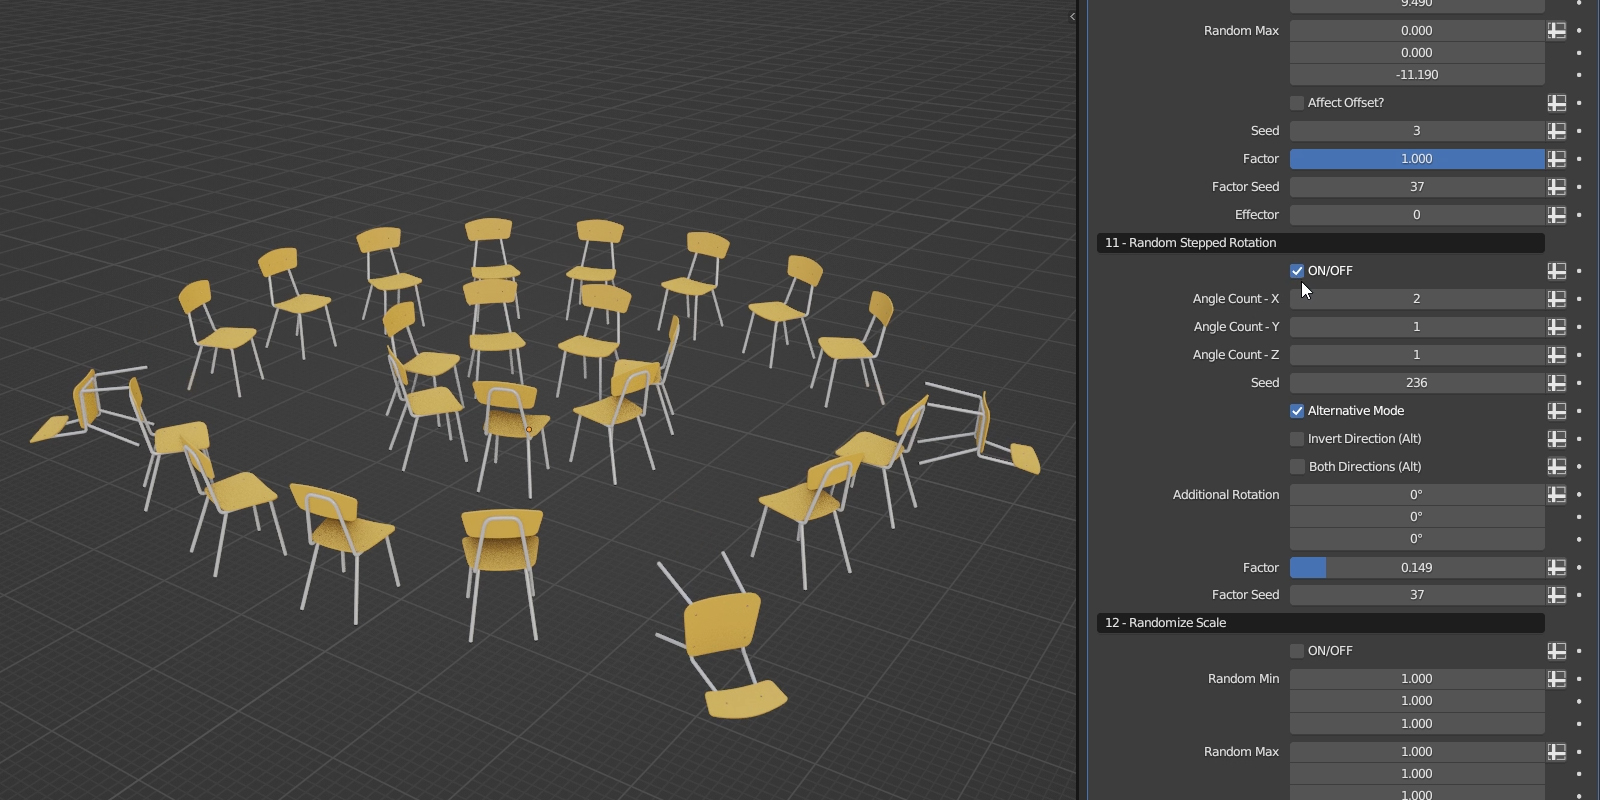
Random Stepped Rotation
This feature allows you to achieve randomized incremental rotations of the instances by specifying the number of angles. It provides a simple and effective way to introduce an element of unpredictability and variation to the orientation of your objects.

You can set different Angle Count for each axis. In this case, the Angle Count is set to 4 on all three axes, giving the following result.
Random Stepped Rotation can be used in many different scenarios such as the following:
This example uses hexagonal objects with the Angle Count set to 6.
Here's an example of using Random Stepped Rotation with Instance on Object.
The Factor setting enables you to control the number of affected instances, and you can also modify the Factor Seed.
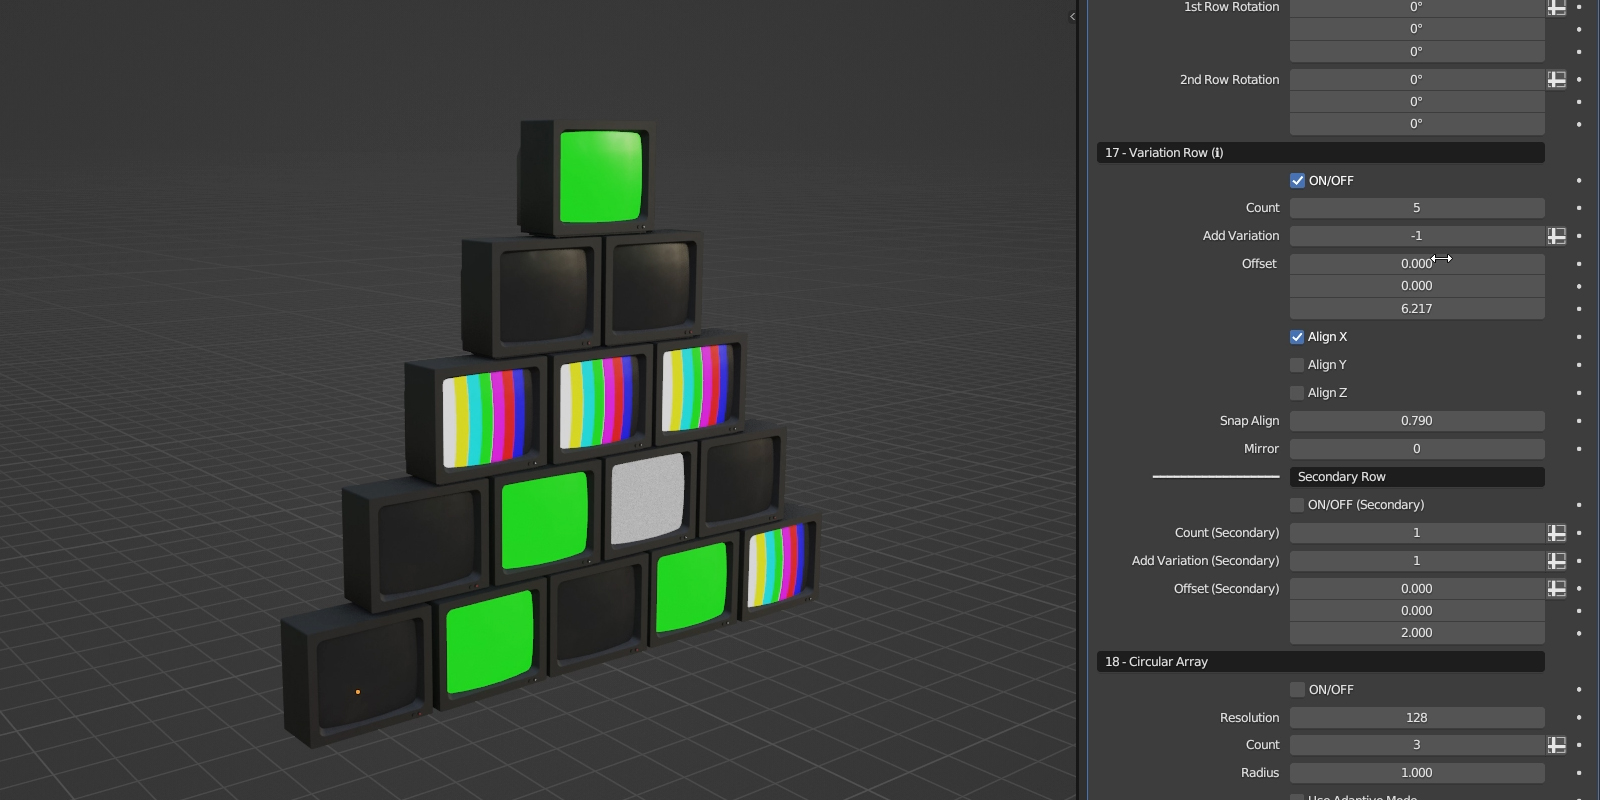
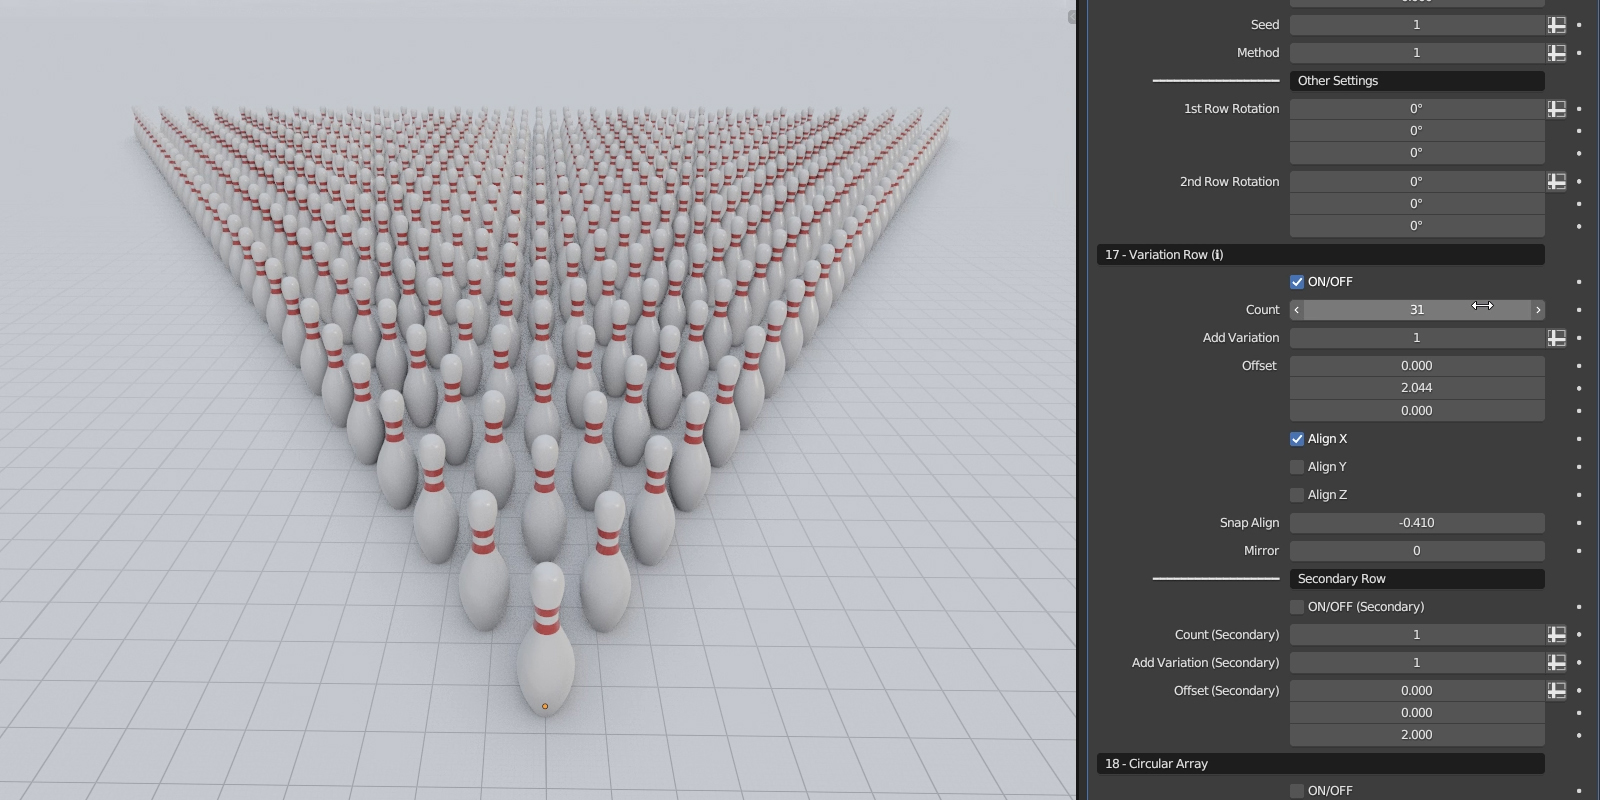
Variation Row
This handy feature lets you increase or decrease the number of the instances within each subsequent row you add, and it also provides convenient alignment settings.

Variation Row Examples
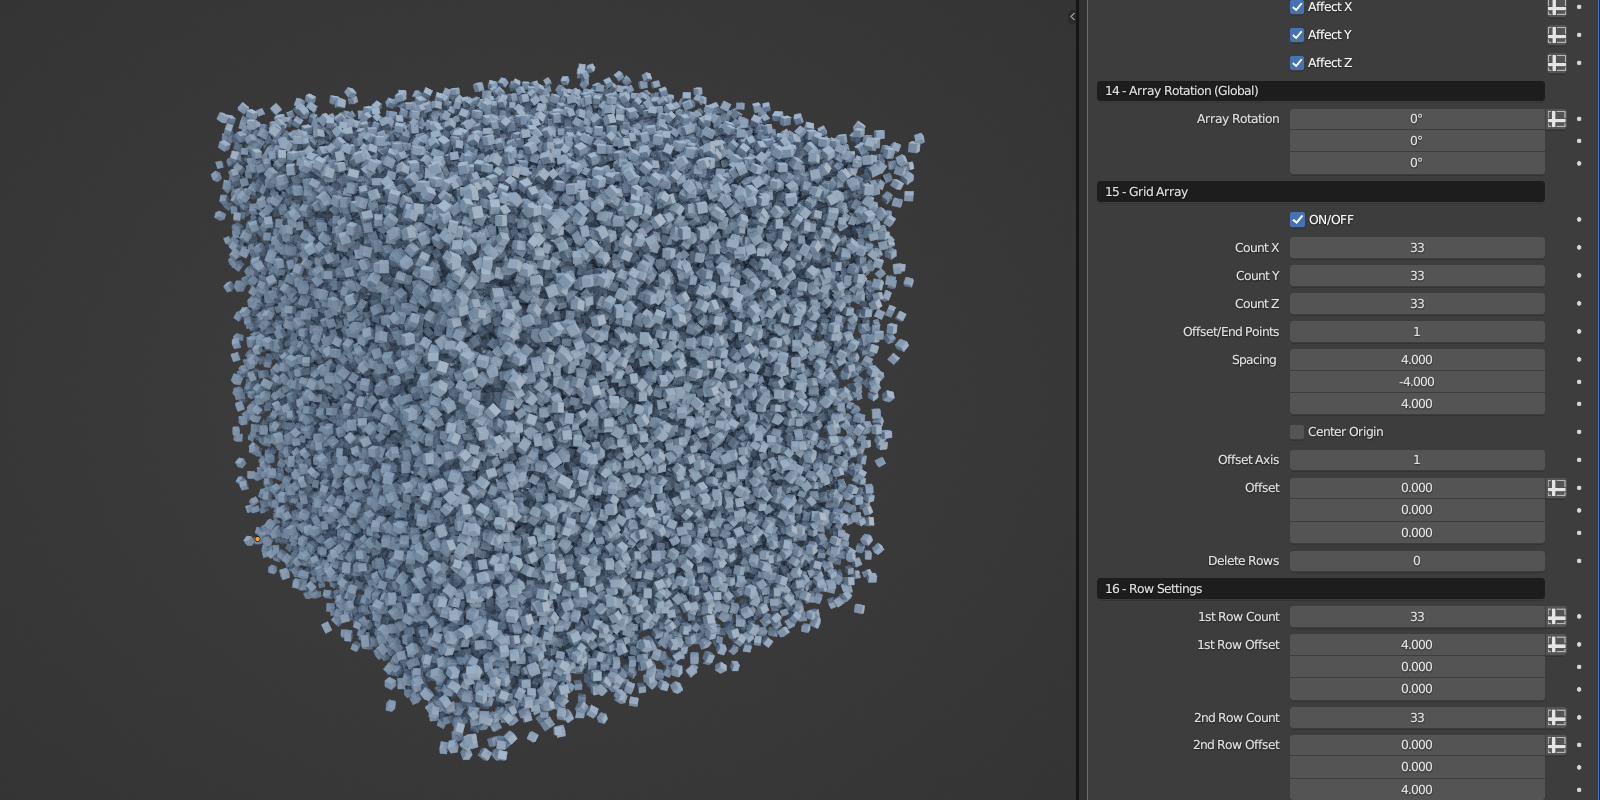
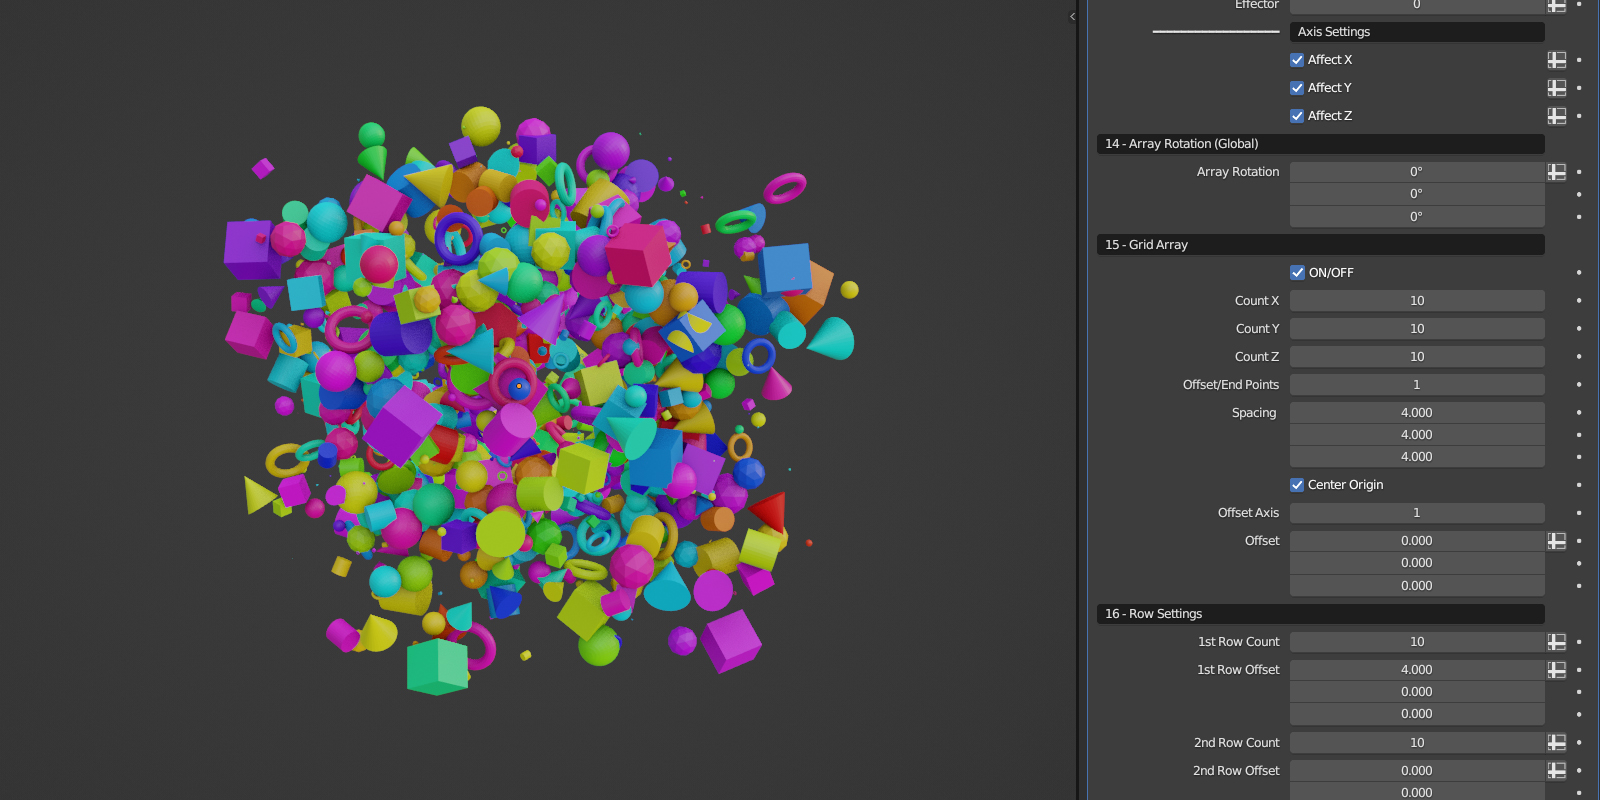
Grid Array
This feature allows you to create a grid-like arrangement of the instances. It enables you to specify the number of rows, columns, and layers of the instances, along with controls for spacing and offsets. It provides you with a convenient way to generate arrays of objects in a structured manner.
You can also create either checker or staggered patterns by adjusting the offset.
The Center Origin option demonstration.
Examples of using Grid Array in combination with the randomization features.

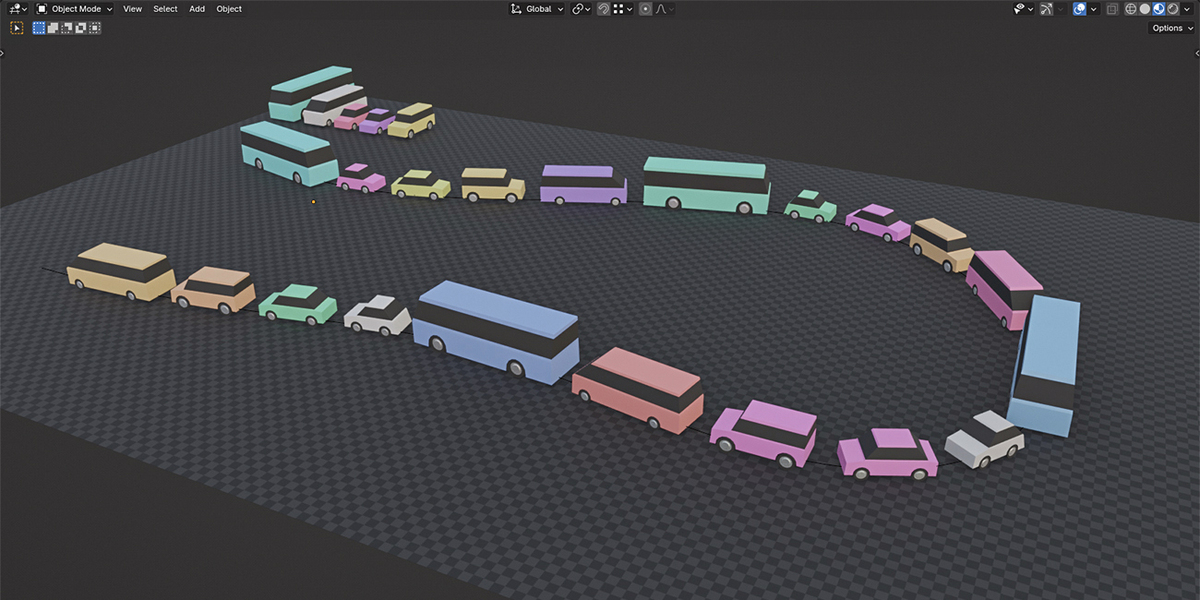
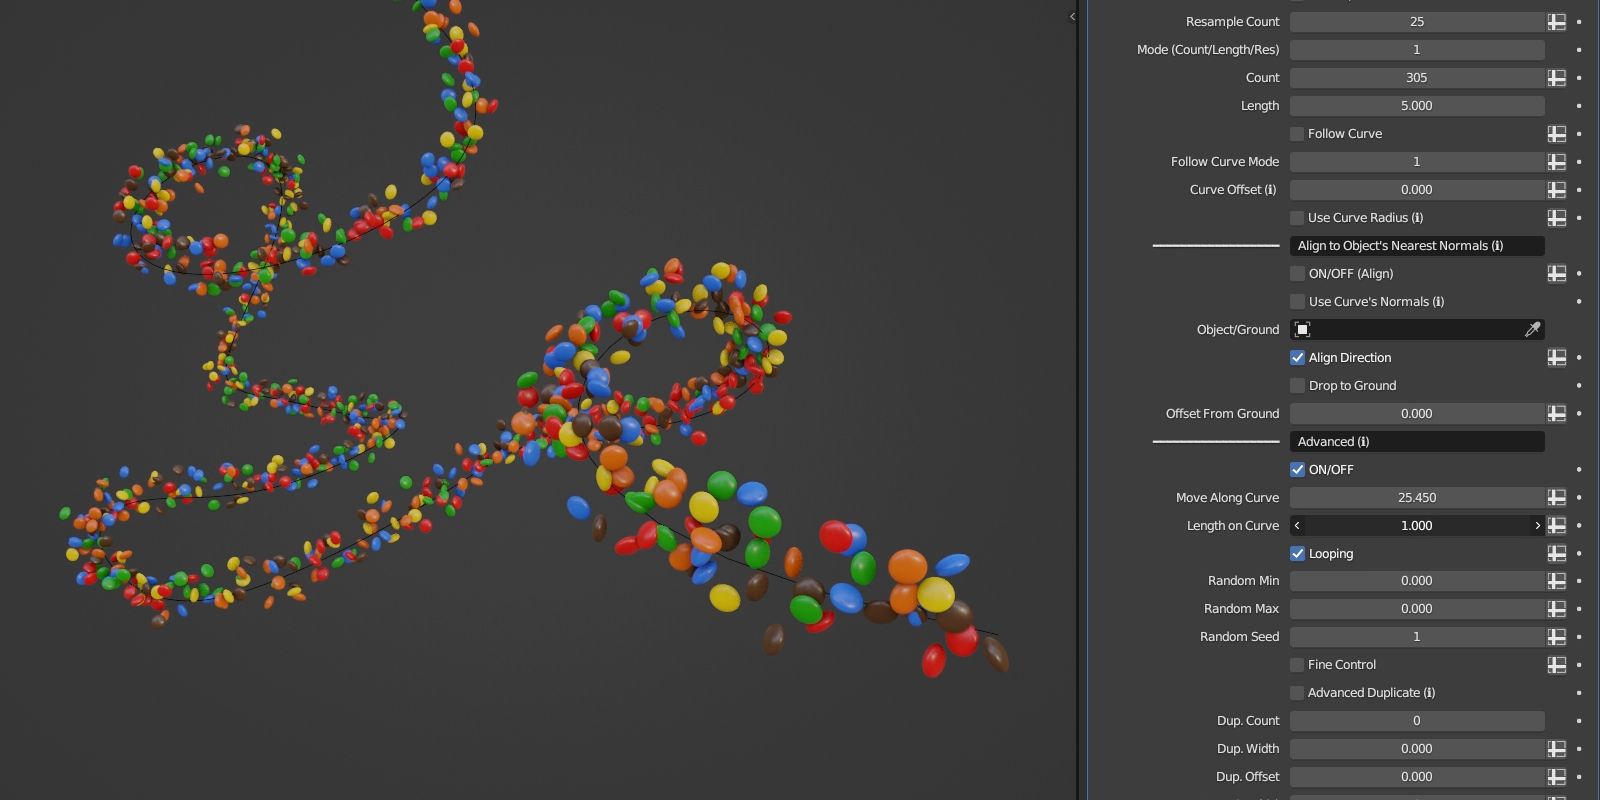
Instance Along Curve
In this category you'll find a set of powerful and essential features designed for the precise distribution of the instances along a curve. You have a wide array of features ranging from advanced alignment to numerous duplication options. These features can be used in many different scenarios and will save you a lot of time.
Instance Along Curve has three modes for distributing the instances along a curve: Count, Length, and Resolution, all of which are demonstrated below.
A demonstration of Count and Length Modes on multiple splines.

You have various duplication settings, the ability to adjust the start and end points of the curve, you can also offset the instances (including randomization) along the curve's normals across all three axes.
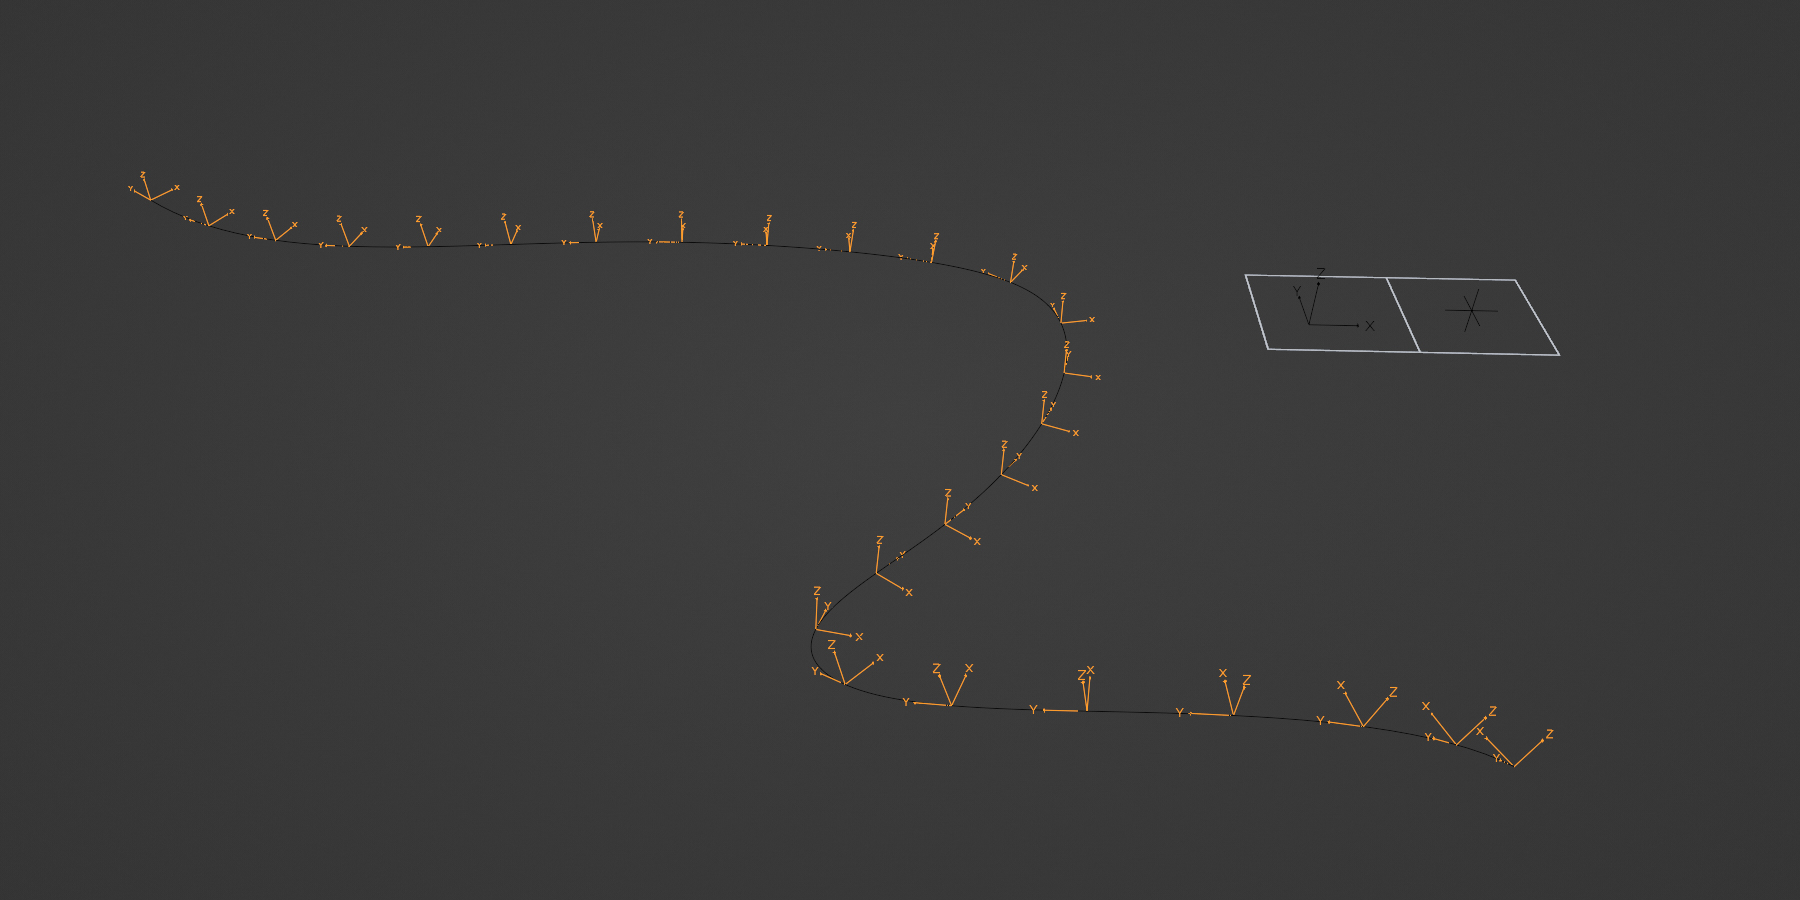
Instance Along Curve offers multiple Follow Curve modes. The Z Only mode is especially useful for objects like light poles.
This is a very useful feature that allows you to align the instances to the nearest normals of a selected object. Additionally, you can use Align Direction to match that of the curve.
New in version 1.1 - You can control the pitch axis of the rotation of the instances. This option also supports randomization, which helps create more natural results.
You can use the curve radius to control the scaling of the instances, with two available modes: Constant and Variable.
Stadium Seats Example
Mesh to Curve is used to convert a mesh to a curve. Additionally, you can utilize a vertex group to convert only selected parts of the mesh.
When combined with the Delete Geometry features, you can achieve the following results:
Instance Along Curve has all the essential options you need for effectively working with Hair Curves.
You have two different duplication modes that allow you to duplicate either the points or the spline.
The Advanced mode allows you to move the instances along the curve (including randomness) and change their length along the curve. You'll also have the option to enable looping of the instances along the curve.

When duplicating instances, you have the option to offset them from center.
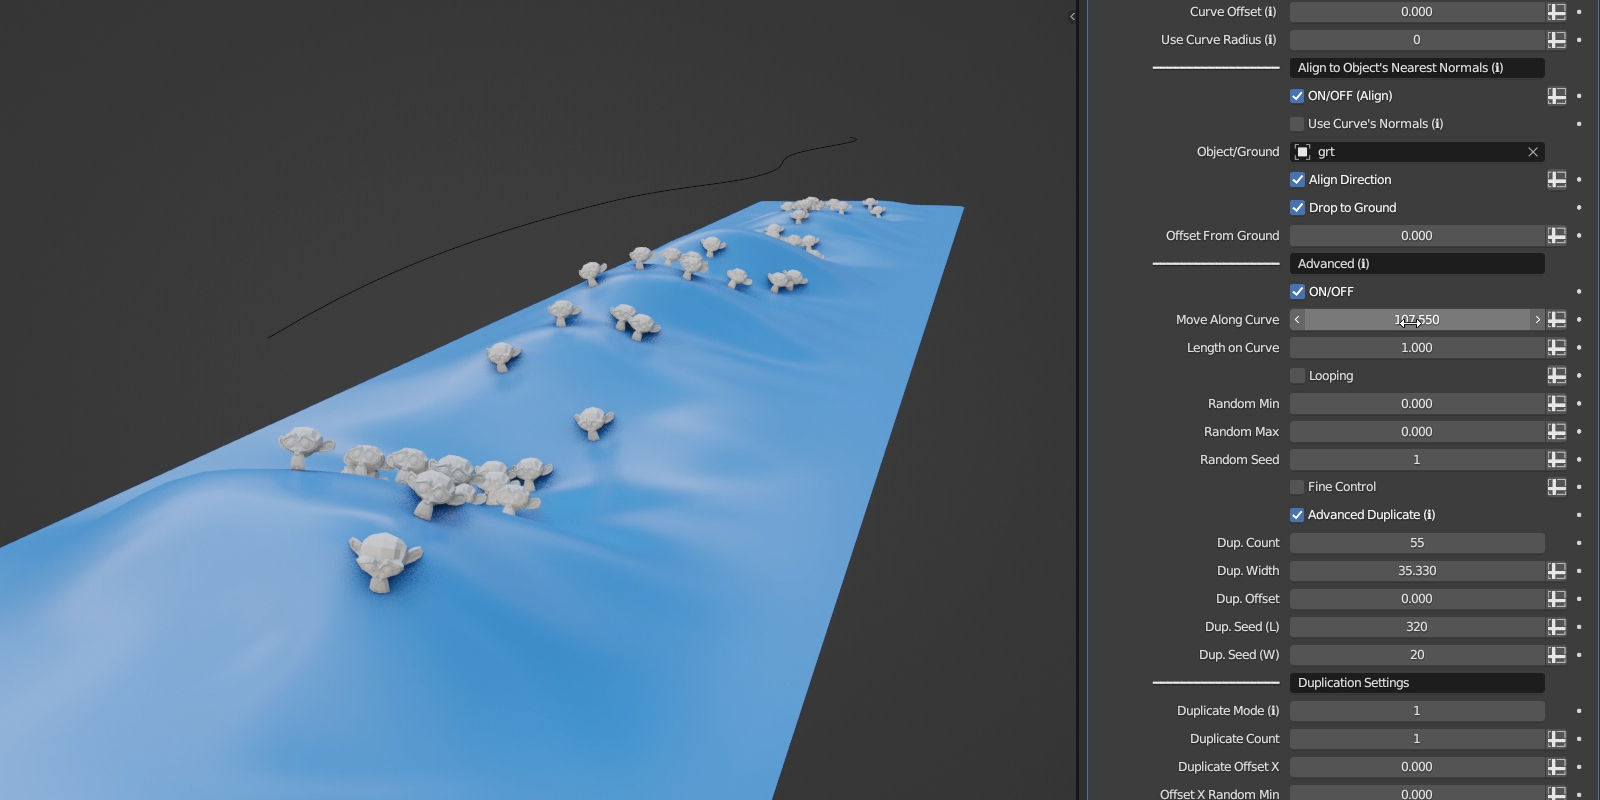
The Drop to Ground function lets you place the instances onto the chosen ground object beneath the curve. Additionally, the instances can be aligned with the ground.
New in version 1.1 - The Use Grid Array allows you to use Grid Array geometry as instancing points. This feature is useful in combination with the Drop to Ground function.
When in Advanced mode, you have the option to use Advanced Duplicate, which allows you to randomly duplicate the instances along the curve. You can change settings such as width and offset, and you also have separate seed values for both length and width. This feature can be useful for creating crowd formations.
Instance on Object
This category contains a variety of useful features that allow you to precisely position the instances on the surface of a selected object. Within this category, you'll find different distribution modes, duplication settings, and other essential tools to enhance your control over the placement process.
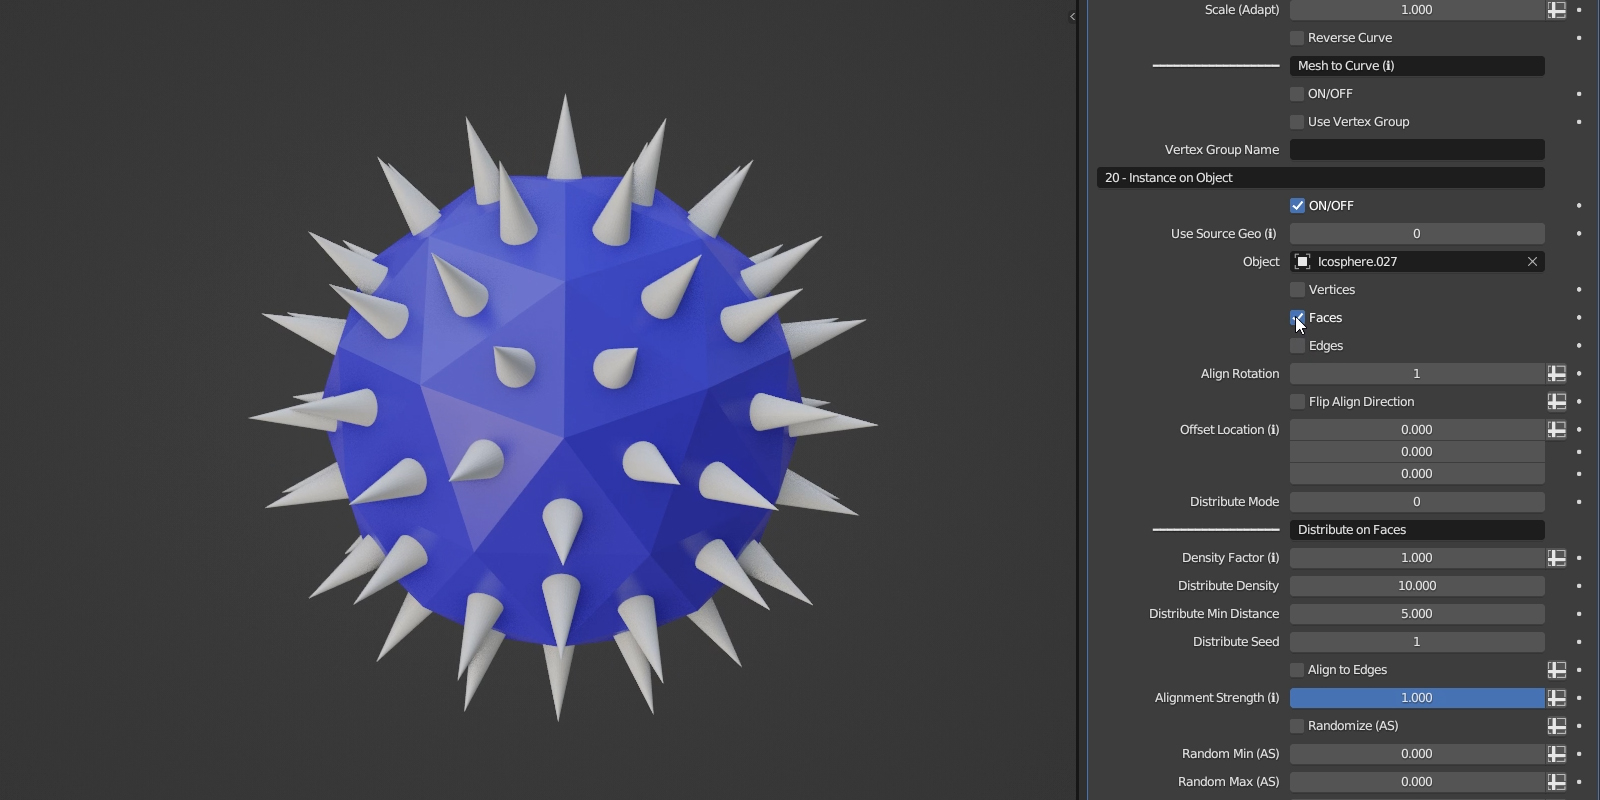
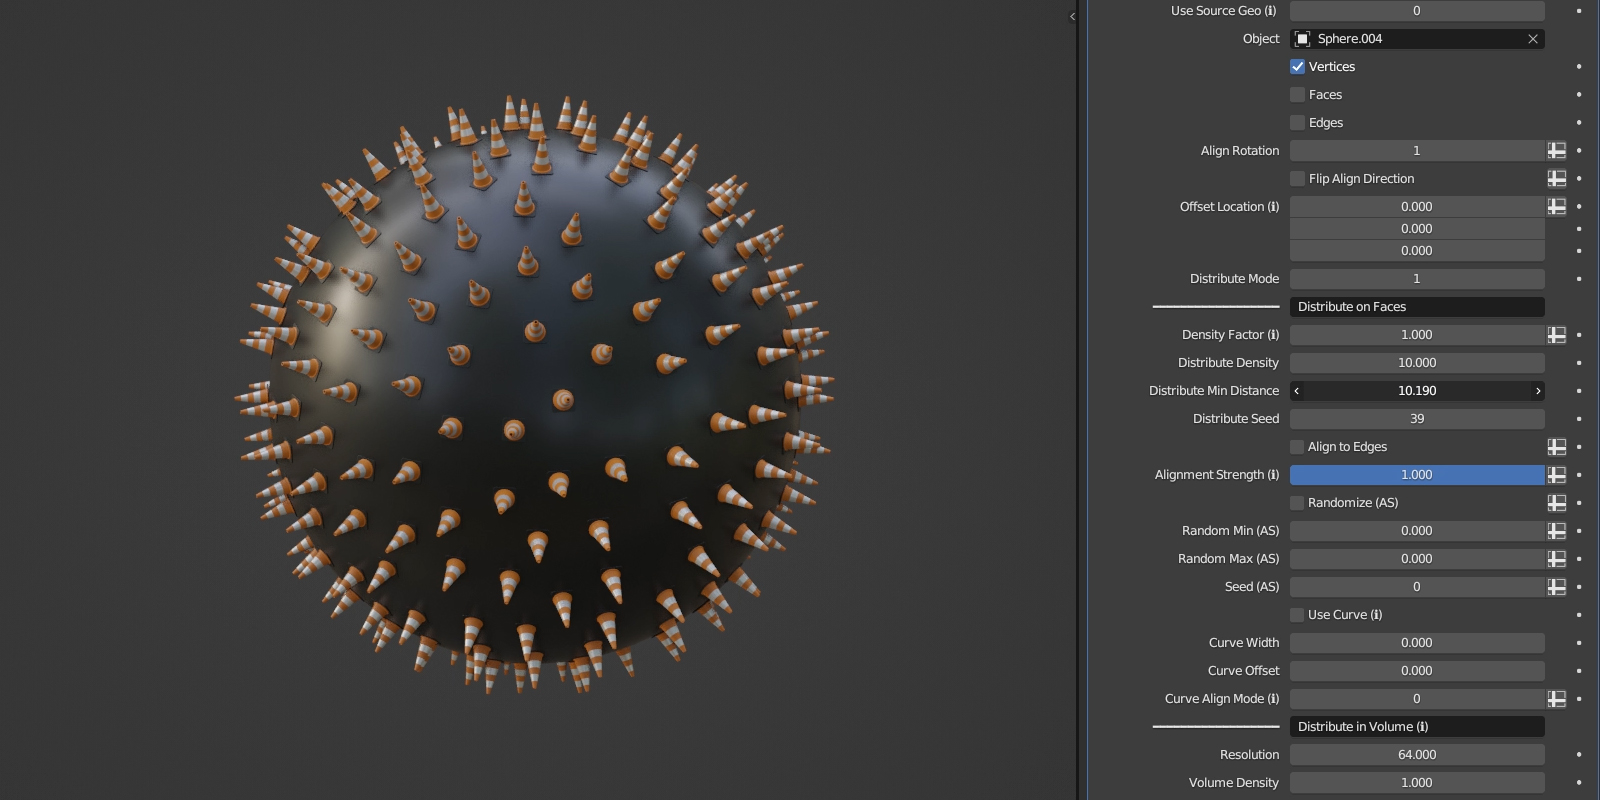
The instances can be positioned on different elements of the object, specifically on vertices, faces, and edges. Additionally, you can align the rotation and offset the instances along the surface normals of the selected object.
The Distribute on Faces mode allows you to randomly distribute the instances on faces of a selected object. You can also set a minimum distance between the instances, modify the density, and adjust the seed for further variations.
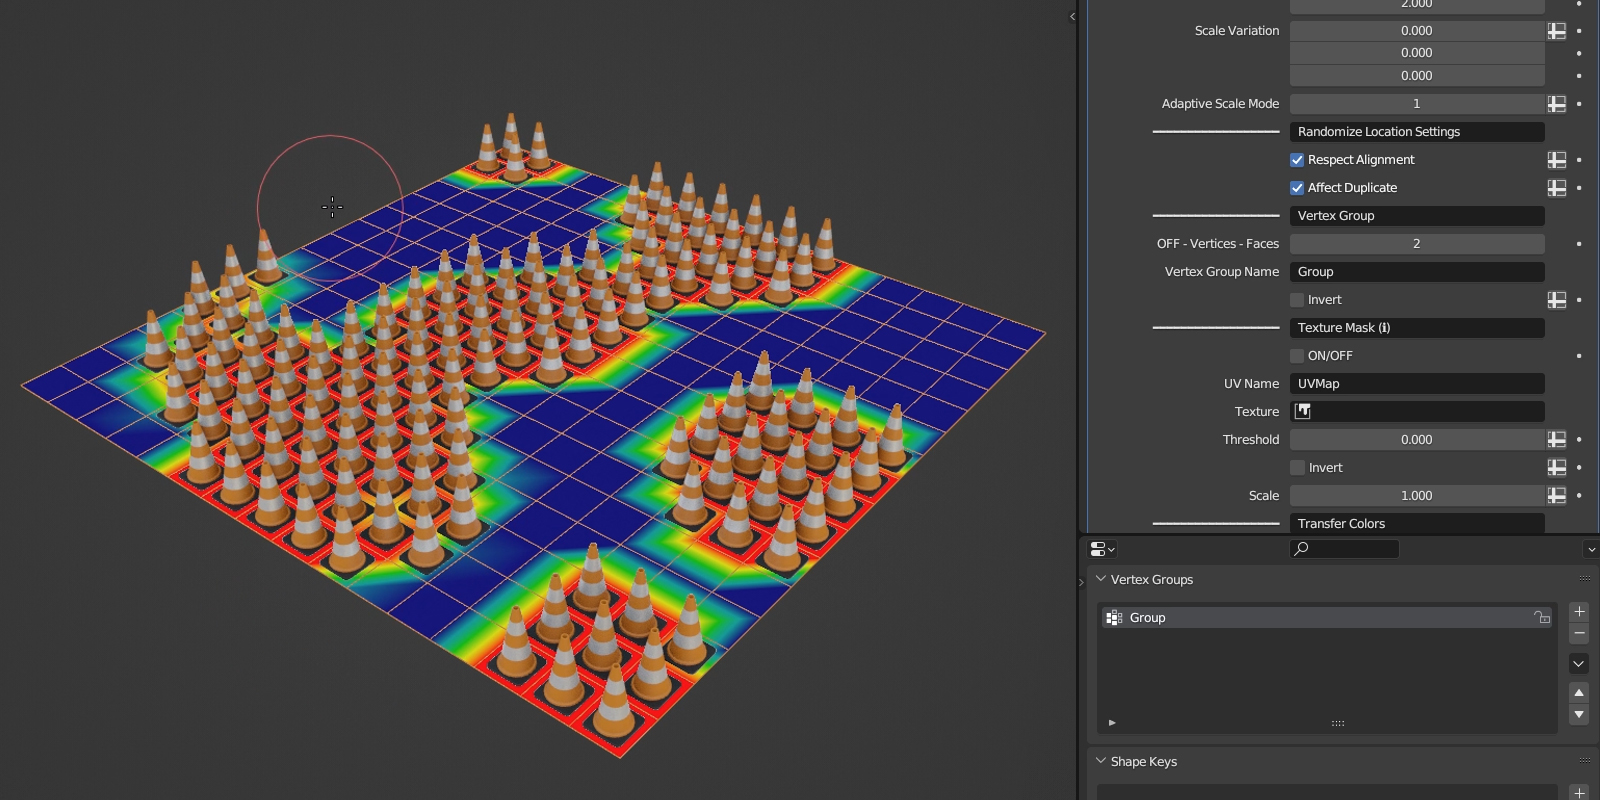
When using the Distribute on Faces mode, you have a Density Factor setting which also allows you to utilize a weight paint / vertex group for precise control over the distribution of the instances.
Additionally, the Distribute on Faces mode has the option to adjust the alignment strength. This option also supports randomization to achieve more natural results.
You can duplicate the instances and offset them along the surface normals of a selected object. It's also possible to control the scale variation of the duplicated instances.
You can use a vertex group or a weight paint to precisely control the placement of the instances.
You also have a feature that allows you to adjust the scale of the instances to match the surface area of a chosen object's nearest face.
An example of using the Distribute on Faces mode on a beveled curve.
The placement of the instances can also be controlled by using a mask texture. You can also adjust the threshold and scale the instances based on the values of the mask.
A demonstration of the randomization features.
You have two different modes for aligning the rotation of the instances.
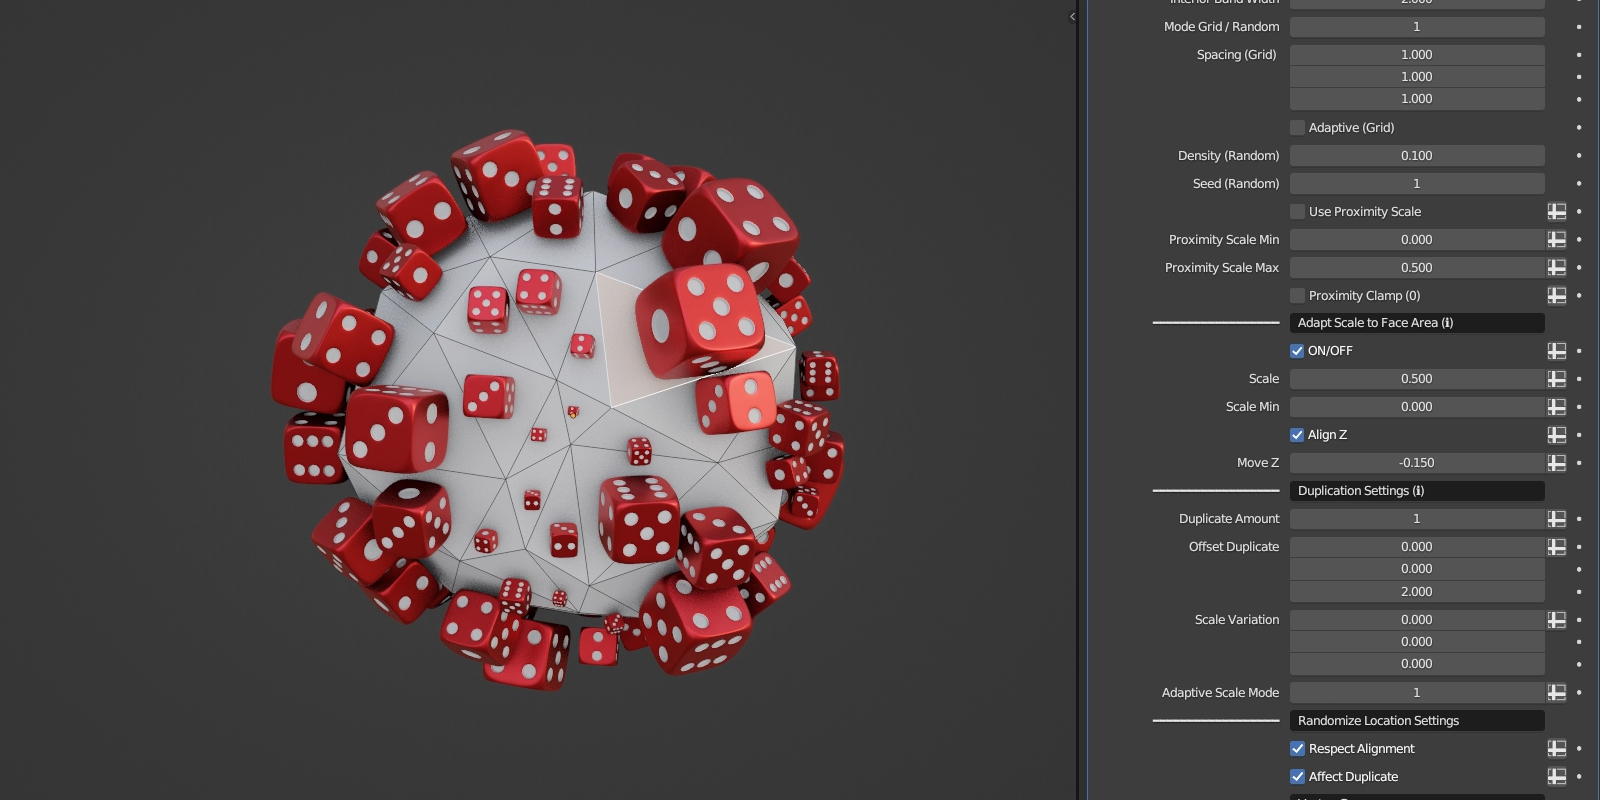
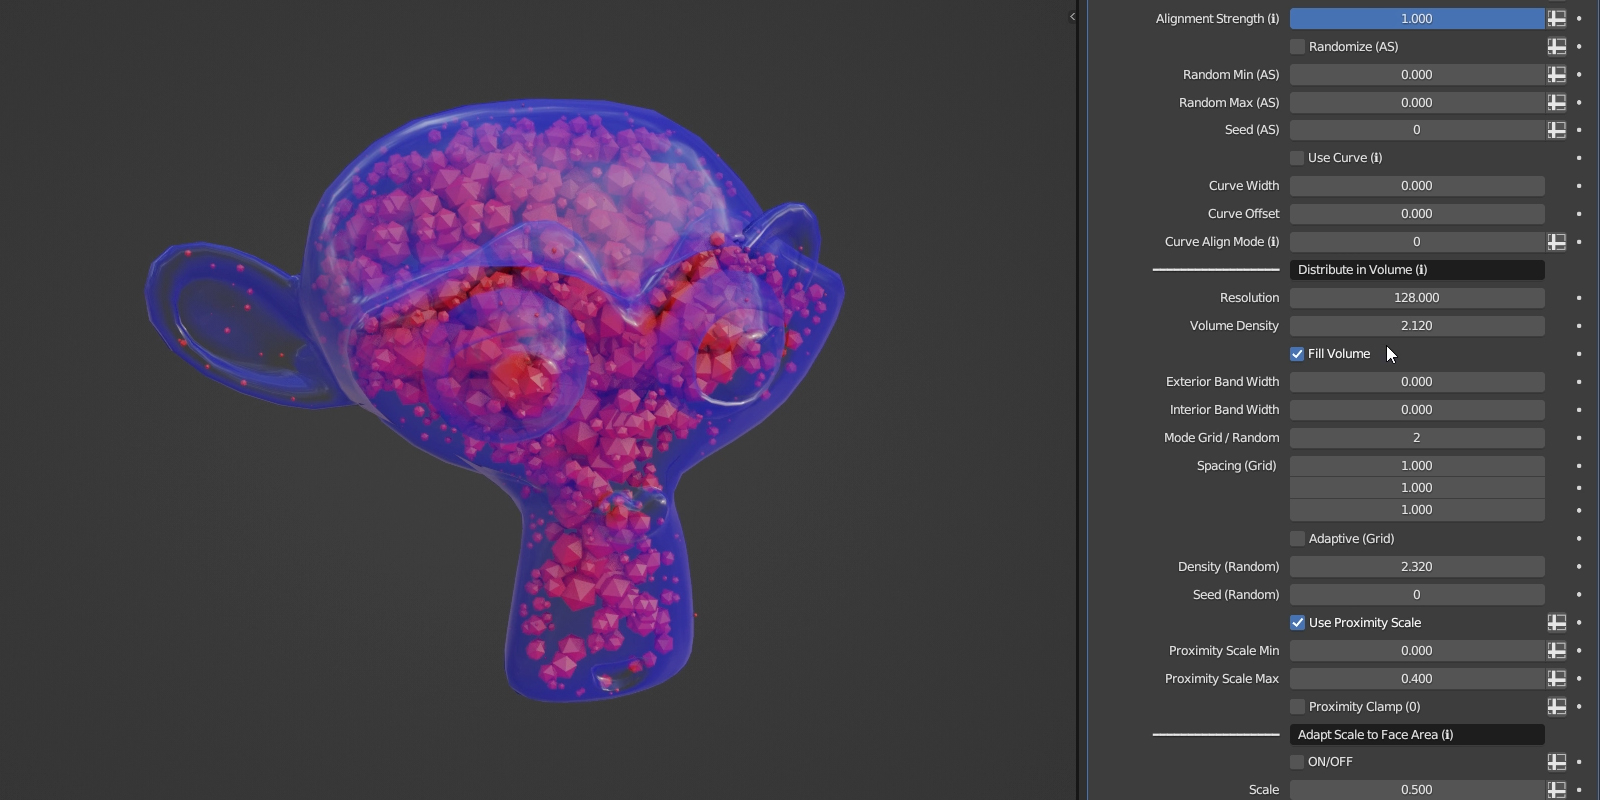
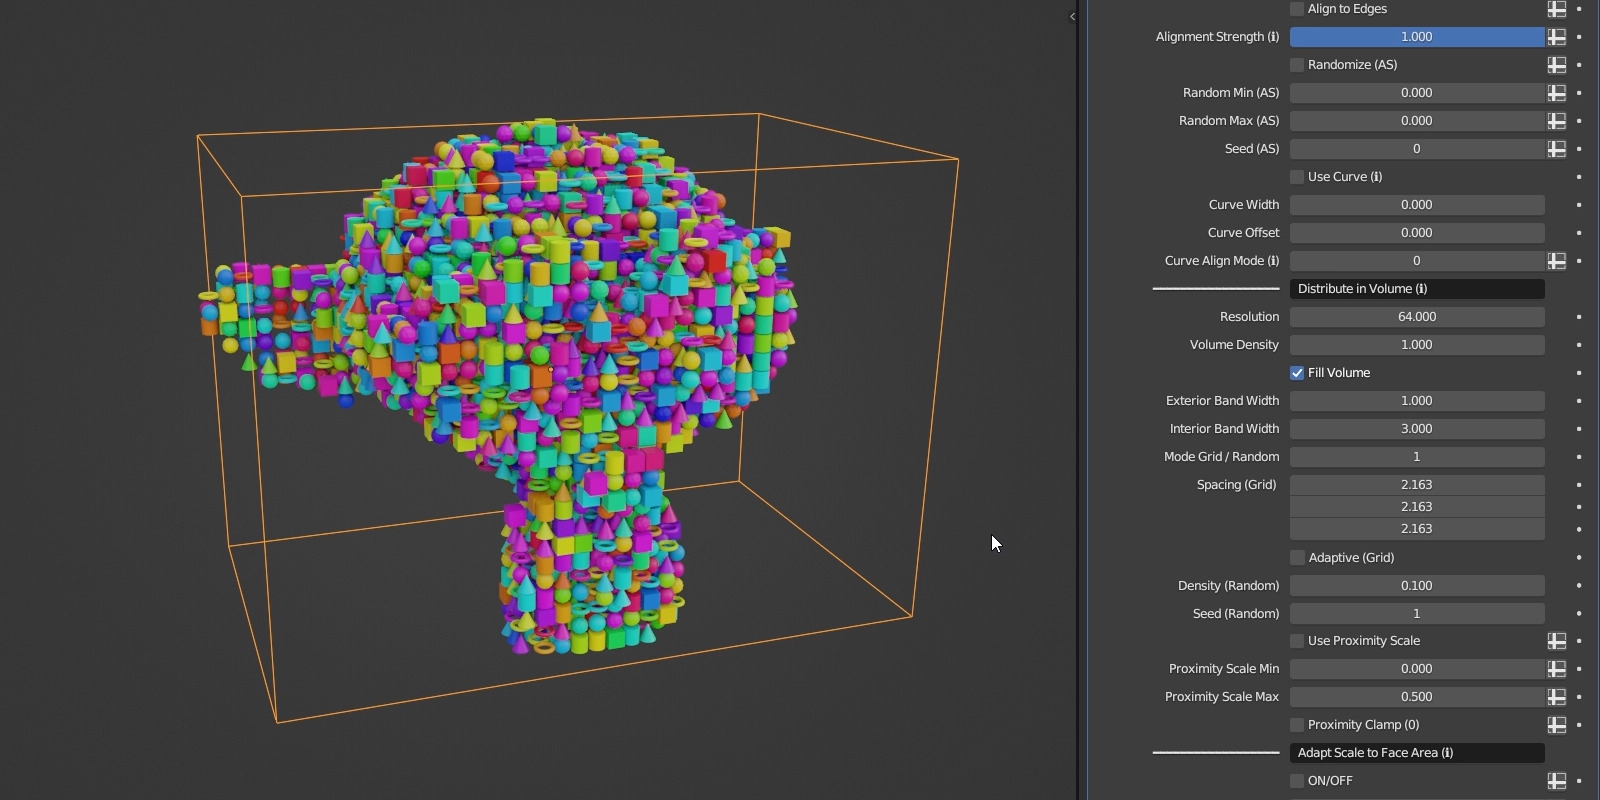
You also have the Distribute in Volume mode that allows you to distribute the instances within the volume of a selected object. It has two available modes: Grid and Random.
The Distribute in Volume mode can also be used on planar objects.
In the Distribute in Volume mode, you have the Proximity Scale option that allows you to control the scale of the instances that are close to the bounds of a selected object's volume.
The Align to Edges option lets you align the instances to the direction of the nearest edges when using the Distribute on Faces mode.
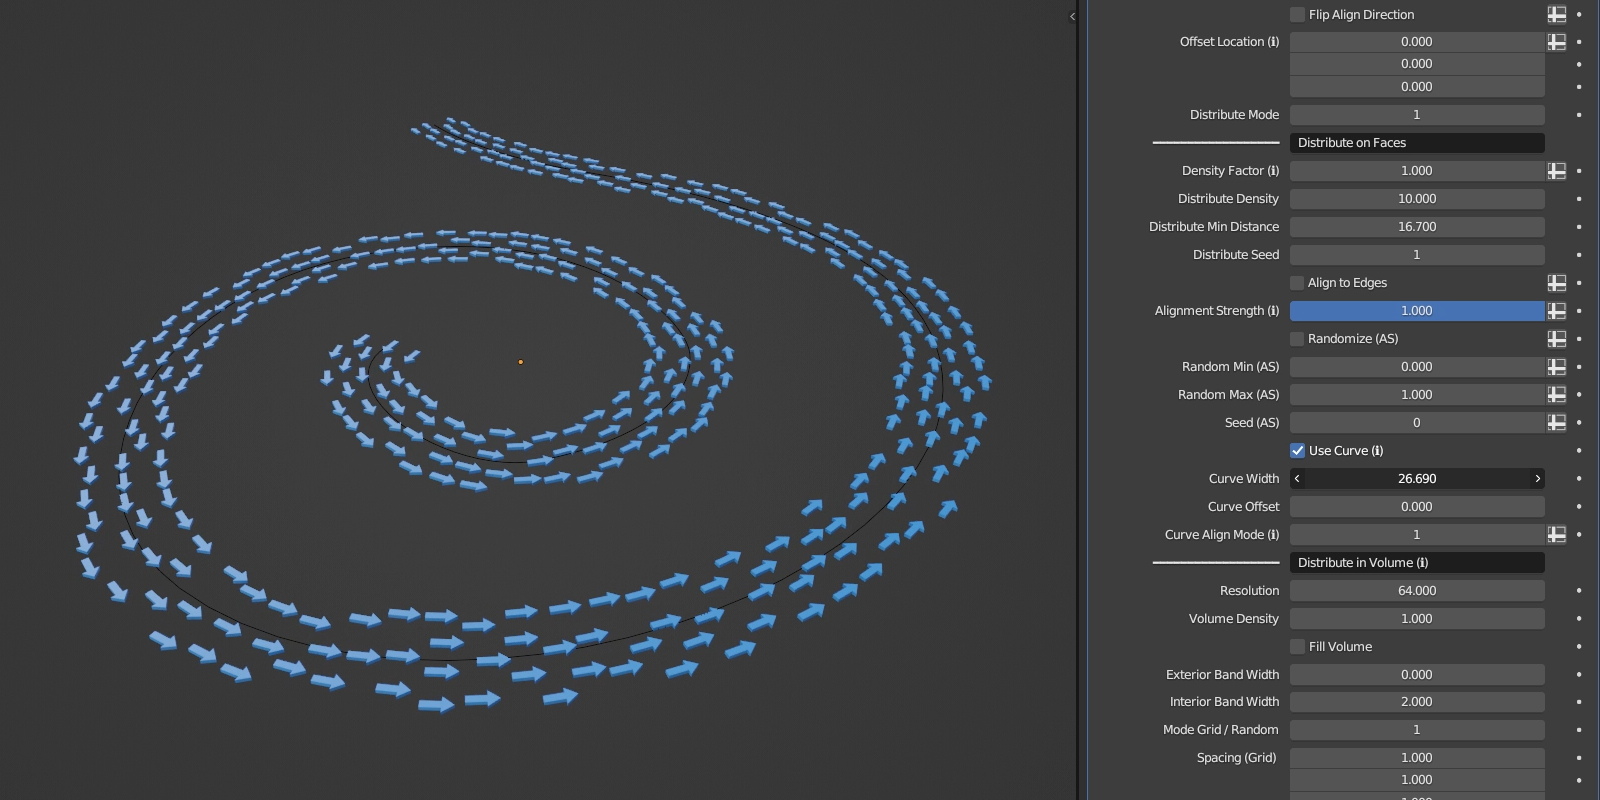
The Use Curve mode enables you to distribute the instances along a selected curve's surface when using the Distribute on Faces mode. You can adjust the width of the surface, offset it, and choose from various alignment modes.
New in version 1.1 - The Use Curve mode now has the option to position and align the instances with the ground.
New in version 1.2 - With the Z-Normal Distribution, you can now distribute instances based on the vertical angle of faces.

New in version 1.3 - You can now add variation when duplicating instances. Additionally, you can adjust the seed and choose the direction of duplication.
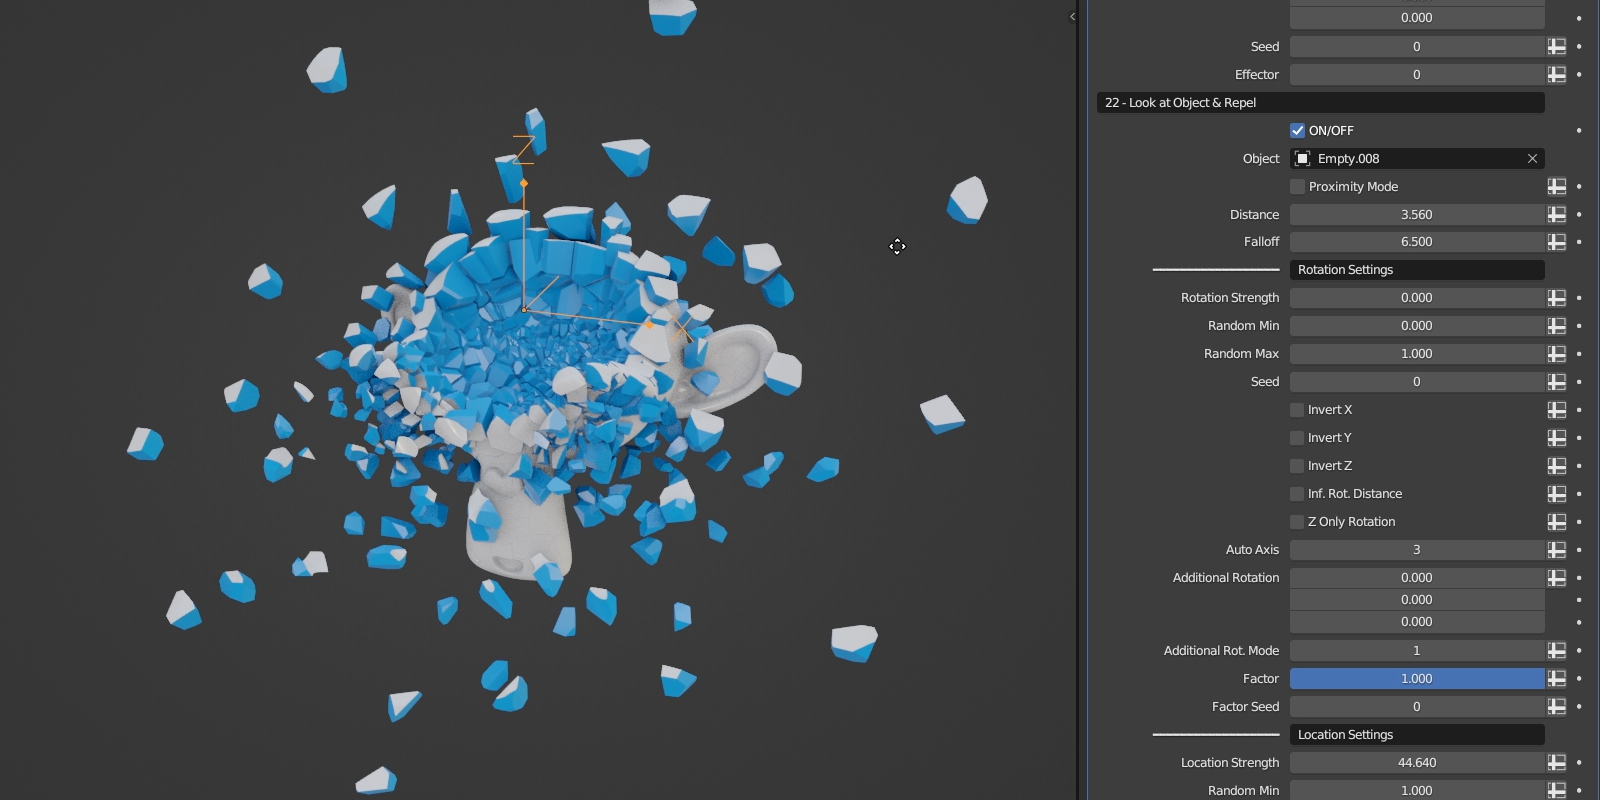
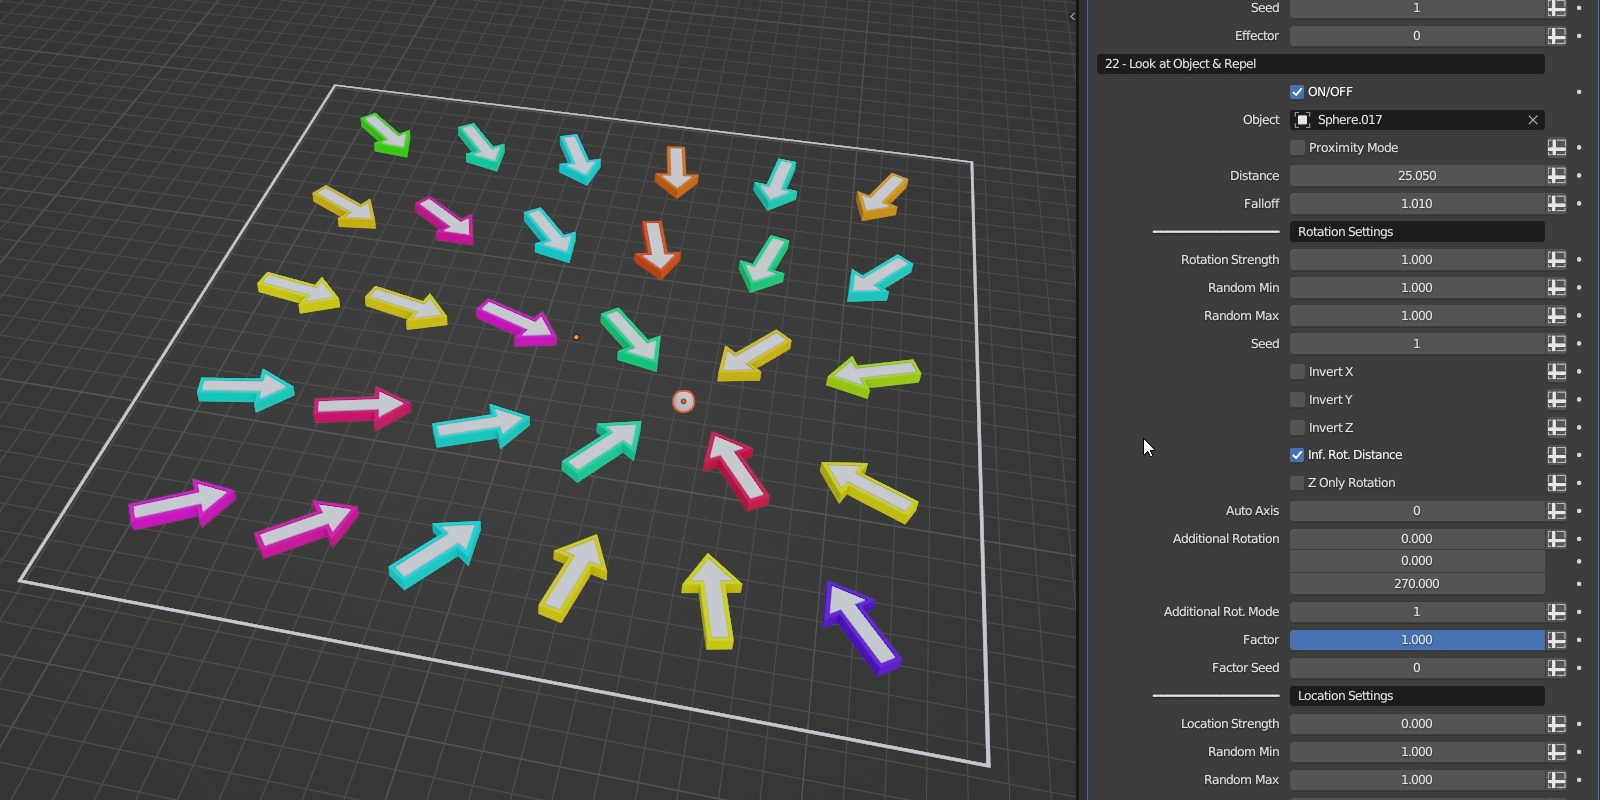
Look at Object & Repel
In this category you have the features that allow you to align the orientation of the instances toward a specified target object, as well as control the repulsion and attraction forces. It has a wide range of applications.
You have the option to restrict the rotation to the Z-axis only, as well as the ability to control the number of affected instances.
You can precisely control the repulsion of the instances, add randomness and choose affected axes. You also have different modes to help you achieve various effects.
When combined with the Collection as Points feature, you can achieve the following result.
Here are some additional examples of what you can achieve using these features.


The Proximity Mode allows you to utilize the entire geometry instead of a single point.

(Using Instance on Object)
(Using Instance Along Curve)
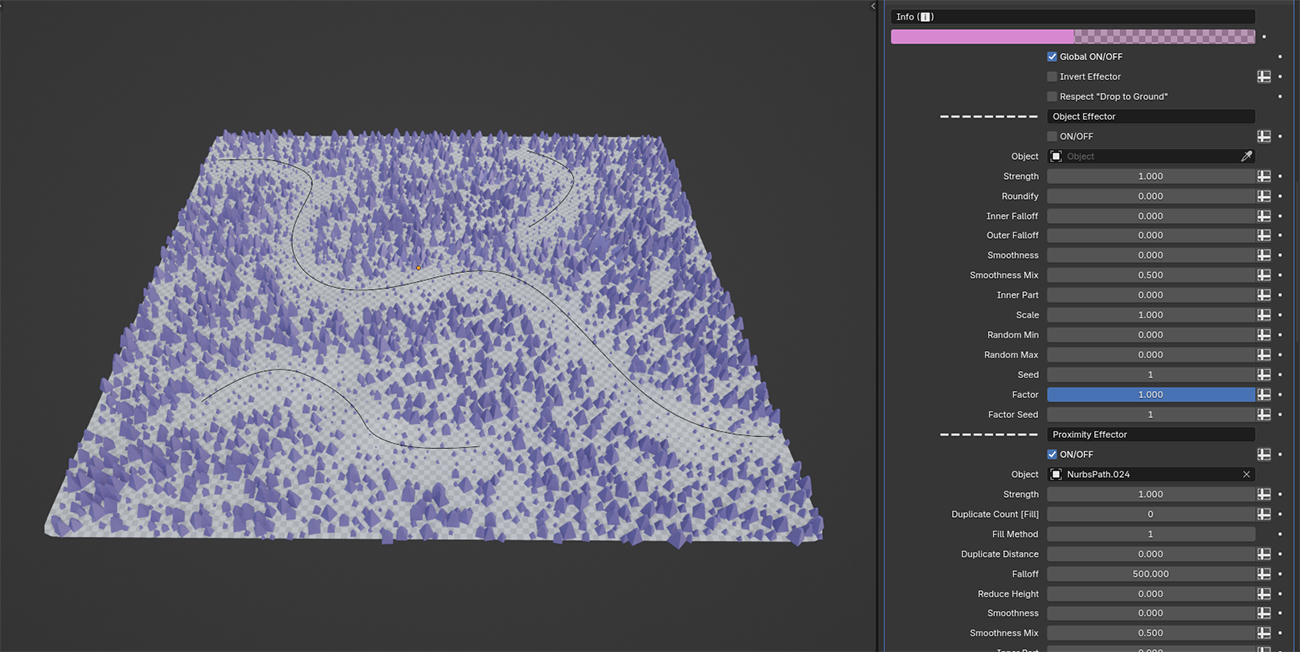
Effector
Effectors offer a wide range of possibilities for controlling instance properties, such as position, scale, and rotation.
Most of the transformation features within Advanced Array Tool support the Effector. The Effector switch has the following modes: ON, Effector Only, and Noise Only.
The AAT features the following effectors: Linear, Object, Proximity, and Noise. You can modify strength, adjust falloffs, introduce randomness, and more.
Linear Effector
Object Effector
Proximity Effector
Additionally, there's the Noise which allows you to influence the instances using a procedural noise texture. It can utilize image textures, be combined with other effectors, and offers various settings to help you achieve your desired effect.
Noise
(Using Collection as Points)
(Using Collection as Points)
Delete Geometry
Within this section, you'll find a range of features dedicated to precise instance deletion. Each feature also comes with the invert option, making it possible to selectively separate the instances.
The Delete Every n'th feature allows you to delete the instances at regular intervals. Additionally, it includes an option called n+i that enables you to control the deletion pattern more precisely by specifying the interval and increment.
Delete Range is a useful feature that lets you delete the instances based on the selected range of indices. The Invert option is also available.

The Random Delete Amount setting lets you randomly delete the instances. You can also invert the result and modify the seed.
Object Delete allows you to delete the instances using an object, you can add randomness and roundify the object. Proximity Mode allows you to use the entire geometry instead of a single point.

Texture Delete allows you to delete the instances using either a procedural noise texture or a custom image texture.
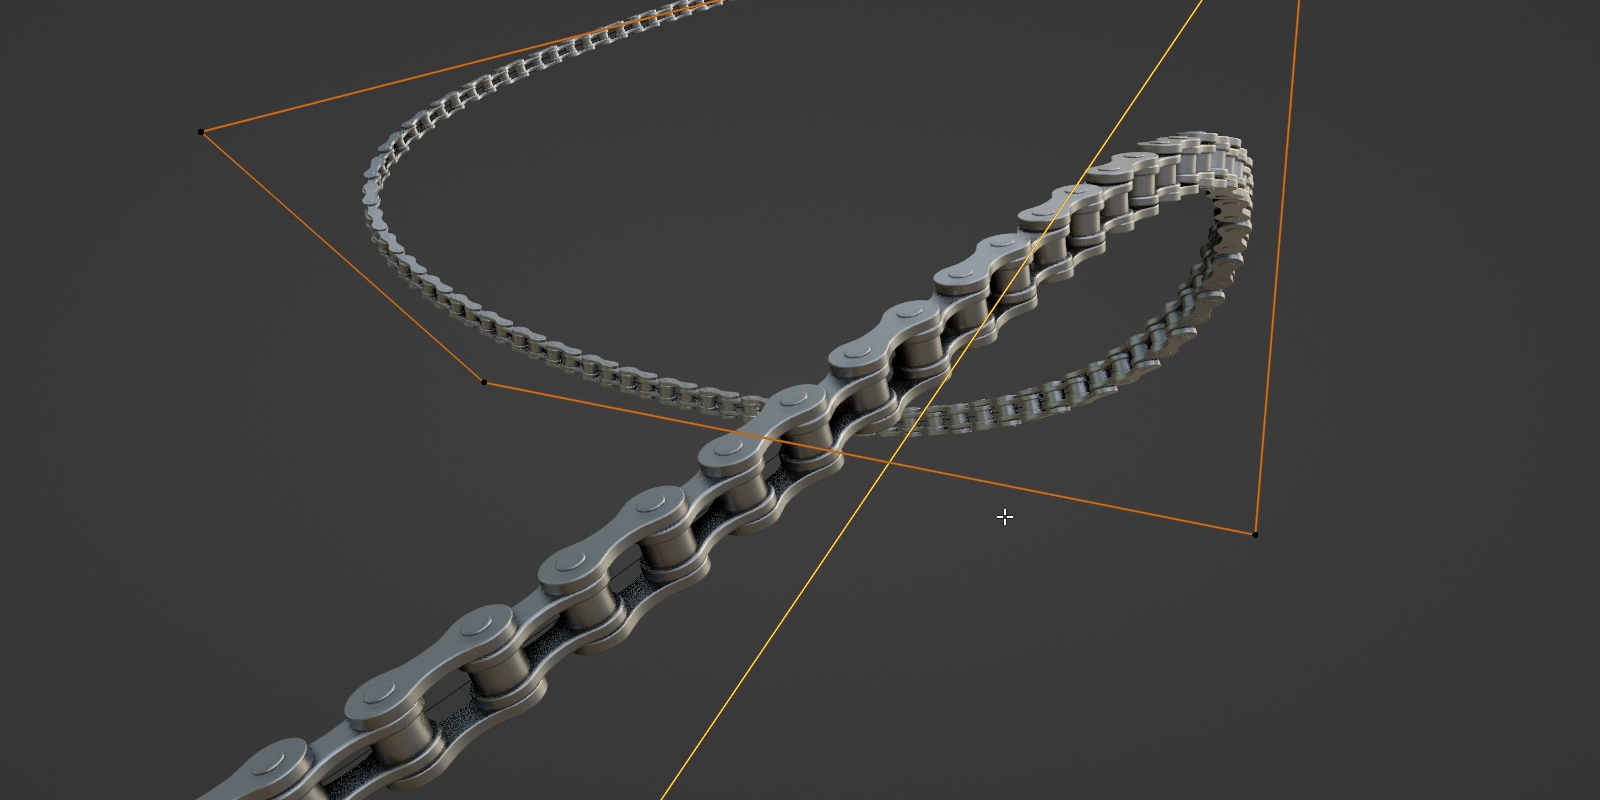
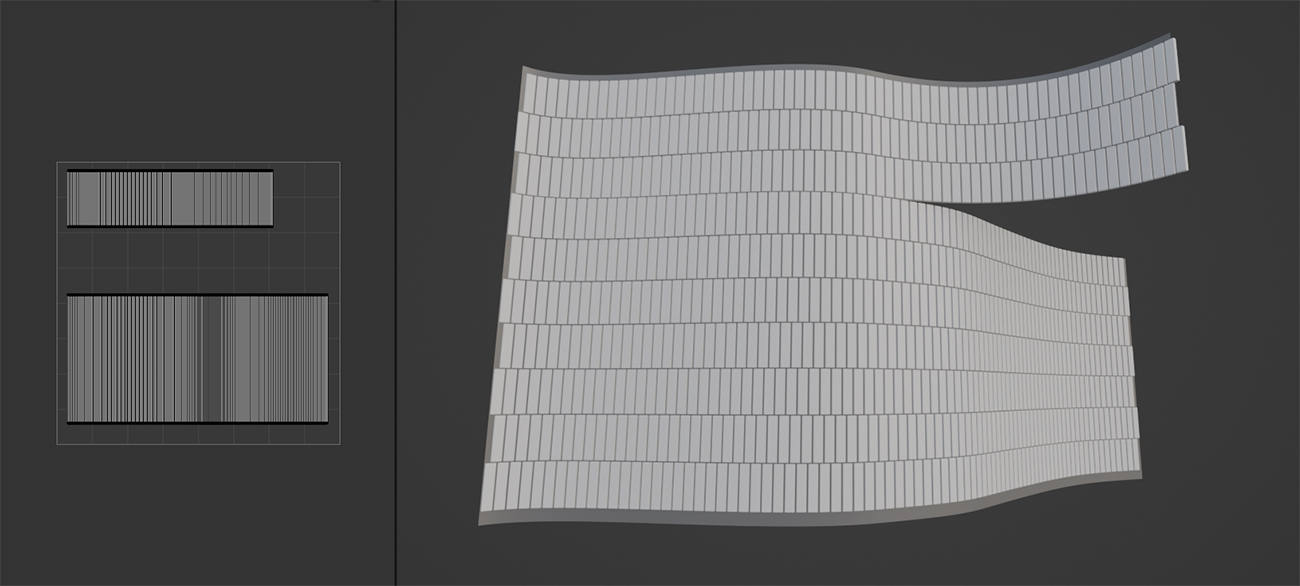
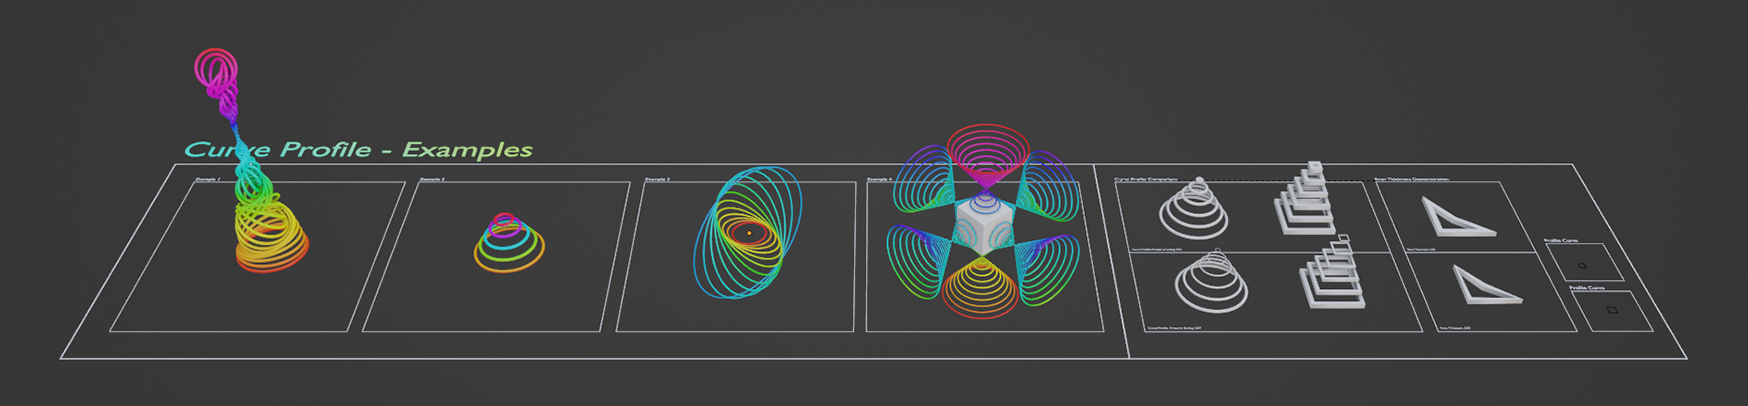
Curve Profile
This feature allows you to convert all splines of a curve to a mesh using a profile curve. You also have an option to preserve scaling of the resulting mesh across different splines, and the ability to keep its thickness even.
Texture Transform
This feature allows you to control the transformation of the instances using either a procedural noise, a custom image texture, or a combination of both. It has many useful options to help you achieve different interesting effects.
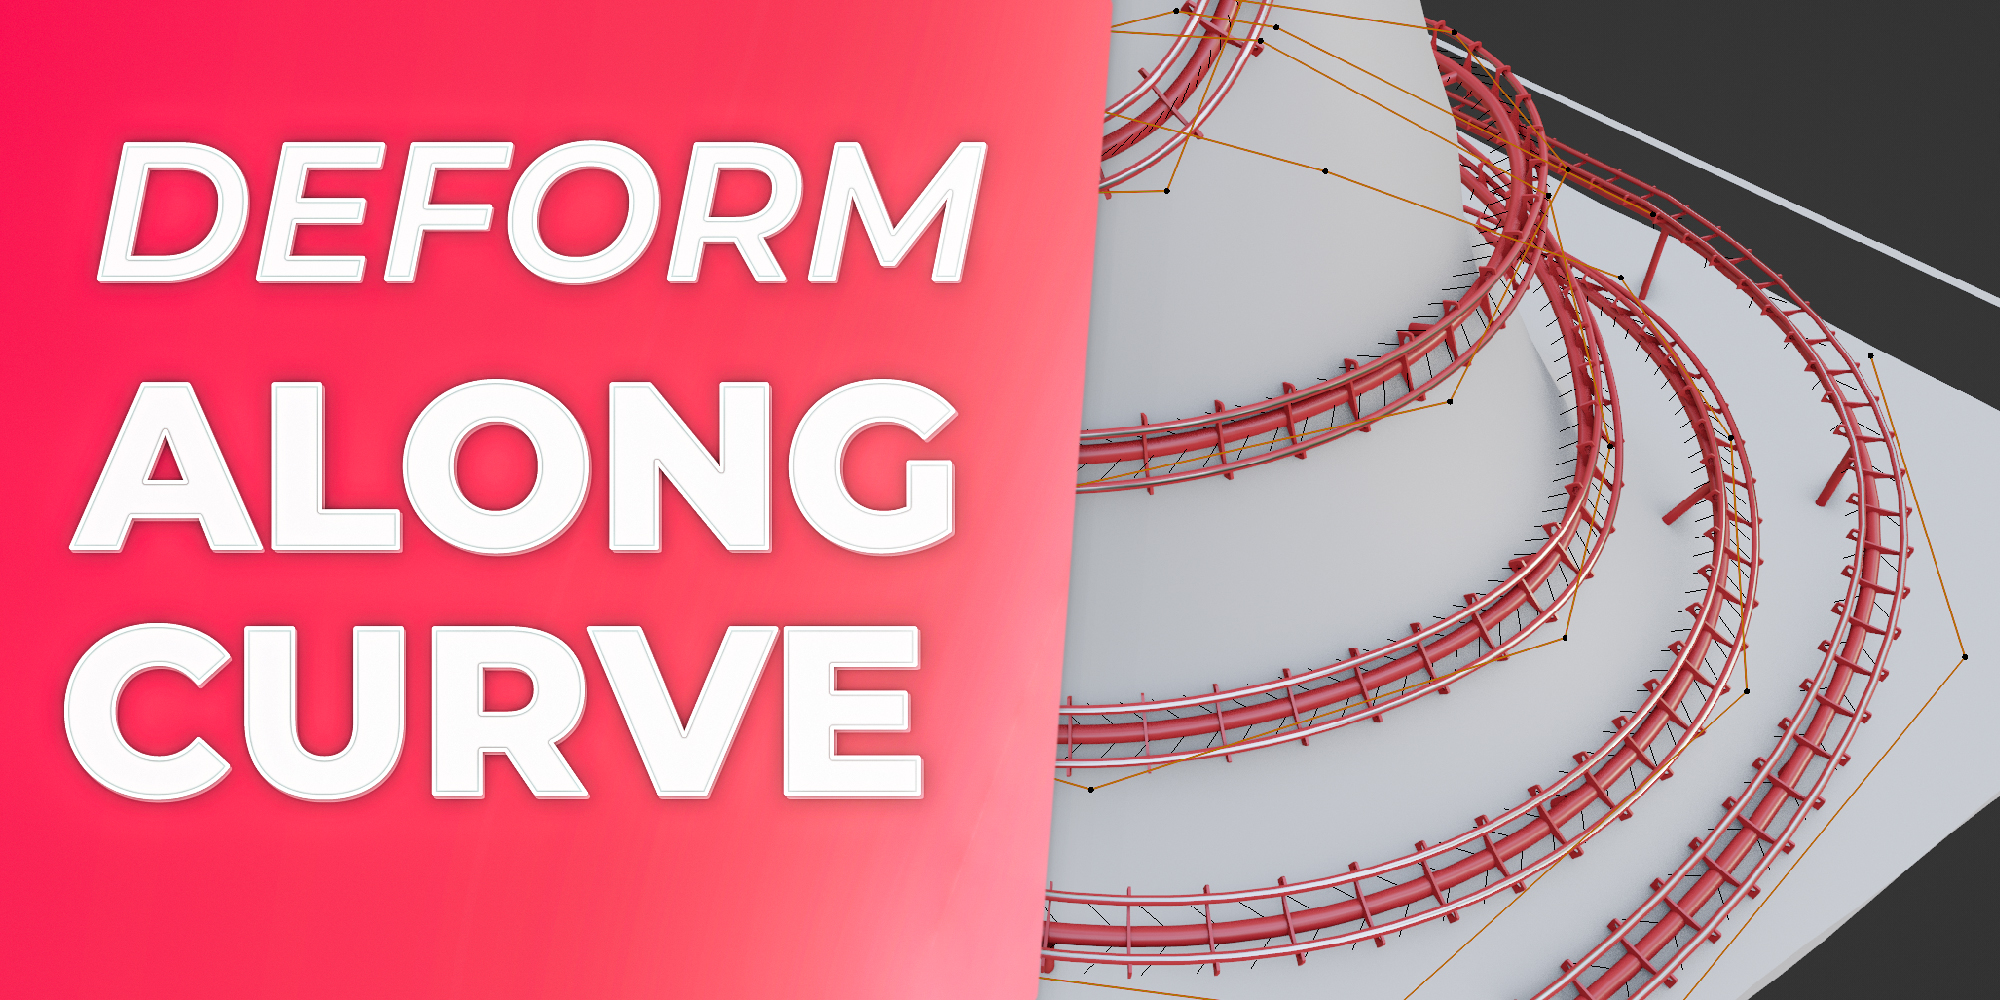
Bonus Tool: Deform Along Curve
Deform Along Curve is a separate tool that's included with Advanced Array Tool. It's designed to simplify the process of deforming objects along a curve
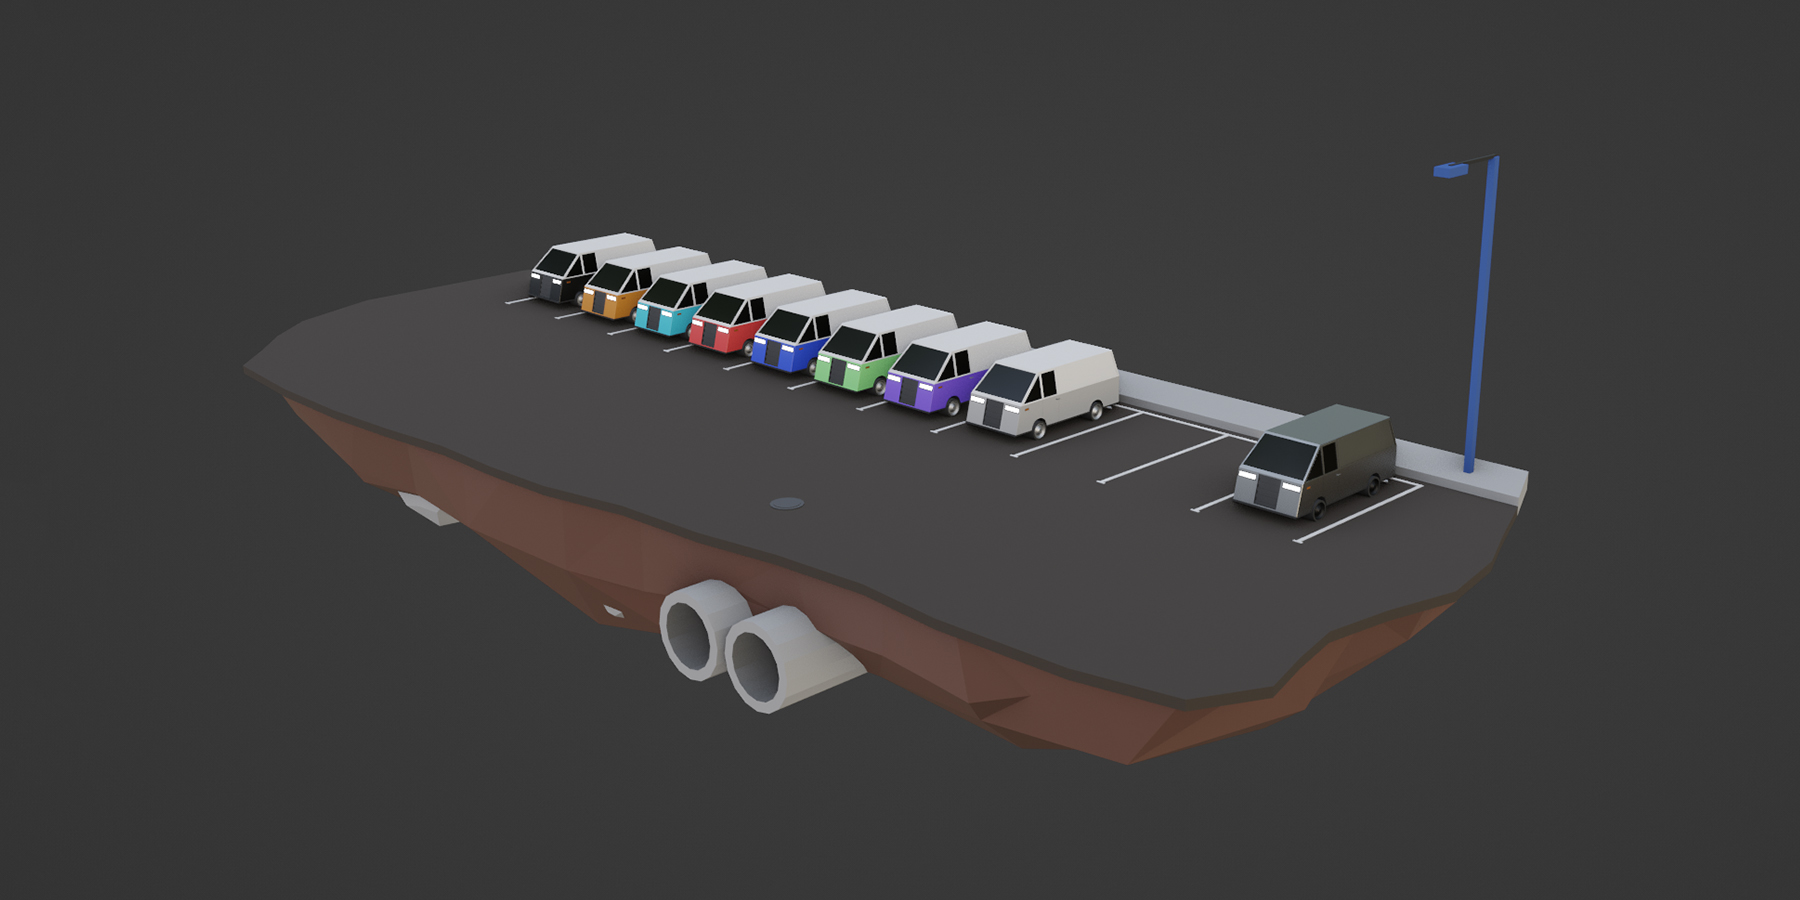
Gift: Detailed Low Poly Car
Thank you for your support! Advanced Array Tool also includes the Commercial Edition of Detailed Low Poly Car as a gift to celebrate 100+ sales!

Discover more products like this
procedural nodes spring24 Development pack radial array crowd array along curve architectural cinema 4d instance curve c4d summer24 target align stadium mograph animation clone easy cloner stack transform bfcm23 motion graphics modifier scattering circle Object winter24 duplicate bfcm24 environment rendering grid geometry nodes Game effector randomize packing spline level customizable circular distribute stacking Node ArchViz