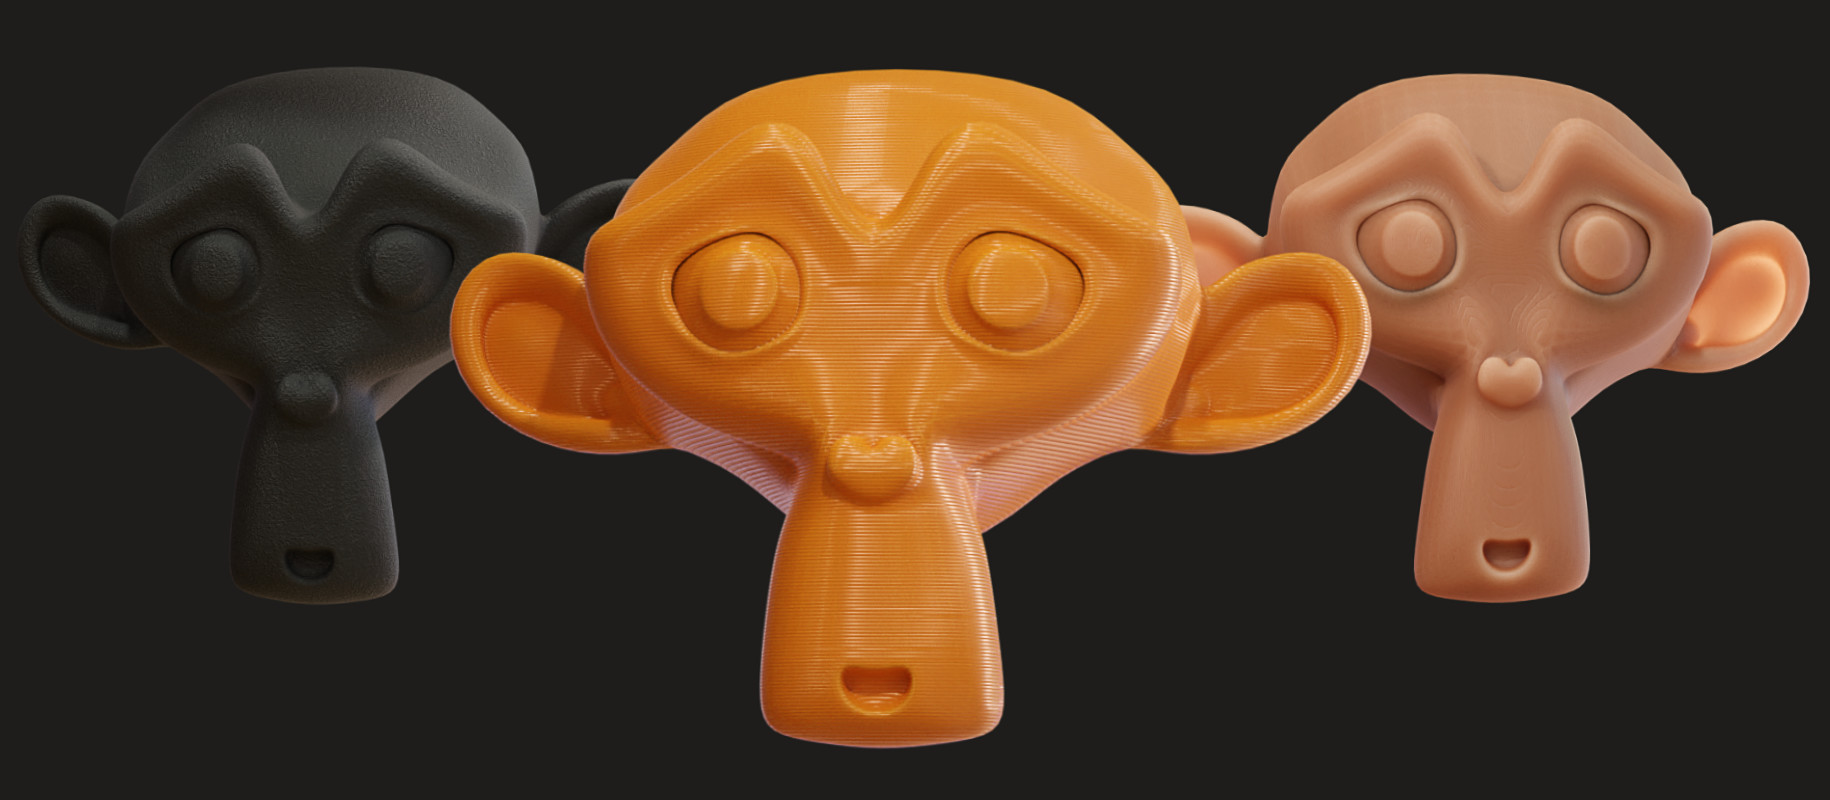
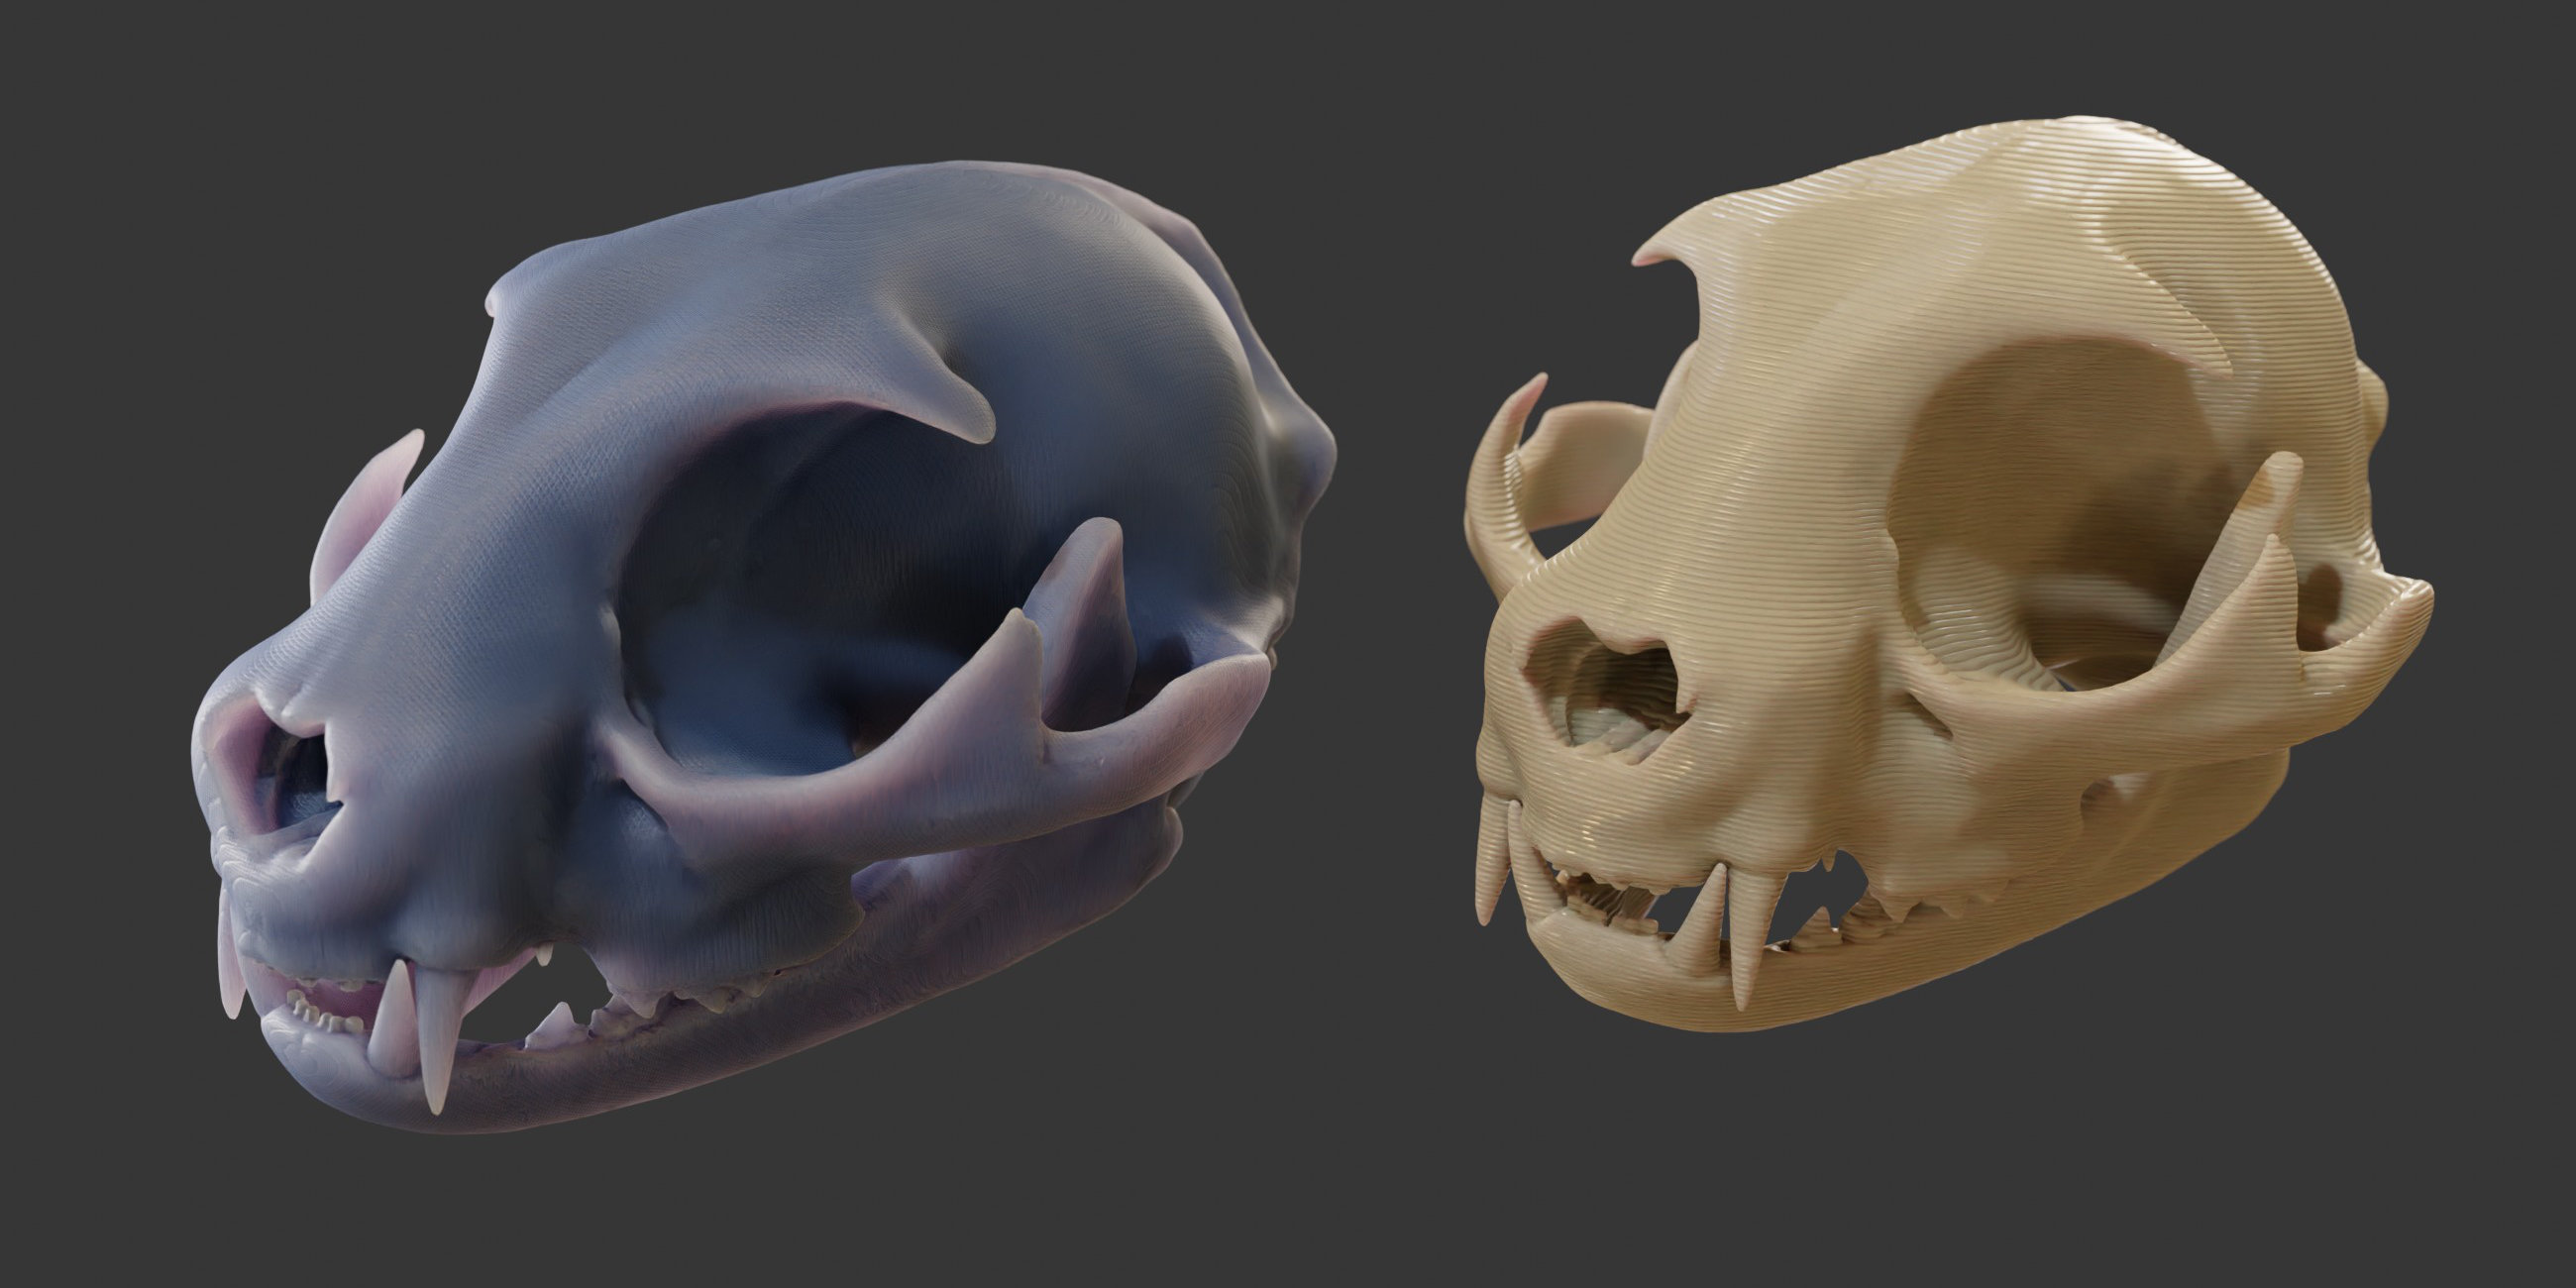
3D Print Shaders - Fdm/Sls/Msla + Dust Filter


Procedural Materials to Realistically Simulate 3D Printed Surfaces in Blender!
High-Quality procedural shaders for Cycles and Eevee.
- The order of material settings has been changed and some settings renamed for clarity.
- Added descriptions for each of the material settings. Hover over any setting to see a short description of what it does.
- Fixed an issue with asset categorization.
- An archived version is available in 'Blender 3.4.zip' for compatibility with older versions of Blender.
- Added a bevel node to all shaders, this can be used with Cycles to add a subtle bevel to the sharp edges of imported .STLs. Combined with the default edge highlighting options this allows you to customize the look of your edges.
- Improved the FDM shader with better options for top surfaces. 'Top Lines Texture' controls the mix of the top surface while the other three options allow you to control the sharpness of the normal masking, infill rotation, and line width. Keep the masking at multiples of 1 in order to apply the effect to the top and bottom or use partial values to mask only the top.
-
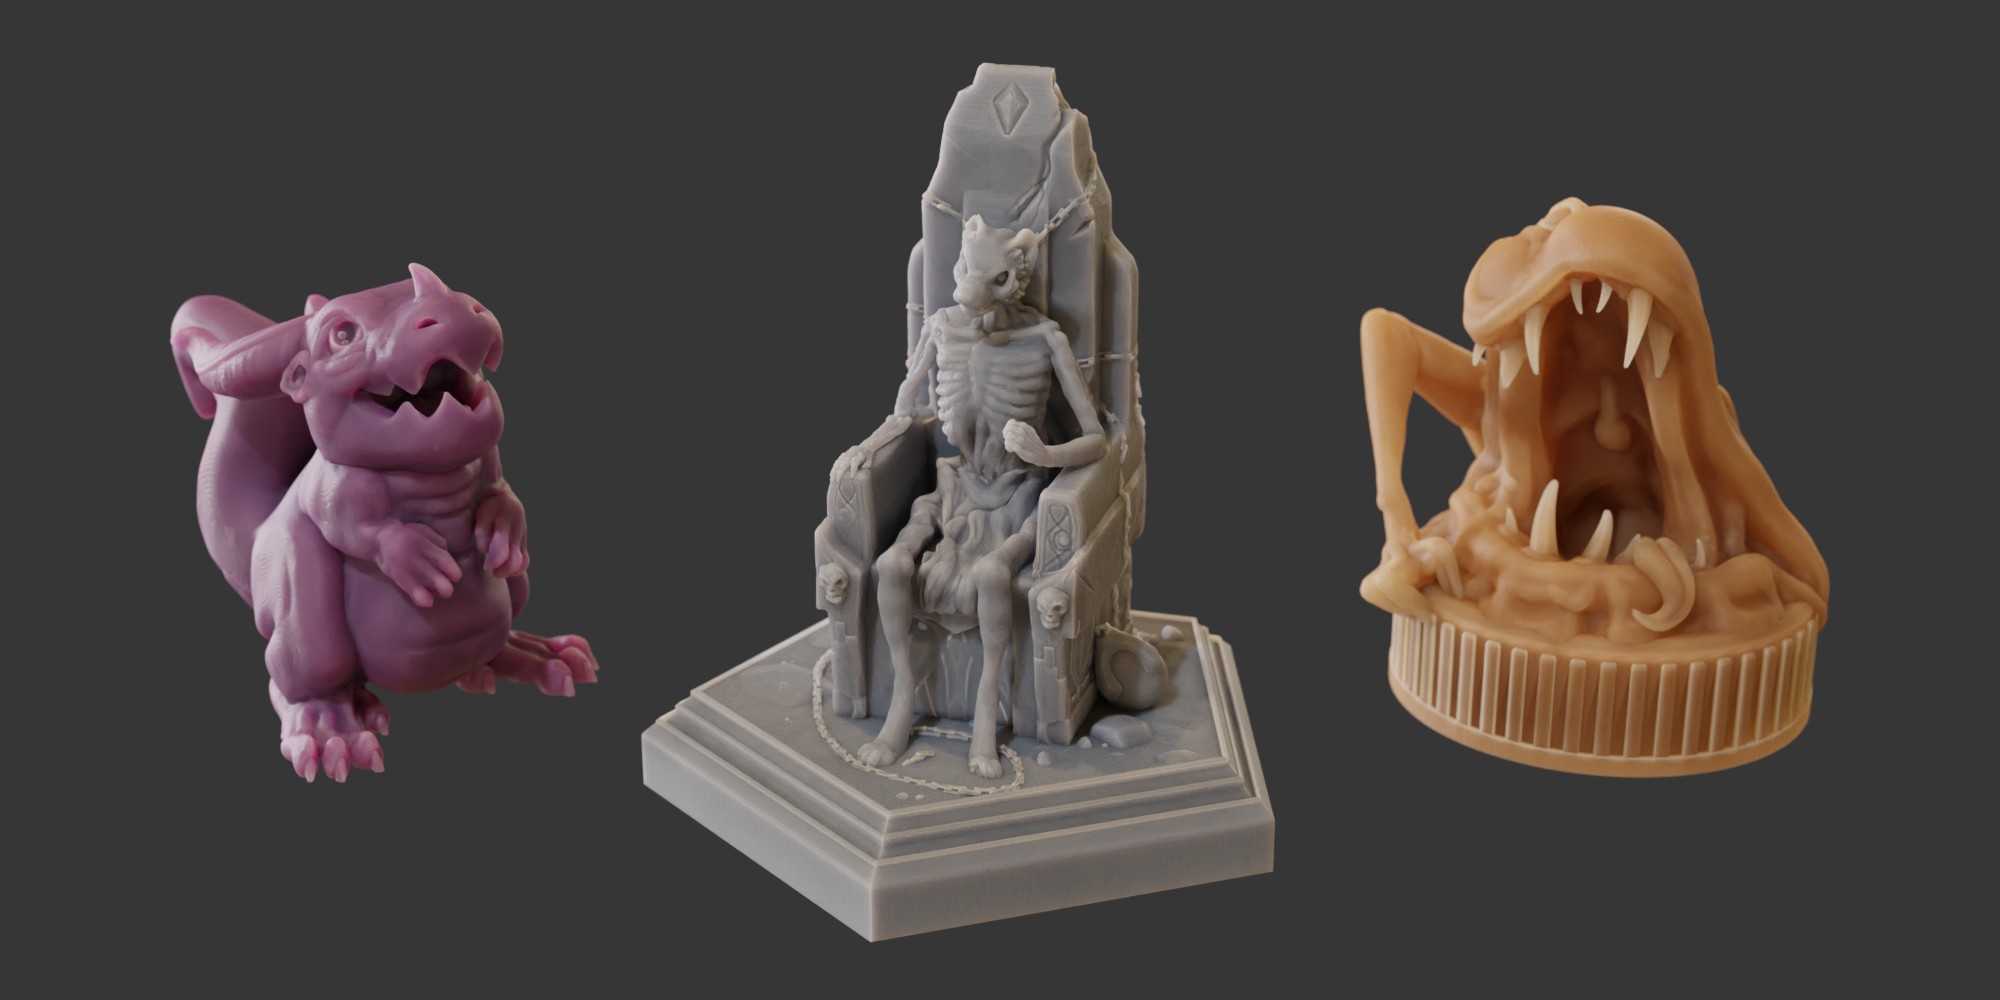
Added an SLS shader with settings similar to the FDM shader.
Currently Included Materials:
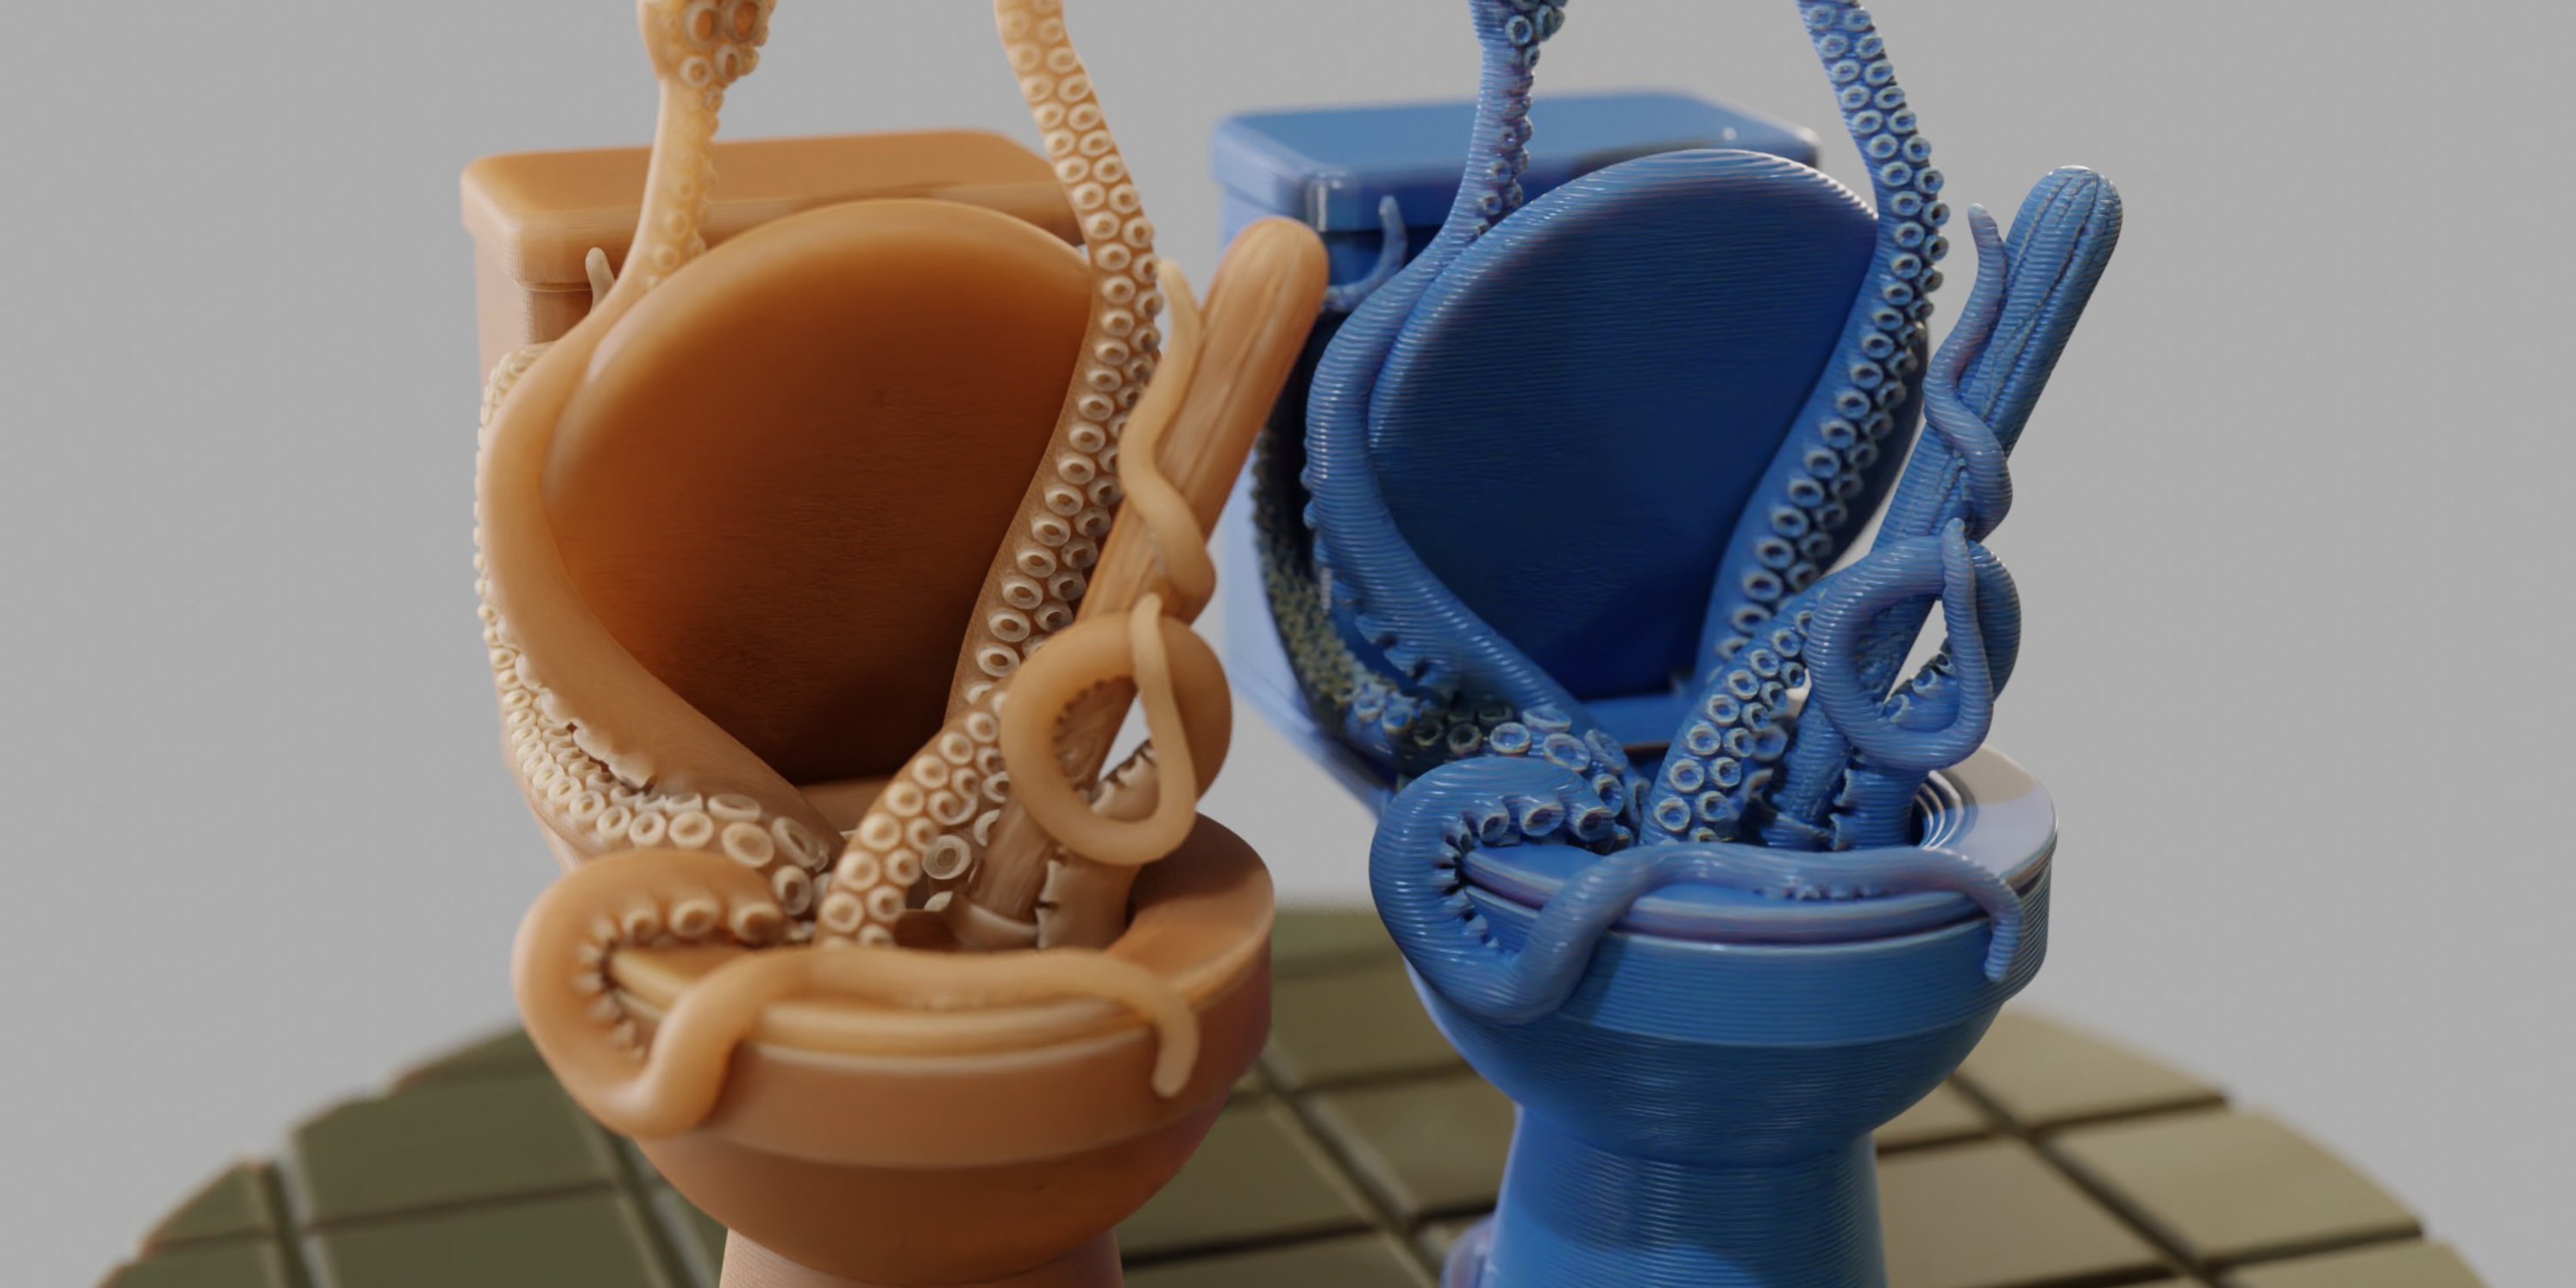
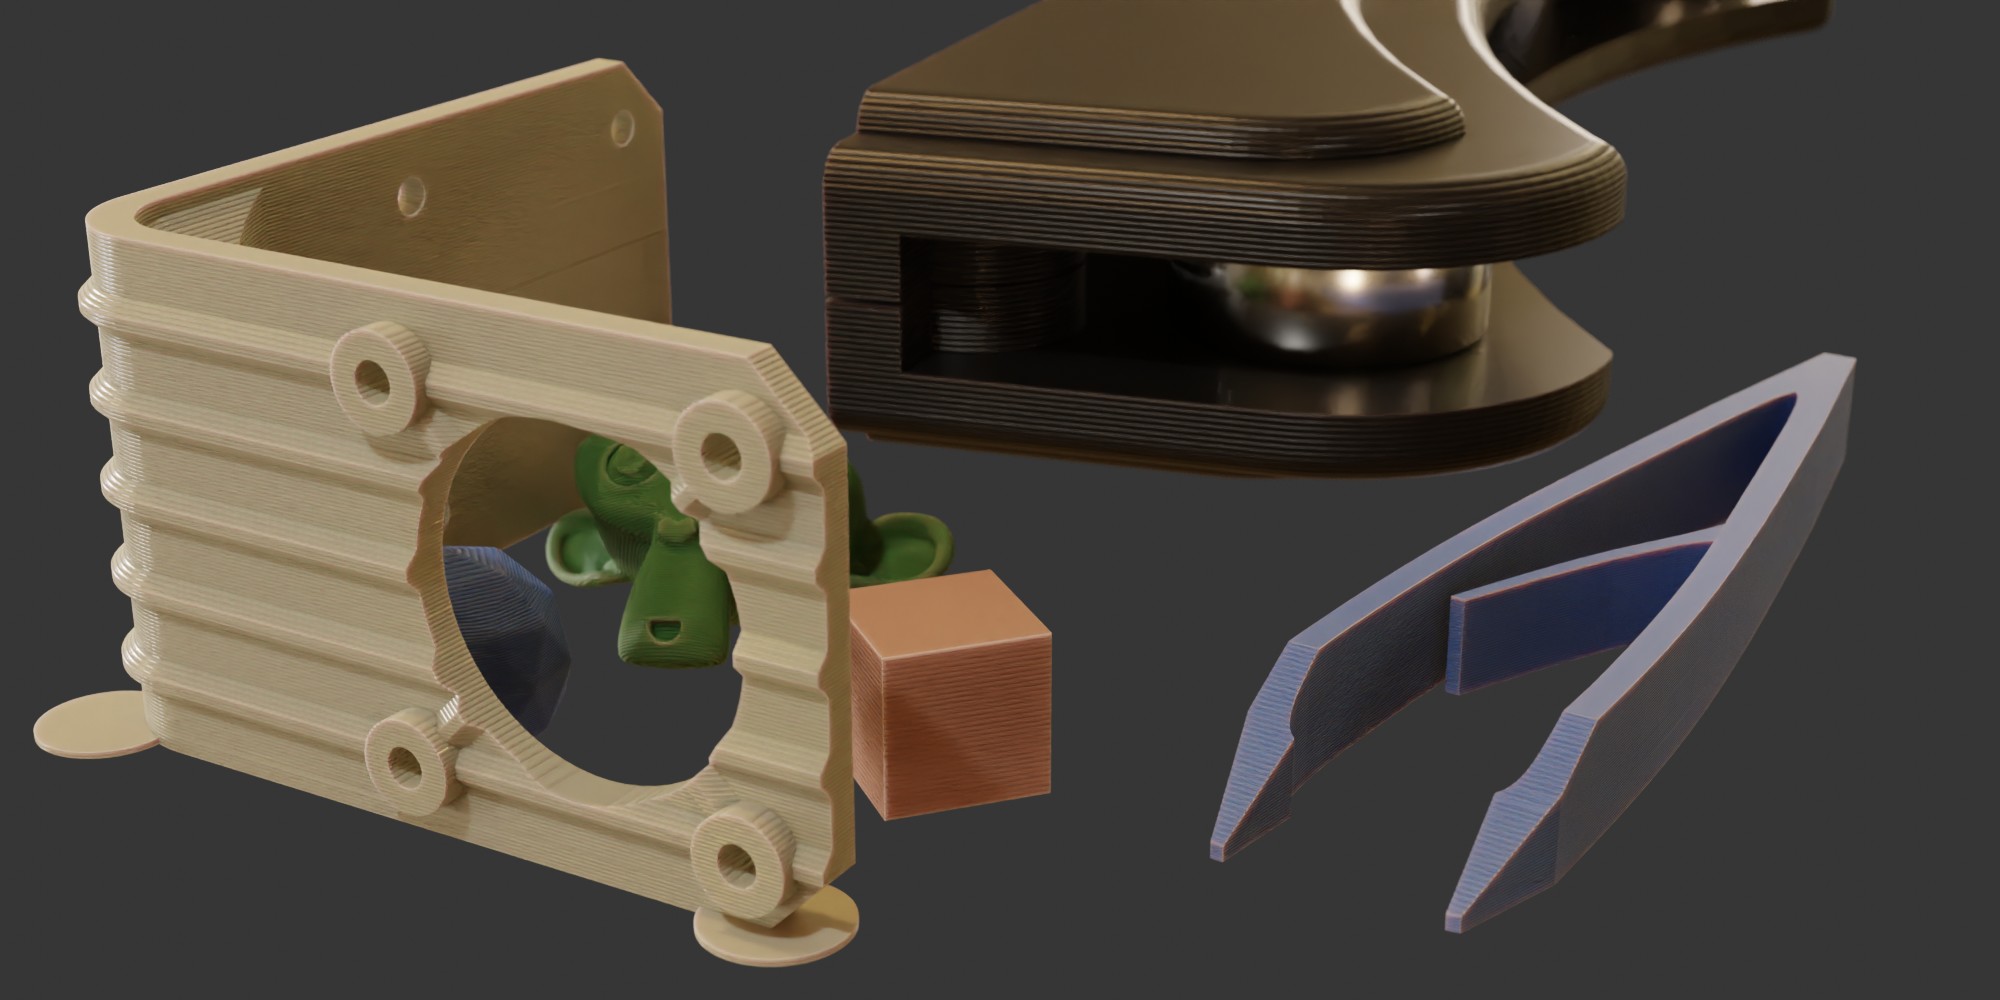
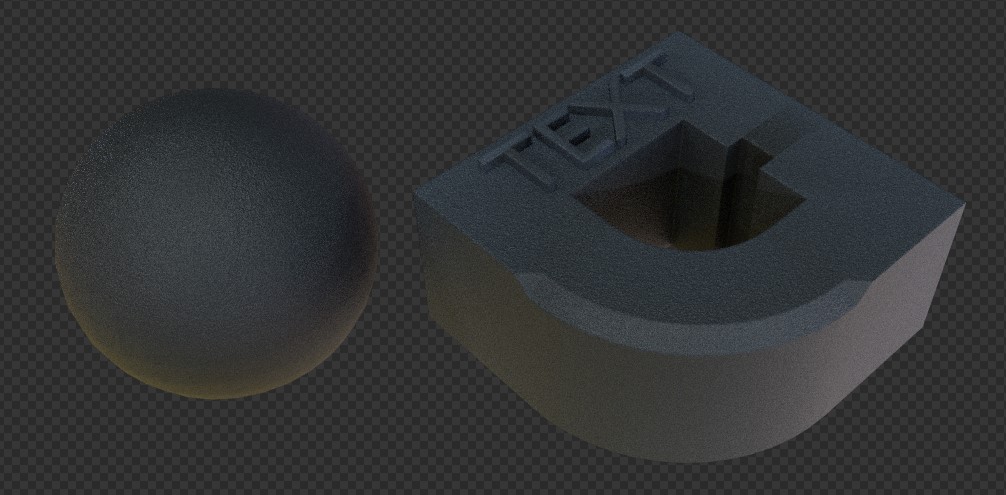
- FDM material to mimic the look of thermoplastic prints produced on printers such as the popular Ender 3
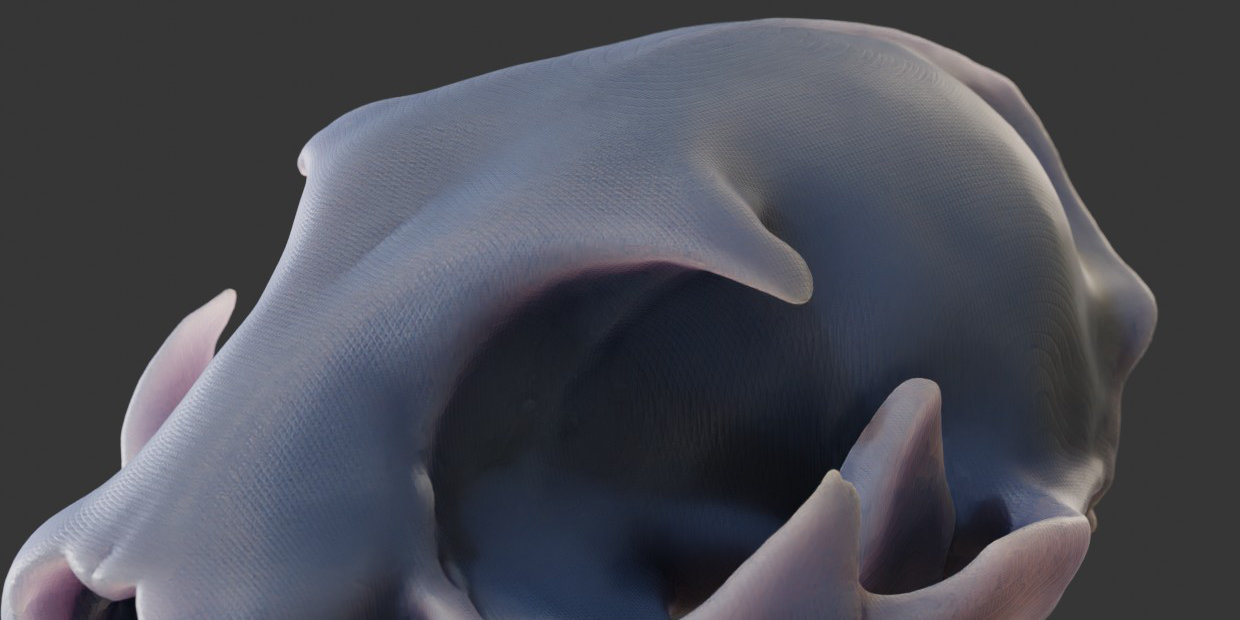
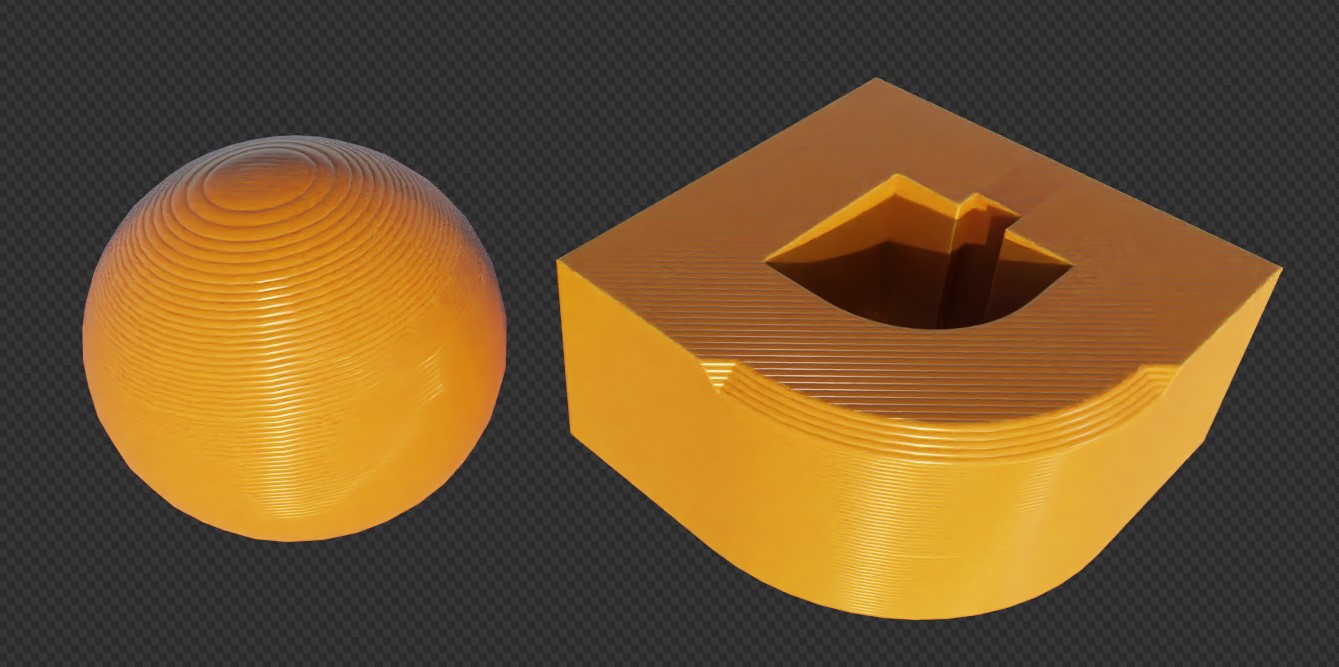
- MSLA material to mimic the look of photopolymer resin prints, includes an adjustable voxel-artifact texture which adds realistic striations to the surface.
- SLS material to mimic the look of laser sintered powder.
- Dust smart-filter node group for easy application of dust to top facing surfaces.
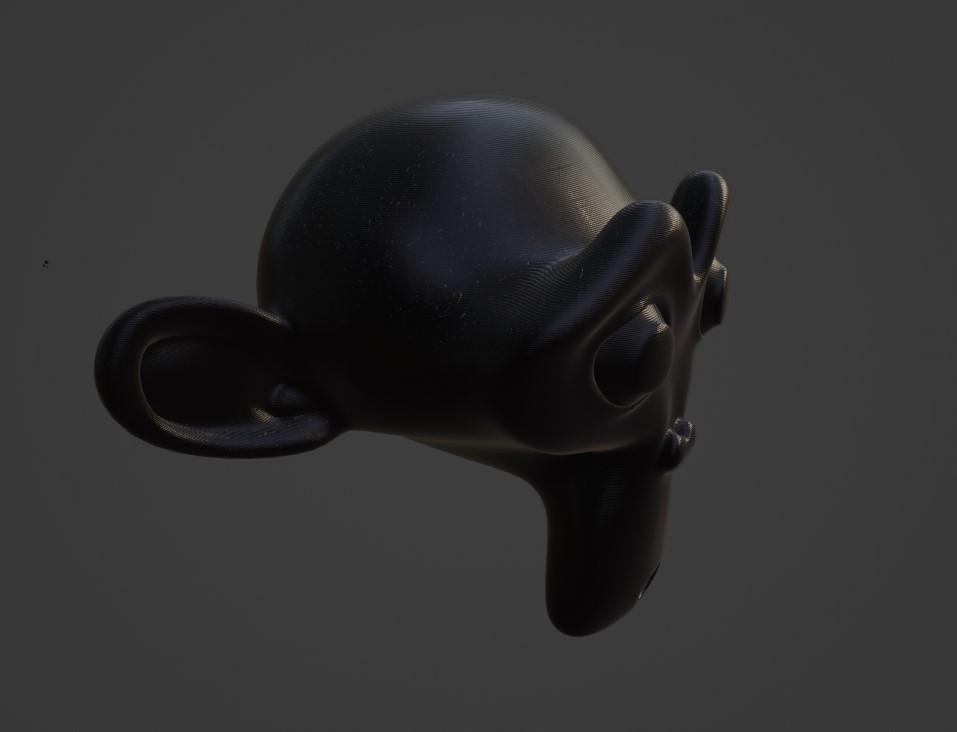
FDM
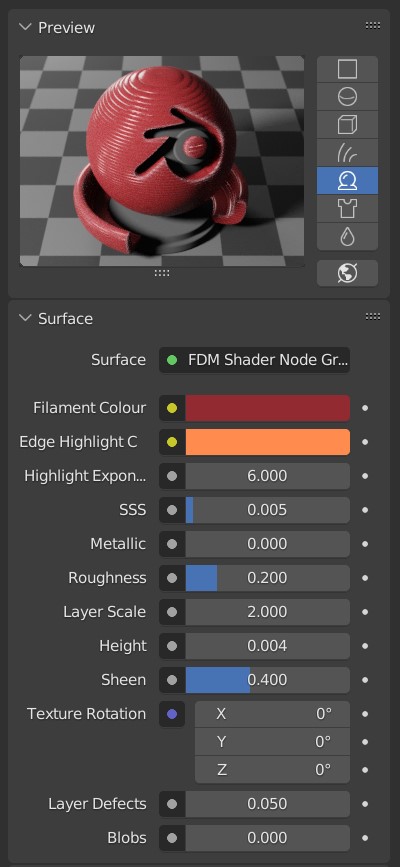
Settings:
- Filament Colour - The base colour of the plastic
- Edge Highlight Colour (Cycles Only) - sets a highlight colour along edges and protruding geometry, can be useful to fake subsurface scattering or add subtle colour variation.
- Highlight Exponent - Affects the range and contrast of the edge highlight, lower values give a diffuse overall effect while higher values selectively mask the effect to sharp edges.
- Subsurface Scattering - Affects the amount of subsurface scattering, with larger scale objects needing larger values to achieve the same effect. A low value is recommended.
- Subsurface Radius - Affects the colour of the subsurface scattering by limiting the range of each RGB channel. Generally this should align with the RGB values of your Filament Colour or Highlight Colour. Note that Subsurface Scattering can create additional noise in Cycles, and may increase the render samples needed for a smooth result; You can instead use the edge highlight settings to fake it.
- Metallic - The metallicity of the filament. This can be used to simulate metallic and silk style filaments.
- Roughness - The roughness/glossiness of the print surface. Higher values produce a very matt filament while lower values produce a glossy plastic.
- Layer Scale - The scale of the procedural texture, with higher values producing finer layers. This needs to be adjusted based on your object scale.
- Layer Intensity - The strength of the bump mapping for the procedural texture.
- Sheen - Adds a subtle edge highlight effect similar to velvet to your model. In most cases this should be kept low, and can help simulate soft matt filaments.
- Texture Rotation - Allows you to rotate the layer pattern along a given axis.
- Layer Defects - Adds extrusion/misalignment layer artifacts to the surface, to break the CGI perfection.
- Blobs - Adds small over-extrusion artifacts to the surface, to break the CGI perfection.
- Anisotropic - The amount of stretching applied to highlights, this is a common effect on brushed or layered surfaces.
- Anisotropic Rotation - Rotates the anisotropic effect. A value of 0.25 corresponds to a 90° rotation
- Specular - Often the material may appear to reflect more light than would be realistic, this can be compensated for by decreasing the specular value. 0.5 is the Blender default.
MSLA
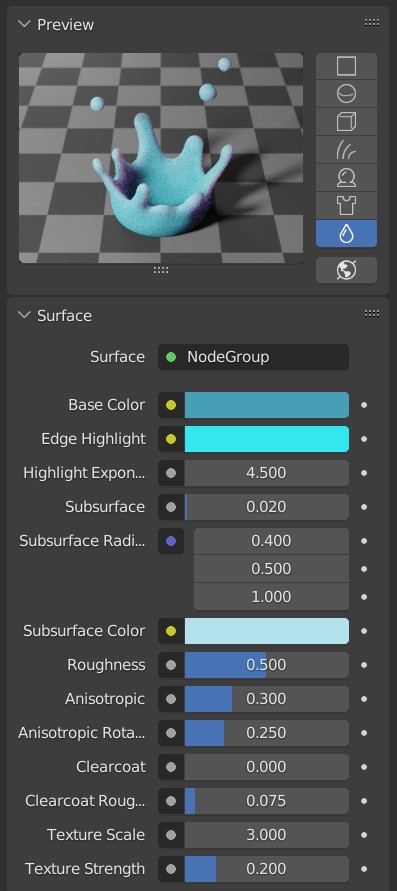
Settings:
- Resin Colour - The base colour of the resin
- Edge Highlight Colour (Cycles Only) - sets a highlight colour along edges and protruding geometry, can be useful to fake subsurface scattering or add subtle colour variation.
- Highlight Exponent - Affects the range and contrast of the edge highlight, lower values give a diffuse overall effect while higher values selectively mask the effect to sharp edges.
- Subsurface Scattering - Affects the amount of subsurface scattering, with larger scale objects needing larger values to achieve the same effect. A low value is recommended.
- Subsurface Colour - Affects the colour of the subsurface scattering
- Subsurface Radius - Affects the colour of the subsurface scattering by limiting the range of each RGB channel. Generally this should align with the RGB values of your Resin Colour or Highlight Colour. Note that Subsurface Scattering can create additional noise in Cycles, and may increase the render samples needed for a smooth result; You can instead use the edge highlight settings to fake it.
- Roughness - The roughness/glossiness of the print surface. Higher values produce a very matt filament while lower values produce a glossy plastic.
- Anisotropic - The amount of stretching applied to highlights, this is a common effect on brushed or layered surfaces.
- Anisotropic Rotation - Rotates the anisotropic effect. A value of 0.25 corresponds to a 90° rotation
- Clearcoat - Applies a clearcoat to the surface. This can be useful for making the resin look wet or coated in varnish.
- Clearcoat Roughness - The roughness of the clearcoat.
- Artifact Scale - The scale of the voxel artifact texture, with larger values producing a finer texture.
- Artifact Intensity - The strength of the bump mapping applied to the voxel artifact texture.
- Sheen - Adds a subtle edge highlight effect similar to velvet to your model. In most cases this should be kept low, and can help simulate soft matt filaments.
Dust Filter
The Dust filter is a smart-filter node group that applies a procedural dust effect to the tops of models. It is added to a shader in the node editor. The Dust Filter takes a shader input and sits between your primary shader and the material output node.
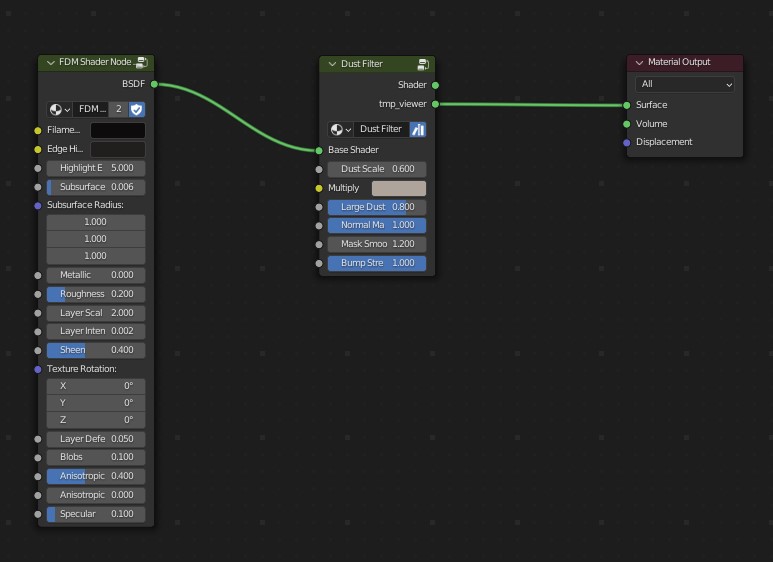
Settings:
- Dust Scale - The scale of the dust, with higher values resulting in a finer texture.
- Multiply Colour - The colour of the dust is multiplied by this value. Darker colours result in darker dust, while more saturated colours will colourize the dust.
- Large Dust - Adjusts the opacity of the large dust particles. Turning this down to zero will result in only very fine powder-dust.
- Normal Masking - The strength of the mask which limits dust to the top surfaces. Turning this down will disable auto-masking, adding dust to the whole model.
- Mask Contrast - Adjusts the contrast of the mask. Higher values result in a narrower range of top-facing-normals being affected by the dust filter.
- Bump Strength - Adjusts the bump mapping strength of the dust
Installation:
Method 1: The easiest way to install the shaders is to copy the .blend to your asset library folder. By default this is located under /Documents/Blender/Assets, but you can find the exact path in Blender, under Preferences > File Paths (in the Asset Libraries section). To access the shaders simply open the asset browser in blender and drag the material onto the object you want to apply it to.
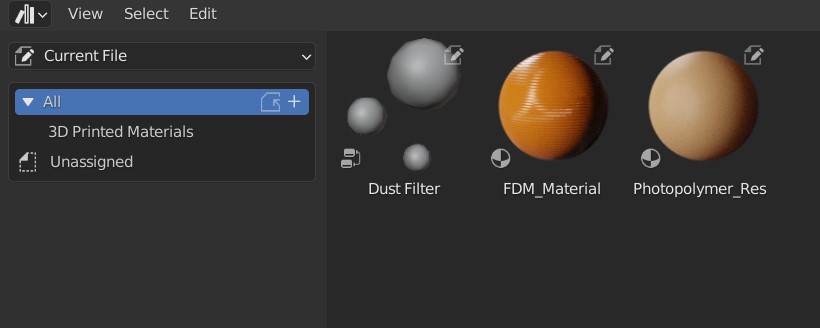
To add the dust filter, drag the node group between your shader and the material output node while in the shader editor.
Method 2: An alternate installation method is to copy the "FDM MSLA Shaders.blend" to a new folder on your hard drive, then add the folder to your asset libraries, found under Preferences > File Paths. This will make the shaders show up under their own menu listing in the asset browser, instead of the default one. Good if you have many assets already.