Adaptive Subdivision

This tool subdivides your meshes based on the camera position and will automatically increase or decrease the subdivisions based on the camera distance.  It will also only subdivide the polygons that are facing the camera, helping you to save even more of your precious memory, so you can use that to add even more assets to your scene.
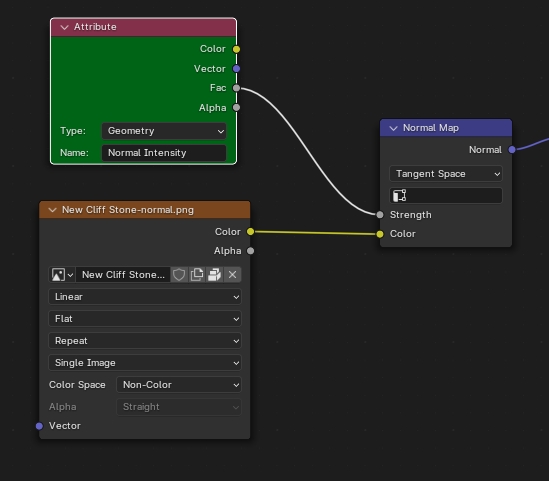
In the Shader Editor you can connect an Attribute Node with the Name: "Normal Intensity" (as you can see in the image bellow) to the Strenght input of the Normal Map node to control the effect of the normal map when the mesh is closer to the camera. This is an important feature as the normal map can get too strong when the shading of the surface is already been affected by the displacement.
Mixing the displacement with normal map will allow the mesh to have the best shading no matter how close to it is from the camera!
 It's very simple to use, you just need to download and save the .blend file to your Asset Library folder or Append the file to your scene selecting the Adaptive Subdivision option that is inside the NodeTree folder.
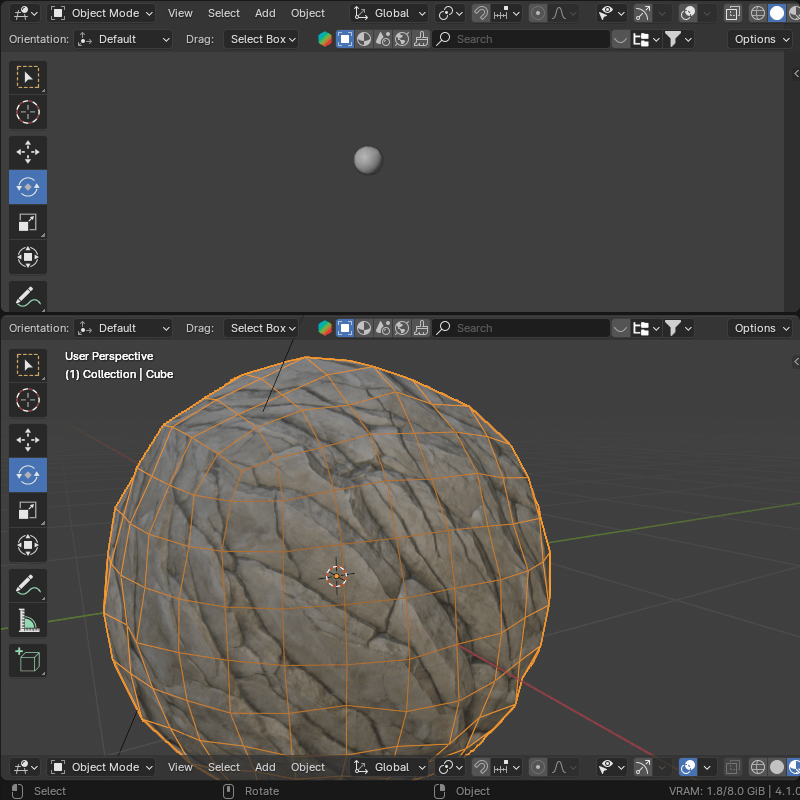
After that, you just need to add the Adaptive Subdivision to the mesh that you want to subdivide, go to the Modifiers tab, select the Render Camera and tweak the setting until you get the amount of geometry that you need to the mesh.
WHAT EACH CONTROL DOES?
Render Camera = This is where do you load the camera that will gonna be used as reference in order to subdivide the mesh.
Base Resolution = This is the minimum mesh resolution to be used.
Render Subdivisions = This is the maximum subdivision used at the render time.
Viewport Subdivisions = This is the maximum subdivision used on the viewport.
Subdivision Method = The "Fast" method uses Simple subdivision with a blur filter for faster calculations and "Accurate" uses Catmull-Clark and it's better when you need to do a more precise displacements using baked maps.
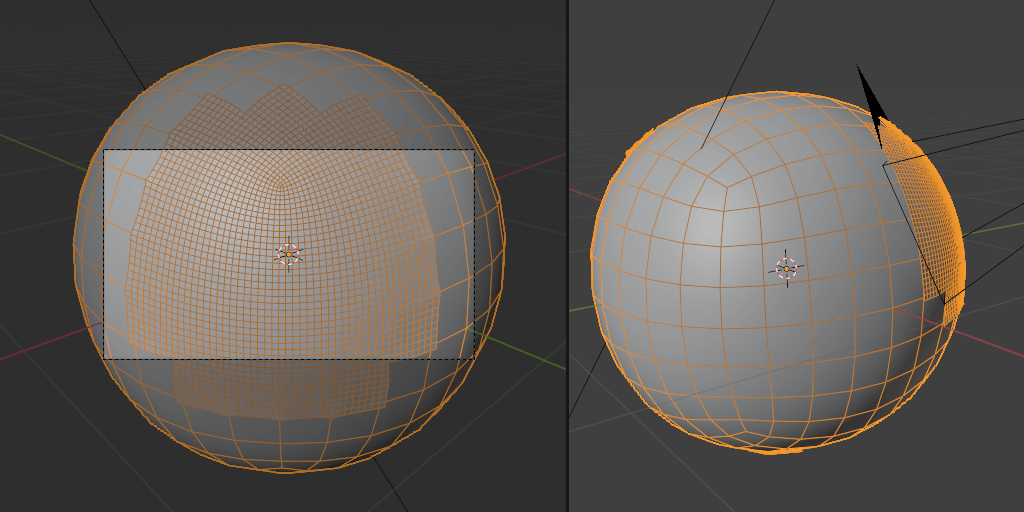
Camera View Culling = This setting optimizes the geometry by limiting the subdivision based on what is on the center of the Render Camera.
Mesh Proximity Margin = Adds a additional margin to the subdivision when the mesh is too close to the camera. Use the "Margin Distance" to control the range of this feature.
Margin Distance = It creates an area close to the camera to determine when the "Mesh Proximity Margin" and the "Near Extra Subdivision" will gonna be applied.
Near Extra Subdivision = It creates an area close to the camera to determine the when the "Mesh Proximity Margin" and the "Near Extra Subdivision" will gonna be applied.
Near Extra Subdivision = Adds extra subdivisions when the mesh is too close to the camera. The area where this is applied is controlled by the "Margin Distance"
Camera Normal Culling = Disables the subdivision on the back of the meshes relative to the Render Camera.
Max Distance = This setting controls the distance from the Render Camera where the polygons will gonna start to be subdivided.
Inflate Subdivided Area = It inflates the subdivided area in order to cover the polygons from the back of the mesh.
Normal Intensity Attribute = You can use this attribute to control the normal map intensity in your material by connecting and Attribute Node, with the name "Normal Intensity" to the intensity input of the Normal Map node.
Near Normal Intensity = If you are using the Normal Intensity attribute on your material, you can use this setting to increase the effect of the normal map on the surface of your mesh when it's closer to the camera.
Check out my Blender Modifiers Bundle
https://blendermarket.com/products/blender-modifiers-bundle
A Complete Set of Tools to Enhance Your 3D Modeling Workflow
| Dev Fund Contributor | |
| Published | 11 days ago |
| Blender Version | 4.1 |
| License | Royalty Free |
Have questions before purchasing?
Contact the Creator with your questions right now.
Login to Message